The MyImage Purple coat

This coat originally appeared on my Fall 2011 sewing plans, so it feels good to finally finish it just as the weather’s starting to defrost (I hope anyway!). I’ve been wearing my muted turquoise coat for most of the winter, but I’m hoping to wear this to transition into Spring!

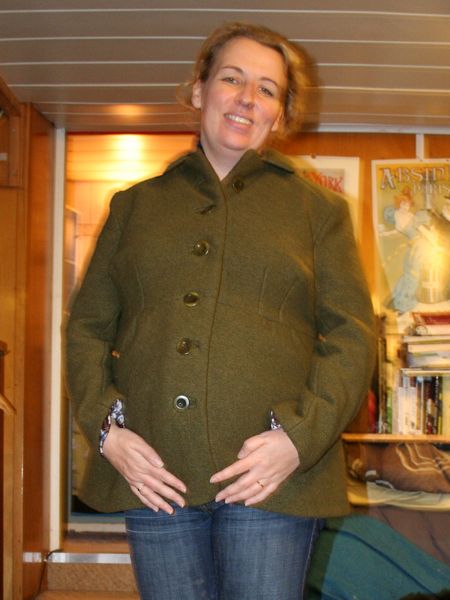
I’ve used “coat” in the title, but is it really a coat? Is it a jacket? Where’s the line drawn, anyway? It’s short like a jacket, but wool and warm like a coat, so I’m not quite sure what to call this.

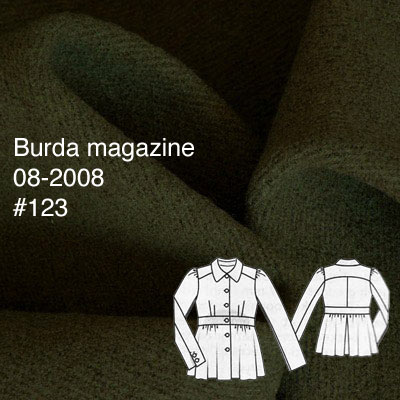
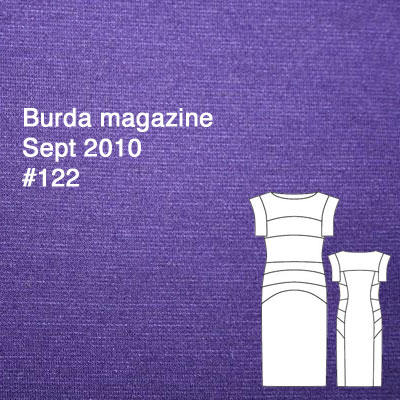
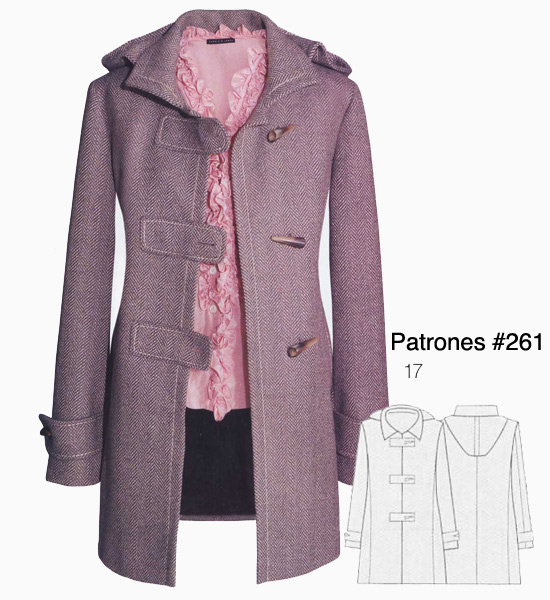
This pattern appeared in the Winter 2011 MyImage magazine (along with that awesome cowl top!) and it’s still available to buy if you fancy it (and holy crap, it’s on sale right now for €1.95/US$2.63, too)!.

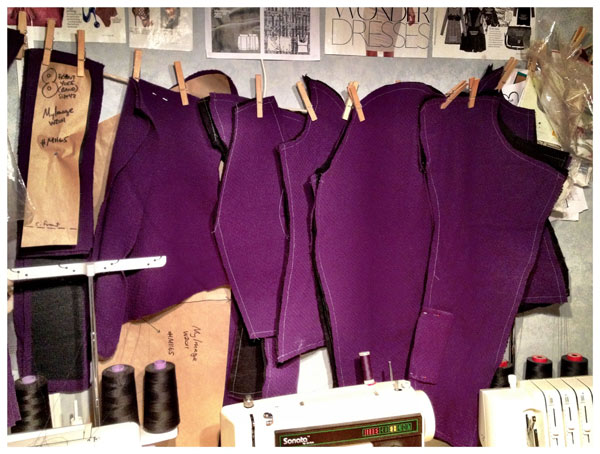
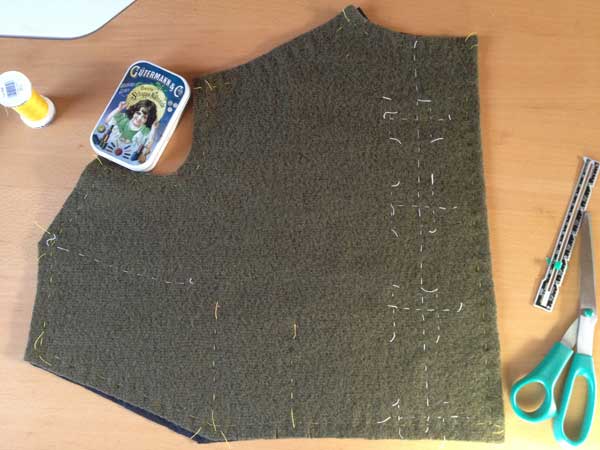
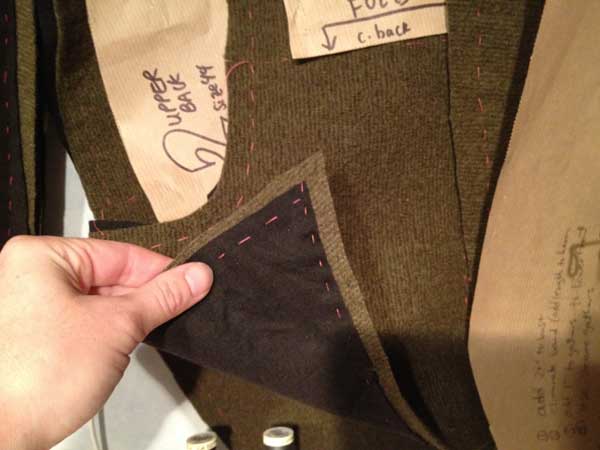
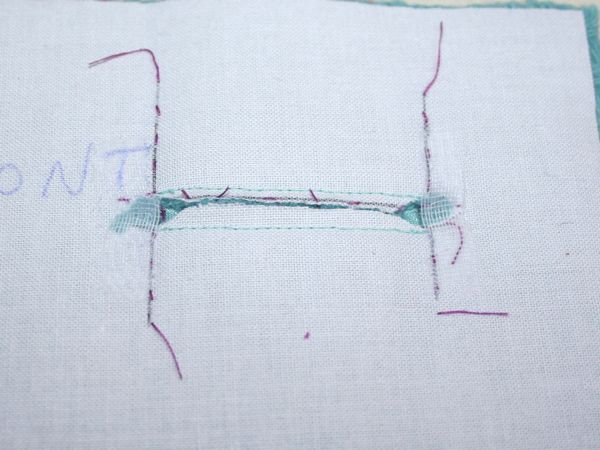
You can see some in-progress photos of this coat here and here. The nice thing about working on a project for a while is that you get to see a lot of the “guts” as I work! The downside, of course, is that I have the attention span of a gnat and I get bored when projects stretch over the fortnight mark…

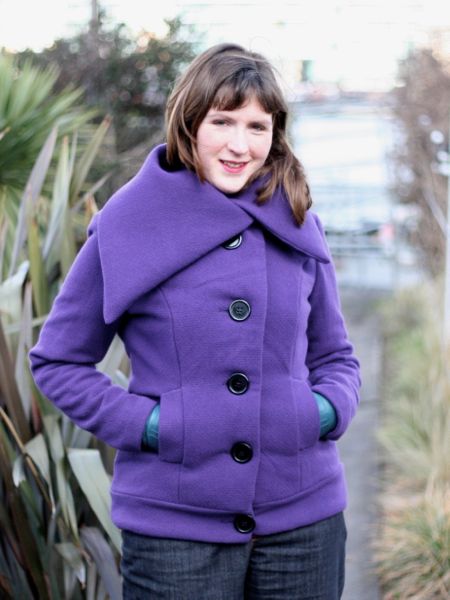
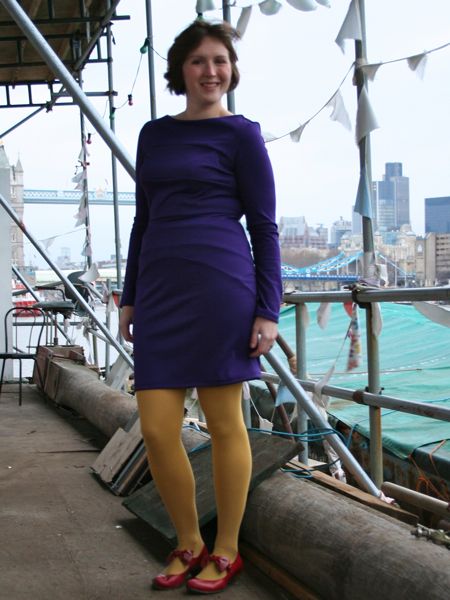
The first thing you notice about this coat is that Big! Collar!! It’s a “whole lotta look”, but I totally dig it. Your mileage may vary! I’ve worn it out twice over the weekend already and the collar is great – it’s substational enough and close enough to the neck that I don’t need a scarf!

MyImage Purple coat – in progress

Yesterday I mentioned that I’ve started sewing the asymmetric, collared coat from the Winter 2011 MyImage magazine, and after a prep period that felt like forever (probably exasperated by the fact that my ironing station is hovering around 0C/30F), I’ve now got some progress to show you!

I’m sewing this up in a wonderful purple basketweave/boucle coating, which was another gift from Claire (she’s so good to me!) at the end of last winter. I always like to underline my coats when I can to just add that little bit of extra warmth, but it made even more sense here as it will help to stabilise the coating fabric and prevent any bagging out that might otherwise occur with looser-weave fabrics. The alternative is to block-fuse the coating with a lightweight interfacing, like I did with my Patrones duffle coat.

For this coat, all the facings were interfaced (the usual front and back facings, plus the front and back hip band facings), and pretty much everything else was underlined in black cotton flannel. This meant there was a lot of prep – everything but like 3 pieces needed underlining or interfacing! I love sewing, but prepping is dull dull dull work!

I machine-basted the flannel underlining to the coat pieces here, because frankly, the prep work was tedious enough as it was. I normally hand baste my underlinings, but in this case, the coating and the flannel “grabbed” each other quite nicely, so this, plus the walking foot, plus a long basting stitch meant it felt okay to do it by machine. I still made sure to never turn any corners though (when basting underlinings, you always stitch to the edge, cut the threads, reposition, and stitch the adjacent side so that you don’t create puckers at the corner)!

A wool maternity coat – finished photos

Last week I was nearly finished with Holly’s coat, and the week before that l told you all about underlining it, but finally I can show you completed completed photos!

If you recall, I used this maternity coat from the August 2008 issue of Burda, but after the first muslin we made some design changes (namely, eliminating the band and gathered sleeve caps) and an added dart as a consequence of an FBA (full bust adjustment) so it’s not quite the same as you see in the original tech drawing below…

Apologies for the slight blurriness and busy background – this is why I try not to do photoshoots after dark, but it couldn’t be helped this time around! At least you can see how it fits her, even if the photo quality isn’t great.

A wool maternity coat – basting and buttonholes

If you recall from last week, my next project is this maternity coat from the August 2008 issue of Burda, which I promised a very good friend:


(The issue date is still wrong above – it is indeed in the 2008 issue…)

After we sorted out the fitting and design alterations (including a second, quick muslin fitting of just the upper bodice in the pub toilets on Saturday night!), my first step was to cut out all the pieces in the green wool and then again in the black cotton flannel I’d bought to underline the spongey wool coating and give it a bit more structure. The coating is wonderful, but I’m a bit concerned about it bagging out in places, and I wanted to give it some added stability as well as a bit of extra warmth (though if warmth were my primary concern, I’d call it “interlining” and attach it a bit differently!).

Here’s all the pieces hanging on the line in my tiny sewing room:

I then hand basted all the layers together around the edges of the pieces, plus through the darts, and then also marked out the placement lines for the five bound buttonholes:

My Image Fall/Winter 2011

The newest issue of My Image Magazine came out a few weeks ago, and since I’ve liked their previous two issues so much, I went any bought this new one without much hesitation! Besides the fact that they’re a new magazine with a great small business story, they’re always really friendly over email, and keen to improve things like translation and note any corrections on their website. In other words, they’re exactly the sort of company I want to support! I’ve only made one of their patterns so far, but there’s quite a few in this issue which are begging to be made!

And scroll down to the bottom for an exclusive discount for FehrTrade readers, too!

My Image is published twice a year, so this is the Fall/Winter issue:

First off, I really like this colourblocked knit dress! They have you use two different knits in the pattern layout, and I like the effect here with a print and a matching solid. I also really like the floppy collar and the skirt shape (which kinda reminds me of my Manequim egg skirt!).

The Burda September cover dress (winter version)

I made no secret of my total love and adoration of Burda’s September issue last year. In my opinion (and many of you!) this was the standout, stellar issue in an otherwise mediocre year for the magazine. I’m slowly working my way through everything I wanted to sew from that issue (some good and some bad!) but now it was the time for the cover dress, #122.

I showed you the pattern alterations I made to “un-petite” this pattern, though I reckon I could have even added a bit more to the middle of piece 2 as my pointiroma has less lengthwise stretch as my muslin knit, making the underbust seam just barely under my bust. The horizontal seam between pieces 3 and 4 hits me right at my natural waist on the sides, which I think is just great. I also took 6 inches off the hem of pieces 7 and 8 so that this is above the knee rather than below.

The Burda meets Armani coat – muslin FAIL

I absolutely LOVE the Burda magazine September 2010 issue. Loved it from the first second I saw the technical drawings, and now, several issues later, I’m still not seeing much that tops it. I literally have 11 or 12 must-sew patterns from it, and one of them is the Tall coat, #118.

As you recall, when I was in New York, I saw an eerily similar coat in the window of the Armani 5th Avenue store, and this sealed the deal – I must make this coat using my super thick, ex-Burberry dusty teal coating that’s been in my stash since last winter!

I don’t make muslins for a lot of things, but when the fabric is expensive, or can’t easily be resized (like leather), or if there’s a lot of work involved before a fitting can be made, then I’ll grumble and moan and make a muslin first rather than waste my nice fabric (and time!) and get any fitting issues out of the way first.

Let’s get down to the instructions first – Burda’s instructions aren’t too bad on this one EXCEPT for the zippered inseam pockets – they are absolutely nuts, and account for a good third of the instructions for the entire coat. But the instructions are besides the point, because if you jam your hands into your winter coat pockets when you walk like I do, you really don’t want metal zipper teeth digging in to the backs of your hands! So leaving off the zippers not only saves you time, but makes for a much more usable coat.

Patrones spring coat – finished shell

Are you thoroughly sick of the sight of the Patrones spring coat yet? Well, too bad, because it’s taking me forever!

The good news is, I sailed smoothly over the speed bump that caused me so many headaches and delays in making my winter coat – the bound buttonholes. I’d already decided that with such a thick, loosely woven fabric that’s so prone to unravelling, that I’d use the satin bias tape I’d bought for binding the hood seam allowances to also make the bound buttonholes.

So I pressed the satin bias tape flat, cut it down to 1/2 inch wide strips, then folded these in half (right sides out) to make the buttonhole “lips”. After basting my ladder stitches on all the coat tabs, I did the usual technique of sewing these lips to the right side and cutting open the buttonholes.

But here’s where I deviated a bit – since my wool unravels so much, I knew that trying to stitch those tiny triangles at the ends would just be an exercise in futility, so I pulled out some lightweight knit interfacing and cut out a tiny strip. I then pulled the triangles to the back and fused the interfacing over top to keep them out of the way:


(It’s a bit hard to see but the mesh white interfacing over the left and right ends is there!)

Coat interlining

As part of my project to sew my winter coat, I’m finding it tricky to source suitable interlining and lining fabrics here in the UK without resorting to expensive overseas shipping prices.

Following Kay Y’s experience with the 150gsm Thinsulate, I rang up Pennine Outdoor who stock it here in the UK and got their advice on suitable warm interlining fabrics. They stock a huge range of outdoor and sport fabrics, so I spoke to a lovely lady on the phone who helped me through my choices. She ultimately recommended microfleece as the best warm, lightweight, and draping choice for me, but conceded that it wasn’t windproof (but that using a silk twill lining would probably help the wind anyway). The only windproof fabric they stock is very bulky and doesn’t drape nicely, and when I enquired about Meraklon, she said that it was tubular and stretchy and also had a bad drape and that it was more suitable for linings of close-fitting garments.

A wool coat in July?!?

I’ve been planning on sewing myself a new winter coat for a while now, and I’ve been lurking on Marji’s Great Coat Sew Along site (currently members-only) for a bit, but after I saw her timeline, I finally realised I can jump right in and sew this alongside all my other summer sewing! So the month of May is where we’ll be gathering supplies, then doing muslin fitting in June, and finally starting the coat construction in July in order to hopefully finish in September.

The more I thought about it, the more I felt confident I could stick to that schedule, and now our renovation plans are looking likely to include the demolition of my temporary sewing room in the fall (to make way for our bedrooms and our lounge) so I may not have a place to sew my coat if I wait any longer!

As you know, I’ve already bought my exterior fabric – some gorgeous charcoal grey, 100% wool coating fabric from Rosenberg’s.