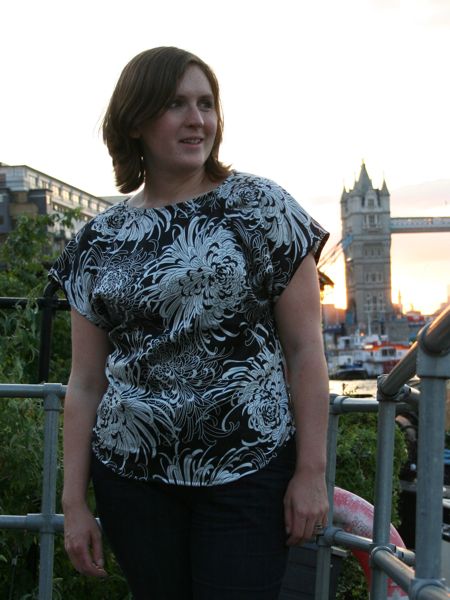
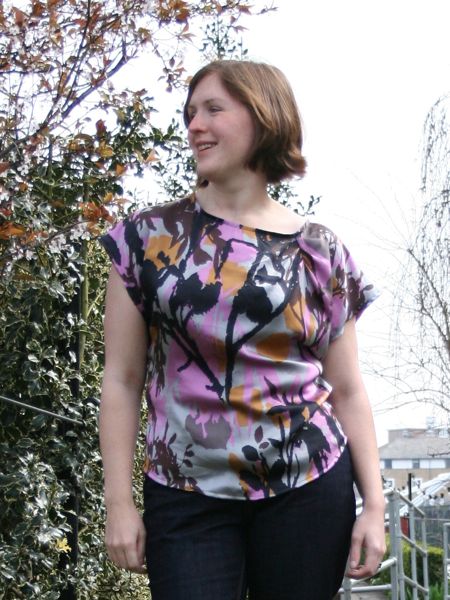
The silk chrysanthemum blouse

As I discussed in my post on “pedestal fabrics” last week, I’ve had a ridiculously gorgeous silver and black chrysanthemum print silk in my stash ever since AllisonC gifted it to me two years ago when I was about to go into hospital.

But I’d brought it out again recently and thought about how I’d best like to wear it and I decided that I love and wear my silk blouses so much (and my birthday blouse in particular!) that I should sew this into a blouse to get the most wear and love out of this “pedestal fabric”!

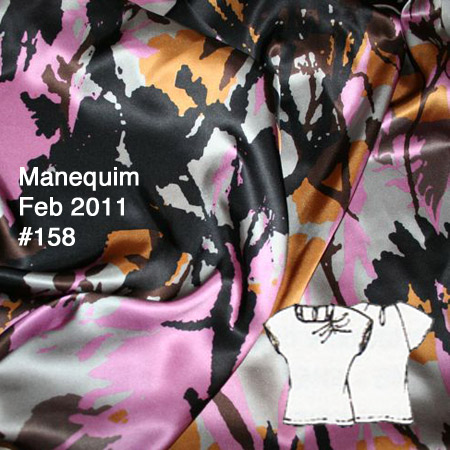
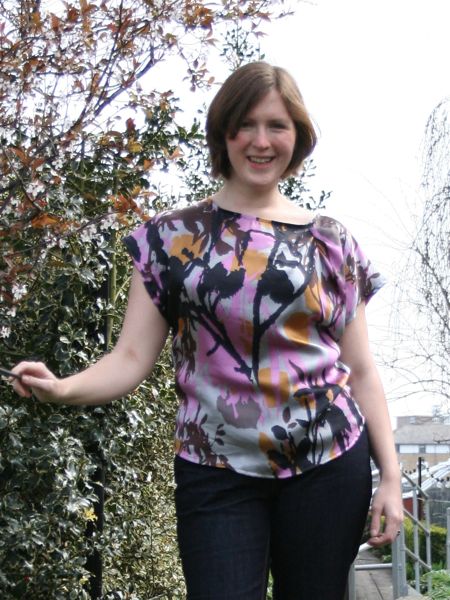
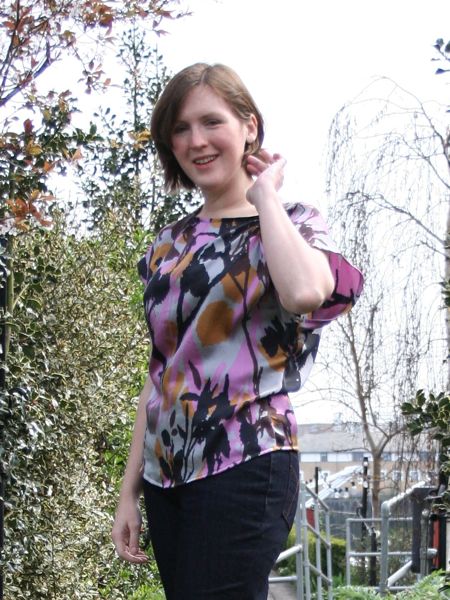
In this case I chose to use the same pattern as my birthday blouse, Manequim Feb 2011 #158, because it fits great, I love the style, and I knew it worked well with a drapey silk.

You know what? I am so happy I took the plunge and cut into this fabric, because I just adore this blouse!

Manequim silk birthday blouse

I love this blouse!

It all started in Paris last June when I saw this amazingly gorgeous silk satin (charmeuse) in Tissues Dreyfus that I just had to have. But it was €22/m (zoot alors!) so I only bought 1 metre. But even now I still love it love it love it love it so it was worth it worth it worth it!

Ever since, I kept my eyes open for a good blouse pattern that only needed 1 metre of fabric, and along came Manequim Feb 2011 #158, which called for exactly the amount I had – 1 metre long and 150cm wide!

These two were clearly meant to be together! I don’t often do prints, but this one is just so gorgeous with the psuedo-floral/paint splatters of silver, black, orange, and fuschia that I wanted it to form both the centrepiece of my March Mini Wardrobe as well as be my special birthday garment this year!

A velvety MyImage bolero jacket

Ever since I saw the first previews online of the MyImage Summer 2011 issue, I knew that this cropped, pieced jacket (M1107) was going on my Must Sew list! I just didn’t know quite how quickly fate would throw us together!

Even though MyImage are a new pattern company, other sewers have reported that the sizing was pretty consistent, so I just threw caution to the wind here, made a size 42, and cut into my fabric!

And yes, it goes really well with the jeans I’d just made, too!

Silver silk jersey tunic

Cast your mind back a year ago, when I totally raved over a certain Plus-sized La Mia Boutique tunic pattern (La Mia Boutique 12-2009 #19)…

This pattern was SO in the style of my sister-in-law, Aileen, that I proposed it to her right away, and even made the muslin for her almost exactly a year ago! Thankfully I made all the changes to the pattern as soon as I got home from the fitting session, and I even bought the silver silk jersey she wanted from Classic Textiles on Goldhawk Road… But then I totally lost momentum and the altered pattern pieces have been hanging on my pattern rack making me feel guilty ever since!

So about 3 weeks ago, I finally sucked it up and made this for her (rather belated) birthday gift. All in all, it only took an afternoon from fabric cutting to completion – why didn’t I just do this months ago! We finally visited Aileen yesterday to give this to her, so I can now post about it. I didn’t get to see her in it since she had her hands full with her 6 year old’s birthday party, but she texted later last night to say it fits well and she loves it, so hopefully I’ll get to see it at some later family gathering!

Until then, you’ll have to make do with Susan modelling:

Honeymoon Lingerie – nightgown muslin

True confessions – I took a brief break from the wedding gown. I don’t deal well with long projects and I was getting really itchy to complete something (I didn’t have any completed projects in July because of the gown, aaaaagghh!).

So I took one evening out to do a test run of one of the patterns I’d earmarked for honeymoon lingerie and Shasha’s Malaysian silks, Burda 7418 (on the right in my earlier image below):

This is a brand-new Burda envelope pattern, but I just went and bought the pdf version instead because a) I’m impatient, b) the pdf patterns are way cheaper than the paper versions (we have a laser printer and printer paper is cheap!), c) piecing together pdf patterns takes only 5 minutes longer than tracing a paper pattern and I can do it sitting down, and d) no seam allowances, woooooooop!

This was my first downloadable pattern from the German Burda site, and I was pleased to find that the instructions were in nine languages, with fully illustrated instructions. I was expecting it to just be in German! But do pay attention to the print preview, though, because you may not need to print the last ten pages or so (the English instructions only take up a few pages). The only weird thing is that they decided to waste some paper giving us two side panel pattern pieces (one to be cut in lace and the other in self-fabric) and the two pieces are absolutely identical. Weird.

Tricky pattern? Build a paper model first!

After a weekend of tracing patterns and sewing kids clothes (some you’ll see later, but others are Christmas gifts not to be ruined), I finally got a chance this evening to cut out the fabric for the wool jersey top from the latest Patrones, #285, that I wrote about last week:

I came across some gorgeous ex-Prada wool jersey at Ditto Fabrics (you’ll remember them from earlier in the summer when I visited their Brighton shop) and knew I was destined to pair fabric and pattern together! (NB: if you’re planning on making this top with this fabric, buy 2m instead of the 1.5m called for in Patrones as it’s ever-so-slightly narrower than Patrones’s and I had a real tricky time fitting everything into 1.5m!) I also bought some dark turquoise ex-Burberry coating, some I-can’t-believe-it’s-not-silk ex-Prada polyester jersey with trompe l’oiel sequin print, Paul Smith grey marl jersey with stars, and some black stretch denim (all pictured at the bottom of my fabric stash gallery if you fancy a perv!). Honestly, I’m beginning to think the owner Gill is a bit like the UK version of Gorgeous Fabrics, she has such an eye for quality ex-designer stuff!

The funny this about this pattern is that on first glance, it looks like a really easy garment – just a basic blouse with dolman sleeves and some horizontal seaming in the front and back, topped off with a triangular collar with a bit of gathering detail and a covered button. Or so it’d seem. Look a bit closer at the pattern pieces and start chucking bits of the instructions through Google Translate, and it all starts to become a bit more interesting…

30th Birthday Dress – completed!

Happy birthday to me!!

Today is my 30th birthday, and as such, I’ve made Burda WOF 03/09 #116 in emerald green silk charmeuse (satin) to wear to my big party on Saturday night!

I tested this pattern a few weeks ago and wrote all about the fitting and muslin work here, and thanks to popular opinion, I did indeed take a wedge out of the back seam to get rid of the swayback wrinkles. Apart from that, I kept the fit the same!

30th Birthday dress – muslin

My 30th birthday is fast approaching, and even though I make myself something special every year to wear on the day, this year I wanted to sew a fabulous dress using some emerald green silk charmeuse (satin) I’d bought years ago and stashed away in the hopes that someday I’d recreate that Atonement dress. I was really excited to see in the Burda WOF March online previews that there was a dress that suited me perfectly – gorgeous gathered, yoked shoulders with floaty sleeves, falling down into a deep V neck with a swooshy gored skirt and plenty of back detail, and shown in my chosen fabric – Burda WOF 03/09 #116.

The timing would be tight, though, since I usually only receive my subscription copy on the 15th or so of the month, but I thought I could pull it off. But then Burda updated the website with the full information, showing it was a *&£@^% petite pattern! Argh! It’s always the way that the designs you like the most aren’t in your size, and with the timeline, I really didn’t think this was meant to be…

Wool, satin, and lace

I’m making good progress on my tuxedo-y suit using my grandmother’s vintage Pendleton wool. I’ve done the single welt pockets (a first time for me!) and the construction of the jacket body, and I’m now working on the many collars and lapels. The placement of the welt pockets (which are hidden under a front flap) is way too high, though, and the pockets are too narrow to be useful, though – this is the second time I’ve had BWOF jacket pockets be waaaay too narrow for my hands to fit through, so I must remember that for next time.