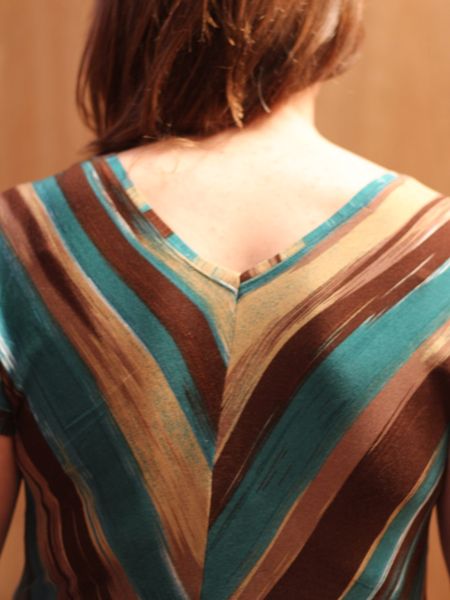
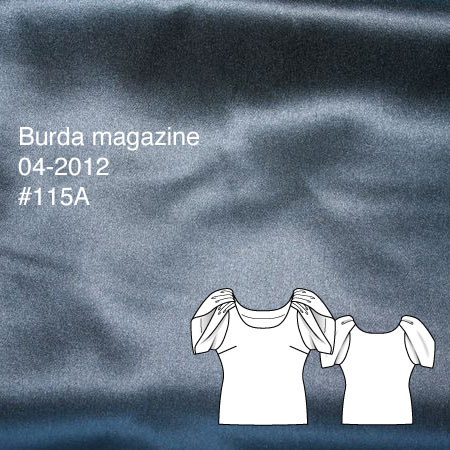
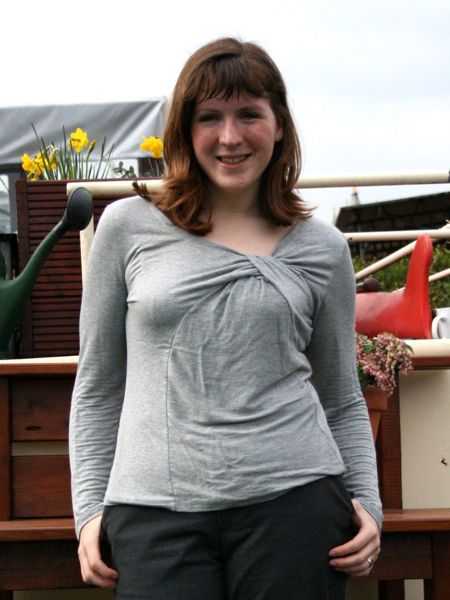
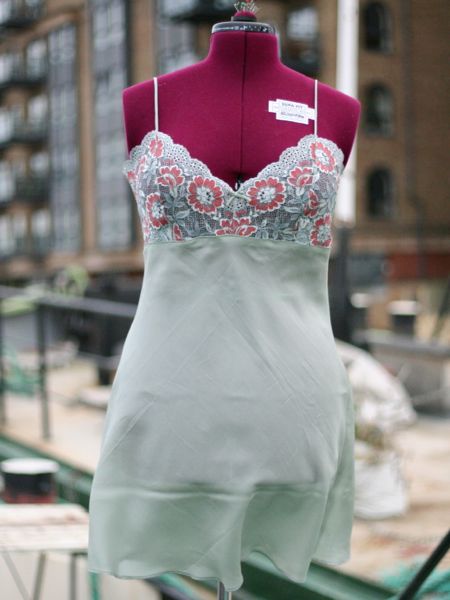
Striped Cabarita collared tee

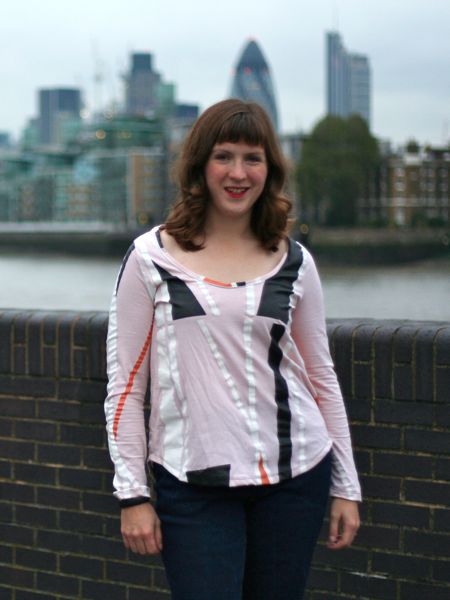
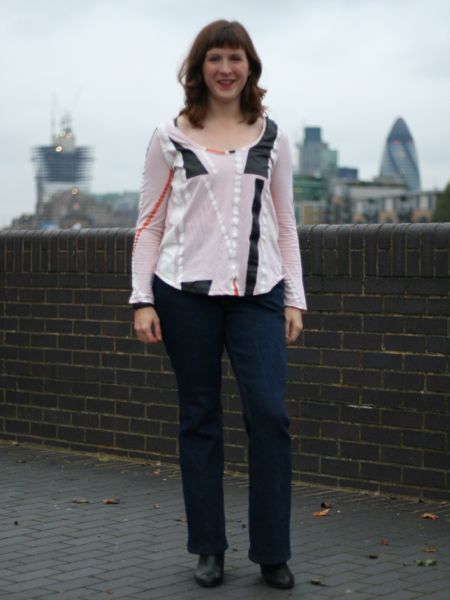
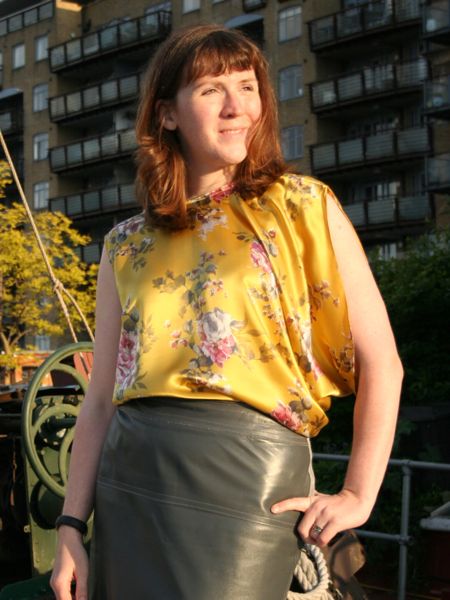
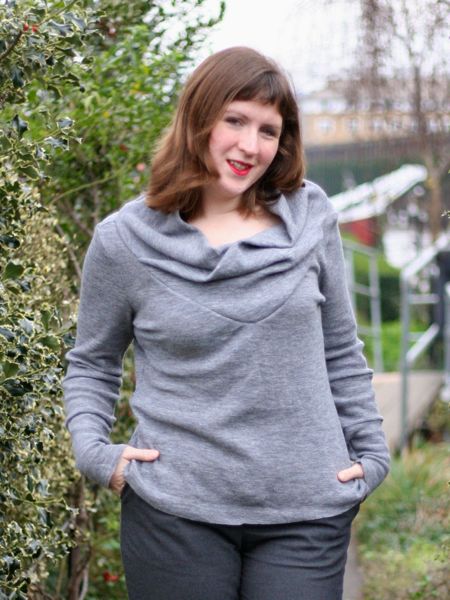
As soon as I saw Cabarita, I knew I had to sew it. It’s got some really unique features I’d not seen in other knit tops – the vintage-inspired collar is the most obvious one, but the back V-neck and choice of short or long dolman sleeves really do make this a cut above the average teeshirt pattern.

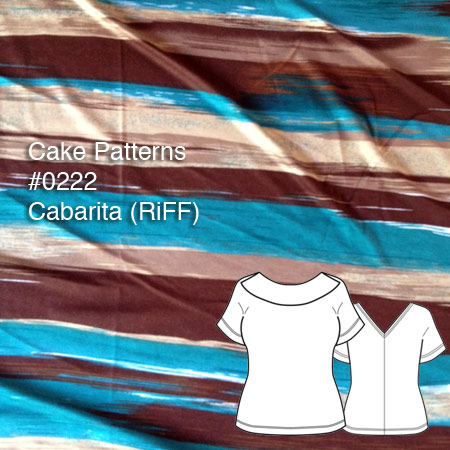
Cabarita is the first of the “RiFFs” range from Cake Patterns and is available either printed or as a pdf from Etsy (I opted for pdf!) (Though note that if you ordered the printed version, you need to download the back neck binding piece here as it was accidentally omitted!)

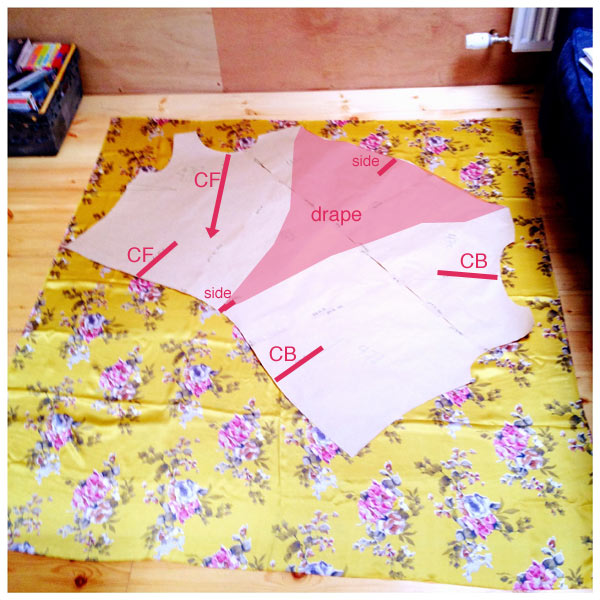
Cake Patterns usually have lengthy and descriptive, very beginner-friendly instructions, but Steph started a side-range of “RiFF” patterns that have the same level of professional drafting, but with brief, text-only instructions and no layout diagrams, intended for more advanced sewists who just want the pattern (hello, that sounds like me!). Crucially, though, they still feature the (now signature) “draw your own side seams” method. When I compared my drawn pattern pieces to my knit sloper, they were scarily close (from the bust down), so this method really does work!

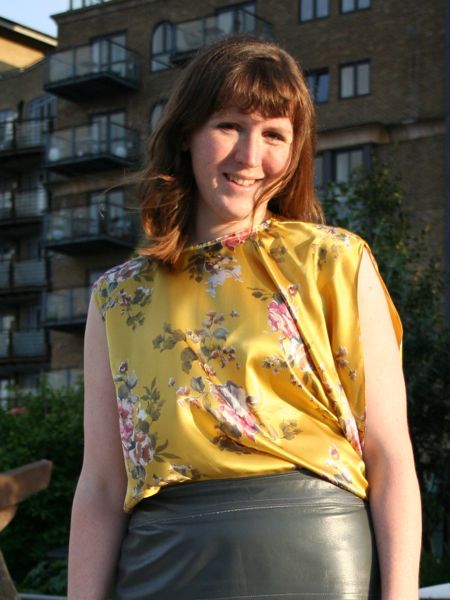
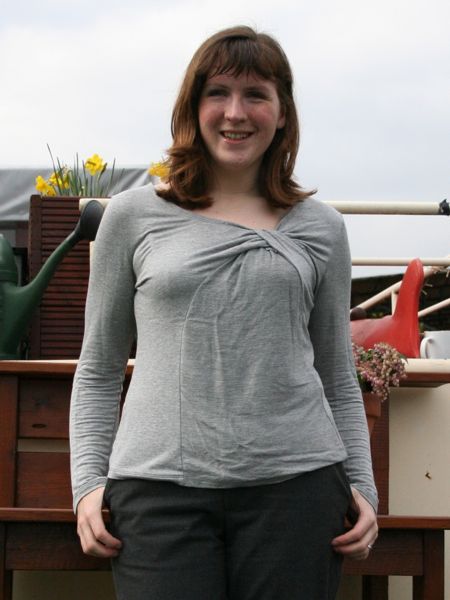
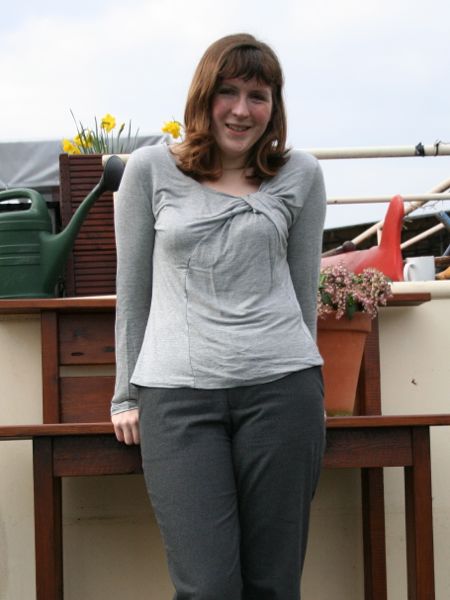
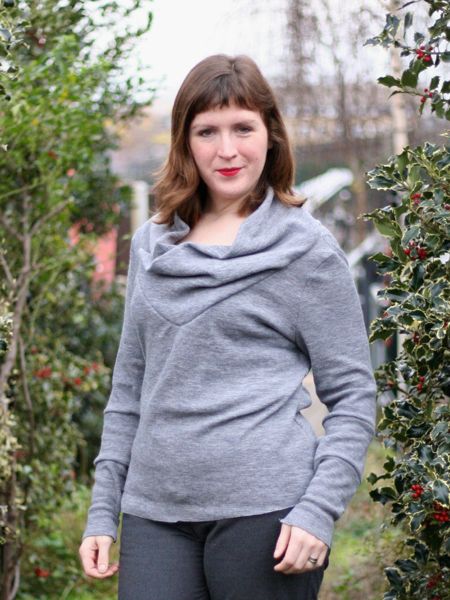
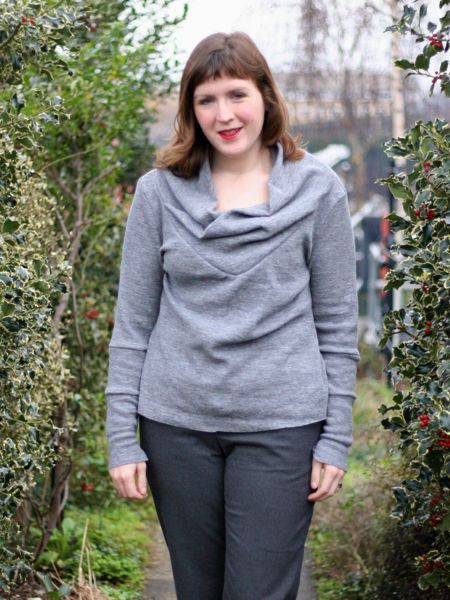
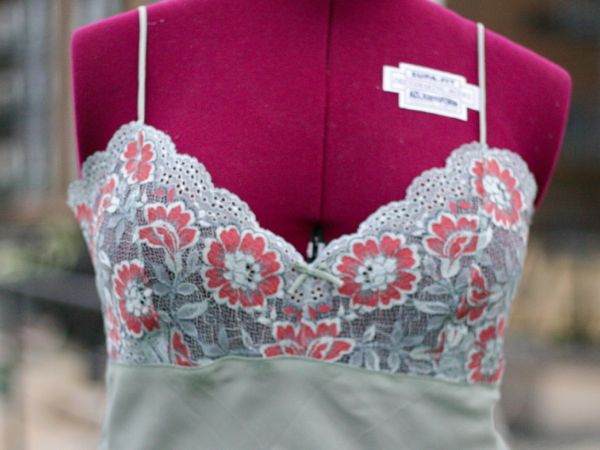
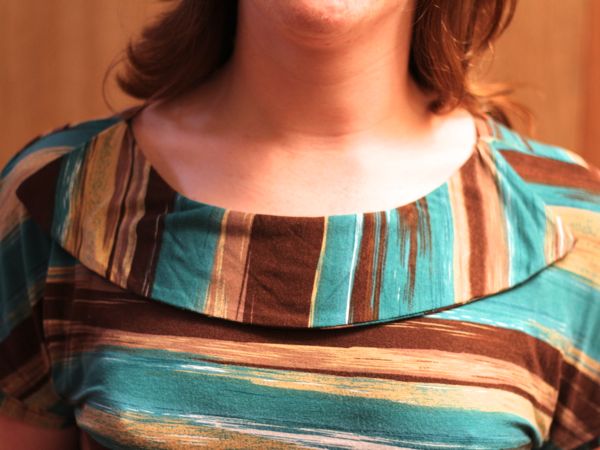
Now, a bit of a confession: I wasn’t entirely sold on the the collar at first. I thought maybe it might look a bit too costume vintagey, and might get in the way or flop around a bit. But I’m glad I included it as I really like it now, and it really does add to this pattern, which might be a bit too plan in front otherwise.

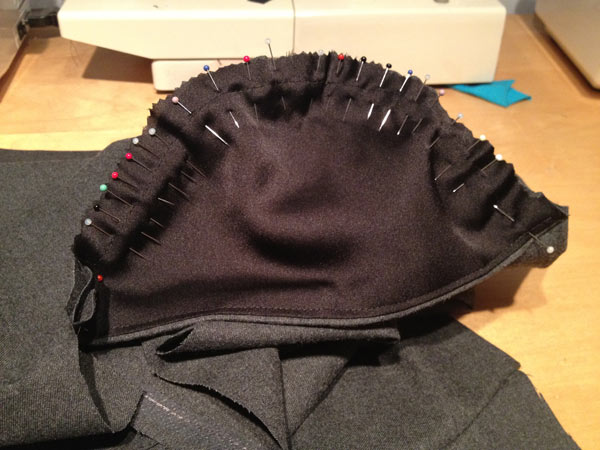
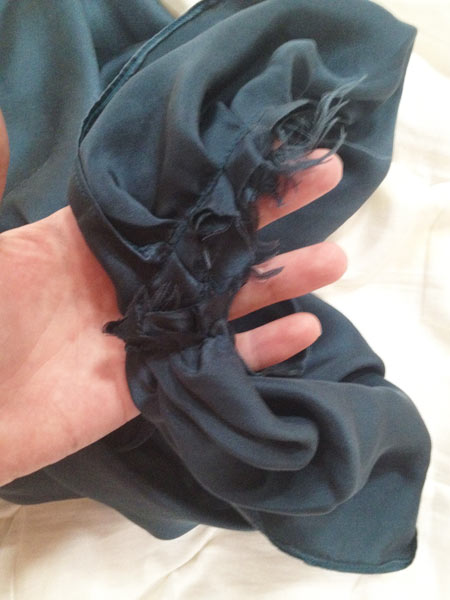
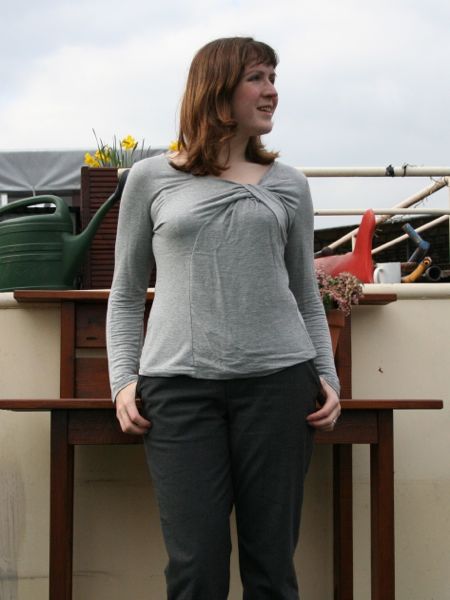
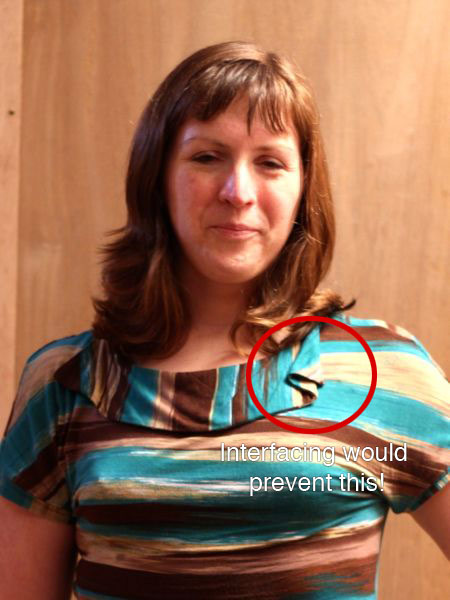
When I sew this top again, though, I’ll a) use lightweight knit interfacing on the collar so it stays in place a bit better (rather than the edges folding over, like you can see below right) and b) attach it so that the seam is on the right side and therefore hidden under the collar as it hangs, negating the need for any understitching on a narrow serged seam allowance.

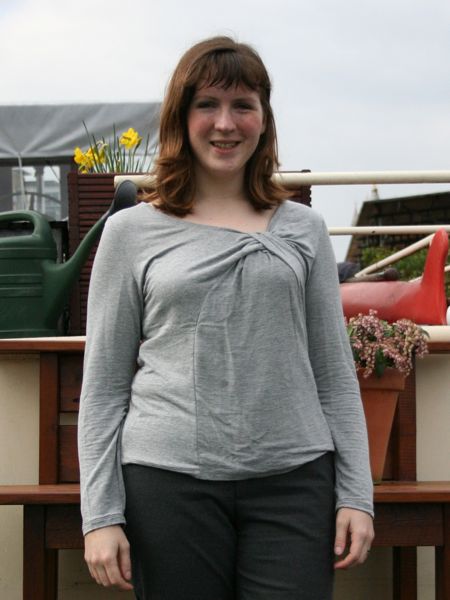
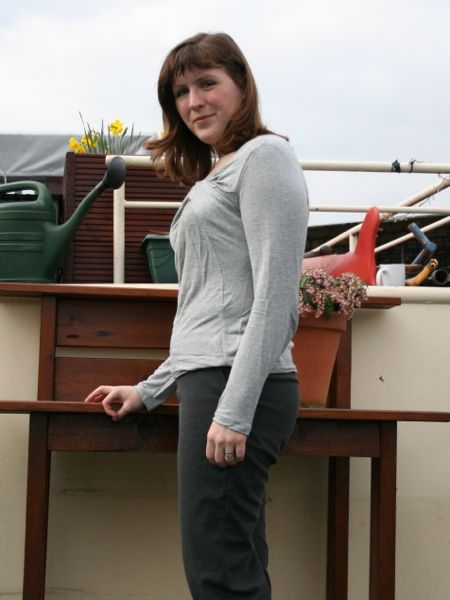
This fabric is a lovely and soft viscose jersey in brown and turquoise from Minerva (and also comes in brown/pink and brown/orange colourways). Minerva don’t do half metres so I took the plunge and only ordered 1m, and I’m happy to report that I could easily fit the shorter-sleeved version into it.

Parisian jeans and a geometric Wiksten tee

As some of you may have guessed from my FW2012 shortlist I posted yesterday, I’ve made the Wiksten tank, using the pattern and geometric Mood jersey Kollabora gifted me and also another pair of Jalie jeans! I wasn’t actually planning that they’d go together, but they were a perfect pairing for a relaxed Sunday roast at a cosy pub near the moorings.

Let’s start with the jeans – as I said earlier, my NY-Lon jeans are easily my most-worn item of clothing ever since I made them last year, but they’re starting to fade and I want to have a replacement pair ready before they totally die. The denim I used there was from Mood in NYC, but I’d found some great stretch denim at the Tissues Dreyfus coupon shop in Paris in March, and only €10 for a 3m length, too. I wouldn’t normally buy that much of the same fabric if given a choice, but it means that I’ve got enough left over to easily make another pair. I find it really difficult to find good stretch denim in shops, but this has good stretch and recovery without being too flimsy, so I snapped it up when I saw it.

I constructed these exactly the same as my NY-Lon jeans – again, my main deviations from the Jalie pattern were to use a Burda curved waistband (instead of their rectangular, bias-cut waistband that was just awful in my muslin pair), and extended the pocket linings to the centre front for a non-stretch “gut slimming” panel, as before.

How to line the Burda peplum top

Peplums are a major AW12 trend and one that’s well within reach of most home sewists and high street shoppers. There are plenty of patterns out there, but one of the nicest I’ve seen so far is the cover design from the August 2012 Burda magazine, which is also available to purchase as a pdf download here (and you can look at the full instructions and layout diagrams on that site for free).

A lot of peplum dresses just feature a ring of excess fabric around the hips, but here, the curved waist seam plus the sloped hemline and bias-cut peplum on this particular pattern really sets it above the rest. I also like that it’s separates, so I can pair my top with a skirt, slim trousers, or leggings and get much more wear from it than just a single dress.

One thing I don’t love about this pattern, though, is that it’s unlined. Or rather, it has lined cap sleeves, a narrow bias edge on the underarms and a neck facing, but nothing further. It’s pretty straightforward to make lining pattern pieces from the shell and facings (see below), but the construction was more challenging to figure out. It is possible to do a nice clean finish almost entirely by machine (you still have to sew the hems by hand), but you have to do a bit of clever reordering of the construction…

Luckily for you, I made notes as I sewed so I can share my clever order of construction with you!

As mentioned above, you’ll need to modify your bodice pattern pieces after you’ve cut out your shell fabric. Place the neck facings on top of the bodice pieces (annoyingly, in this case they must be face-down so the shoulder seams and CB/CF edges line up), trace the neck facings onto your front & back bodice pieces and then cut these off before cutting your lining pieces. Remember to add seam allowances to these new cut edges, too!

Be sure to interface the facing pieces, then attach them to the lining pieces and treat as one for the rest of the construction.

Instructions for a clean-finish lining!

  1. Sew all darts, attach peplum pieces to bodice on the shell, and sew at shoulders (but keep it open at side seams and centre back!), ie: the follow the first few steps of Burda’s instructions, but stop before the zipper insertion!
  2. Do the same for the lining
  3. Sew the sleeve shell pieces & sleeve lining pieces together at the bottom edge of the sleeve. Understitch, then baste around the other (armscyce) edge
  4. Baste the sleeve onto the shell with right sides together (beware of excess ease!! Don’t skip this basting step!)

The Donna Karan red vixen dress (Vogue 1280)

I don’t often sew Vogue patterns, but I am a massive fan of the Donna Karan patterns’ design and execution, so it’s no surprise that I added Vogue 1280 to my Wish List the second it was announced recently!

Happily, my mom saw there was a pattern sale where she lives in the USA and offered to buy a few patterns for me at US sale prices – she paid less than half the price for the pattern + shipping to the UK than I’m charged just in postage to the UK for the same pattern! I wasn’t planning on sewing a dress right now, but I got so excited when I saw Vogue’s numbered pattern marks for the first time (possibly in response to my complaints regarding Vogue 1259’s instructions), that this dress moved quickly up my Must Sew list.

Like all DKNY & Donna Karan Vogue patterns, this one’s a great mind puzzle to put together! It also has the joy and wonder of looking like a total mess until the very end, when it all comes together into a dress shape. I found it to be true to size, so go with your measurements, not some vague idea that all Big Four patterns have tons of ease. Most of the pieces are cut on the bias (not that it means much in a jersey!), and it hugs the body very closely. If you’ve got any lumps and bumps, though, this is not the pattern to hide them, and so you’ll probably be wearing Spanx underneath in addition to the strapless bra the bodice requires (Full disclosure: I’m not wearing Spanx in these photos!).

Golden silk asymmetric blouse

From a total loser of a silk blouse to a triumph of a silk blouse, all in one afternoon! After the Burda FAIL, I turned around, cut into my gorgeous butter yellow floral silk charmeuse I bought at Ditto in Brighton last weekend, and sewed up this blouse in about two hours flat!

The layout of this blouse is really cool, and the entire blouse is just one piece, with only one side seam (and two shoulder seams). I took a photo of my fabric when it was laid out on the floor, and I added some annotations in pink (below) to help show where the drapey side comes into play. I hadn’t realised it from the diagram, but the CF neckline is on the straight grain, and the CB neckline is on the cross-grain, with the only side seam on the bias. Very cool, and the design feels quite Bunka.

I used the leftover silk in the bottom left corner to make several bias strips about 4cm wide, as I prefer a narrow bias edge on my silk blouses instead of finicky facings. I also left off the shoulder bow, as I felt there’s enough going on in this blouse already!

We were very lucky to catch the “golden hour” on Monday evening, which just makes this silk come alive in these photos! I’ve paired it here with my grey leather skirt to try and give an edgier look to the twee floral of the silk.

A rare dud of the highest order

Last weekend I cut into cut into one of the oldest fabrics in my stash, a dark turquoise silk charmeuse bought in January 2009, to make the cover top from the Burda April 2012 issue:

There are so many things wrong about this pattern that I’m going to revert to list form to get the rant out of my brain:

  • The recommended fabric is silk, yet the instructions don’t tell you to sew French seams, or indeed finish the raw edges at all. As far as I can tell, even if you follow their insane instructions, you’re left with a triangular area of raw seams at the shoulder. If I’d liked the top enough, I’d have had to make my own weird facing to handstitch on to cover this.
  • There’s a ridiculous amount of ease in the bodice – way more than Sorbetto, for example, and that’s also a non-bias, slip on shell. I ended up cutting this with the front and back pieces a centimeter or two off the fold simply to fit it onto my narrow silk, but I checked first to make sure it’d not be too small. And having completed the shell, I can say that it’s still on the loose side, even with my reductions!
  • Facings on a silk. WTFOMGBBQ? Why?? I said Nuts! to the facing and did a narrow bias edge (in leftover silk from my birthday top which I still had lying around) on the neckline, and did a two-step narrow edge for the hem.
  • Burda tells to to cut an extra wide hem allowance on the sleeve edges, press in and out (and shake it all about, do the hokey pokey- oh wait) and mess about with it until the sleeve is entirely completed… and then sew an invisible hem by hand. On silk. And it’s a reeeeeeally long hem. I’d rather eat glass, Burda. The much better option here would be to cut a regular hem allowance, and machine-stitch a narrow edge or rolled hem before basting any of the sleeve pleats. Realising they’re crazy and trying to do this later is much more difficult (ask me how I know).
  • The sleeve instructions are absolutely incomprehensible. Burda would have you flip the entire pleated edges around the neckline and back to the armscye at the shoulder, which a) completely contradicts the photos, and b) there isn’t enough seam length to do. So I had to try and make the best of pre-basted pleats, attach to placement lines that may as well have not existed (since the pleated edges didn’t match up anyway), and a mess of raw edges (see above). My best attempt was not good enough.
  • And finally, when I tried the top on to see if I even wanted to carry on finishing the raw edges, the sleeves are just ugly. Less “quirky chic” and more “80s shoulder pads”. Ugh.

Grey Pattern Magic "Flip Turn" top

Ever since I first opened the Pattern Magic books, a few designs have been burning a hole in my sewing brain. One of these was the “Flip Turn for a Draped Effect” bodice from Pattern Magic 2, and I was so happy that I was able to draft this on my Morley College Pattern Magic 2 course last month! It wasn’t too bad to figure out, but I’m still really pleased to have the instructor there and because I muddled through (albeit with help), I feel much more confident about tackling other designs in the books.

The only problem was that we drafted all the course designs based on the largest Bunka sloper, which was still rather a lot smaller than me, so if I wanted to actually wear the designs from the course, I’d have to create them again off my own sloper, which just seemed a bit dull.

Or maybe… just maybe… I wonder if the Bunka sloper version would fit if I eliminated the back waist darts and made it in a knit?

OMG a toile for a fashion college dressform fits me!! :O 😀

Since this was a total fit experiment, I wanted to try this first in a low-risk fabric, and I had just enough of this viscose grey marl jersey leftover in my stash from the Manequim “big shirt”.

One interesting part of this design is that the reverse of the fabric is shown on a large portion of the lower front, and in this fabric, the reverse is kinda textured and loopy, but without any major colour change from the “correct” side. It means you get a subtle texture change on that panel, but without screaming “hey! I’m the wrong side!”.

To further play up the texture change and to make it look more intentional, I used the wrong side of the fabric on the neck band, too (maybe I’ll do the sleeves on the wrong side next time, too?)

Manequim draped collar sweater

There came a point about midway through the construction of this where it suddenly dawned on me that I was creating my second draped collar sweater with pieced sleeves of the month. Clearly the sweater knits in my stash were calling out to me, and I’m naturally drawn to drapey styles. Though I really must remember when I’m in fabric stores that 2m really isn’t enough for long sleeves and a big collar!

This the Michael Kors-inspired, collared sweater from the June 2011 Manequim magazine. Last week I showed you details on the construction of the various pieces and altering the size “Small” pattern to my basic knit tee pattern.

The only problem was, when I was laying out the pattern pieces onto my awesome, ex-Versace sweater knit from Ditto in Brighton I realised that yet again, I didn’t have enough fabric to lay out the sleeves without piecing them, argh! I didn’t want to back down since I’d tried to use this fabric for something else last winter, but 2m of a really narrow fabric really limits your possibilities. So I carried on, introducing two seams in the lower arms. Frankly, sleeves tend to bunch up so much around the sleeves that I find the seams kinda get lost visually around that area anyway.

In the end, I was forced to cut the collar on the bias simply because the fabric was too narrow to place it on the cross grain!

A seafoam green Ruby Slip (and matching panties)

The Ruby Slip is a free pdf pattern and comprehensive set of tutorials over at Pattern Scissors Cloth, and as soon as I saw it, I knew it was just the most perfect pattern ever for me and I had to sew it ASAP!

I had 2m of seafoam green silk in my stash that I’d bought at Bhopal Fabric on Brick Lane over the summer (at £6/m), so I took a swatch of that along with me to MacCulloch and Wallis just before Christmas to buy lace specifically for this. Their lace selection isn’t great, but I totally fell in love with this stretch lace, made up of seafoam green, grey, and brick-red flowers, and it was the required 18cm for the pattern. It was pretty eye wateringly-expensive at £14/m, but I ended up with a silk matching lingerie set for £40 exactly, so I think the economics of my decision were sound.

Sherry has done an incredible job going through all the ins and outs of lace cutting, bias silk sewing, how to do an FBA, etc, but I did get a surprise when I found that 18cm lace is not wide enough for the side front:

Since I went out and bought the lace specifically for this, I was a little annoyed, but I was also feeling flu-ish so I sat down with my copy of Bridal Couture and hand-pieced some lace from my scraps to make up the missing corner. It involved a ton of tiny hand stitches in both seafoam and brick to get everything to match seamlessly, but I’m pleased with the end result (she’s since posted some ways of dealing with narrow lace).

I also wanted to demonstrate how much you need to pay attention which cutting lace. I was paying heed to all of the scallops in order to get them in join up nicely at the seams, but I totally didn’t see that my motif was off at first. Happily, I had enough to re-cut that piece to have a nicer join over the seam (seen on the right).

Right, all that aside, and let’s see some finished photos! But, er, not modeled on me since there’s see-through lace and I’m not an exhibitionist. So you’ll just have to take my word that I squealed with delight when I first tried this on, because the fit is just perfect! The bias skirt really just hugs my curves without being tight, and everything just fits like it was meant to be. I made the “short” version, and the hem lies about 3-4 inches above the knee, which is perfect for me.

A silk chrysanthemum Sorbetto blouse

Every now and then I mention a few people from my personal life when they enter into my sewing world for whatever reason, but regular readers will probably recognise the name of “Neighbour Helen” more than most. As a neighbour, close friend, and convenient fashion industry alumni, she’s helped me assess muslins, balance proportions, learn how to rotate darts, and she even drew the amazing illustration for my free ruffled wristlet pattern!

So I was very saddened to hear that she and her husband are moving their barge to France in a few weeks’ time, to travel through the French canals for the foreseeable future (ok, saddened and jealous!). Since it was also her birthday, my gift to her was to make her a silk blouse of her choosing.

She chose the gorgeous chrysanthemum silk that was leftover from my blouse and I even let her try mine on, but she felt my top was too blousy for her and requested a simple shell instead.

So I turned to the new (and free!) Colette Patterns Sorbetto top!

I made a few changes, though – the most obvious is that I eliminated the central pleat (which would have been too busy with the large scale print), and I lengthened hem by 3” as others said this came up short.