Blog

A lavender chic sweatshirt for my mom

I sure hope you aren’t sick of chic sweatshirts yet, because despite showing you my wool one on Tuesday, I’ve got another for you today (which I actually made several weeks before my grey one).

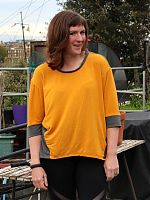
When my parents were visiting in October, my mom looked through all my recent makes and decided she’d like a chic sweatshirt for her belated Christmas gift, and she picked out a lovely lavender sweatshirting for it while she was here. Remember how lovely she looked in this lavender dress I made her a few years ago?
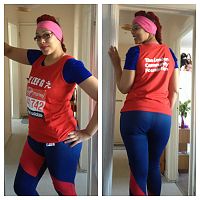
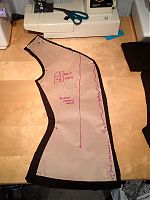
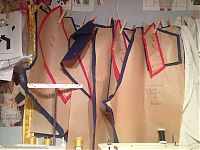
The pattern is again from the the September 2012 Burda magazine (or you can purchase the download pattern here) but the pattern only goes up to 44, and she decided she needed a size 46, so I had to grade it up. With multi-size patterns, it’s not too difficult – just measure the space between the size lines, add that onto the largest size, and connect the lines at the corners.
Here’s a good tutorial on grading up a pattern, and thankfully, this particular one happened to be the pink shaded pattern for this issue so it was easier than usual. It probably took me about 15-20 minutes to grade up all the pieces on the pattern sheet (of which there’s only 4!), then another 10 to trace them off, so it wasn’t nearly as painful as grading up a pattern that isn’t multi-sized.


(Big thanks to my brother for taking the photos for me!)

Wool sweatshirt & denim-look pleated leggings

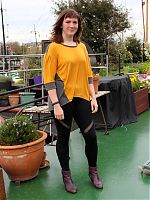
I’ve been meaning to sew both of these pieces for a few months now, but it didn’t occur to me exactly how well they work together until I went to do the photoshoot and realised, hey – these make for a great transitional weather casual outfit!

The wool sweatshirt

I mentioned it in my Burda Challenge roundup but I abolutely adore my turquoise chic sweatshirt from the September 2012 Burda magazine (or you can purchase the download pattern here), and I wear it so much I’ve been plotting another ever since. I’ve had this wool blend fabric in my stash since our honeymoon in 2010, when I bought it at Elliott Berman in NYC. I’m not sure if it’s a jersey or a woven, and it’s got a bit of loft and stretch, but it’s not as spongey as your typical loden. And for a wool, it’s super soft and not scratchy in the slightest.

So I made another “chic sweatshirt” out of this wool – does this make this one my “luxe sweatshirt” or something?

As before, you’ve really got to baste those curved front darts carefully so they’re accurate when you sew them. I always do my hand basting with silk thread (hot pink so it stands out against pretty much everything I sew) because it pulls out so much easier than polyester or cotton thread when you’re done.

I really like the detail of the curved, darted sleeve head, which makes the construction of this more like a raglan sleeve than a set in one.

Brick orange Marita draped dress

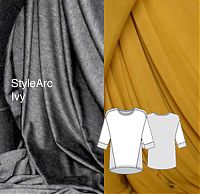
I fell in love with the design of the Style Arc “Marita” dress as soon as it was released, and I bought it right away. But that was back in our summer, and I thought the long sleeves would be better suited towards cooler weather, so I let it hibernate a bit in my pattern stash before adding it into my Fall/Winter 2012 Sewing Shortlist.

I bought some wonderful some brick orange (or “rust”) viscose-lycra jersey from Tissu and knew it’d have the perfect drapiness and recovery for this design. Coincidentally, it’s also the same fabric I made the Donna Karan skirt set in – I just love this stuff and you cannot beat the price (£3.50/m)!

The pattern front claims you can make it in one hour, and it really is ridiculously fast to sew! I don’t feel right showing the pattern pieces as I feel that’s giving away their design, and I really think this is ingenious. The finished dress looks really complicated, but in reality it’s just a basic knit dress with one dart and one tuck. That’s it.

Catching up…

A month on, and I’m still ravaged by the shingles attack that hit me in mid-January. Absolutely everyone who saw my torso said it was the worst case they’ve ever seen (doctors included), and lucky, lucky me, the little bugger caused nerve damage, which means the pain in my side could continue on for months or possibly a year (again, lucky, lucky me). I’m on four different prescription painkillers until the neural-specific one hopefully starts working soon, so I’ve been stuck at home Resting (I hate resting.). The good news is that the doctor says I can now go do the odd half day at work and very easy run here and there as it’s driving me crazy not to, but I’m not to overdo things. But even that’s better than being chained to a couch!

Anyway, I’ve done as much resting as it’s humanly possible for Melissa to do, which means I’ve been lying flat on my back and sleeping for most of the days, but I managed to squeeze in some sewing, almost entirely in 5 minute segments, followed by 20 minutes of rest. Rinse & repeat… These will have photoshoots and proper posts coming hopefully next week!

The amazingly simple-to-sew Style Arc Marita dress:

A grey wool “chic sweatshirt”:

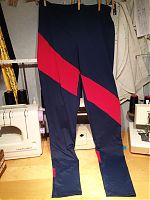
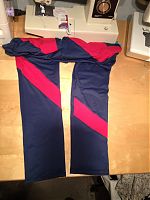
A pair of pleated, My Image denim-look leggings:

A quick, gathered raglan merino wool sweater from the February BurdaStyle magazine:

Free online lingerie sewing resources

So, how much fun was Lingerie Week last week, eh?? It may be Monday, but I thought I’d finish with a big list of free online patterns and tutorials for lingerie sewing, so you can carry on and make a bunch of pretty matching sets for yourself without breaking the bank!

Win a Lacey Thong kit!

Have you been inspired by all the activity this week during Lingerie Week and fancy sewing your own Lacey Thong now?

Would you like to win a kit with all the bits you need to make your very own? (Of course you do!)

In the spirit of lingerie and bra kits you can buy from stores online, I shopped my (cough, rather extensive) lingerie sewing stash to put together all the bits you’ll need to make a Lacey Thong pattern (suitable for any of the sizes).

Lacey Thong panty – construction tips & photos

Continuing on with Lingerie Week, I wanted to give you some extra construction tips on my Lacey Thong pattern that wouldn’t quite fit in the pattern itself (if you start adding in large photos, the Pdf filesize goes up really quickly!).

First of all, I wanted to start with two areas I’ve had some questions on:

“The 4cm ruler isn’t 4cm when I print it”. If the ruler on page 3 isn’t measuring exactly 4cm when you print it, then the print software you’re using is scaling the pattern! I use Preview on OSX, and I know it’s got its quirks – on this particular programme, if you enter in 100% and just click Print, it’ll still print at whatever the settings were before you changed them. You need to enter 100%, tap elsewhere in the print preview to watch the thumbnail resize, and then click Print. I’m sure other programmes have their quirks, too, but the bottom line is, if your ruler doesn’t measure 4cm, the pattern is not at the proper scale!

“Which size should I choose?” Sizing if difficult from a pattern creator’s perspective, because so many bodies wear a full range of sizes. I’m most confident of the Burda sizes recommended (much less so for the Big Four), so if you know your Burda size, go with that. The finished half-hip measurement is probably less helpful, but it’ll save some of you measuring it yourself.

If you’re unsure of your size, another approach to take it to “try on” the elastic before you start. Measure the waist elastic for the different sizes (pin or mark it, don’t cut!) and try it out by checking the feel around your half hip area (these panties sit over your hip bones, well below your belly button). The elastic should be snug and partially stretched, but not tight or loose.

During the construction of my black pair I took some photos of the trickier construction tips so those of you who prefer photos to diagrams can have a better look (though perhaps choosing a black fabric with similar-looking right and wrong sides wasn’t the best idea, sorry!).

I’ll use the numbers from the steps in the Pdf pattern’s Sewing Instructions below so you can easily refer back. As usual, click any of these to view the larger versions.

1. Join the Crotch to the Front

2. Join the Crotch to the Back

Purple lingerie set – camisole & lacey thong

Here’s the second of my recent lingerie sets I sewed while I’ve been ill, which I hope will inspire you! This purple set is again comprised of my (free!) Lacey Thong pattern and the (also free!) Ruby Slip pattern, shortened to camisole length.

I’m so pleased to finally break into the lace and materials I bought at Kantje Boord in Amsterdam when I was there running the marathon in October! I was very restrained in the shop, buying only this lace, the purple lycra remnant, and coordinating lime elastic and motif with this exact camisole in mind!

I’ve definitely got enough materials left (okay, I had to hit up Danglez.nl* for some more coordinating bra supplies!) to make a matching bra in the next week or two, so I might whip up another pair of panties to make this set a foursome like the black lingerie set too.

The only real difference between this set and the black one you saw earlier this week is that the body fabric used here is a lycra rather than a woven. The lace bodices are strikingly similar, even though the laces themselves are so different!

Black lingerie set – camisole & lacey thong

Wow, thank you so much for all your enthusiasm on the Lacey Thong pattern! It was downloaded nearly 200 times in the first 24 hours, and that’s without any promotion beyond your word of mouth!

I’m wondering who’s going to be the first to send me their finished panty photos, but in the meantime, I thought it might be inspiring to show you all two more lingerie sets I’ve made while I’ve been ill with shingles (and likely to continue to be ill for several more weeks, ugh).

First up is a black and champagne set comprised of my Lacey Thong pattern and the (also free!) Ruby Slip pattern, shortened to camisole length.

You may think this lace looks familiar, and that’s because it’s the same lace I used a few weeks ago to make a bra and another thong panty, so now I’ve got a set of four to wear together (and have finally used up all 2 metres of the Gabi lace I’d bought!). This time I used a thin poly(?) black satin for the body of the cami and panties, and used a beige picot elastic on the panties instead of black, like I had in my earlier set.

Free Lacey Thong Panty pattern!

I’m very excited to announce a special week here on FehrTrade – for the benefit of those of you reading this from RSS subscriptions and can’t see the site header…

It's Lingerie Week on FehrTrade

Yes, an entire week devoted to sewing lingerie, and we’re going to start the week off with something very special indeed – a free downloadable sewing pattern for a pair of thong-style panties, with lace over the hips and a special diamond-inset at the front and back.

The pattern is for sizes S-XL with seam allowances included, and for those of you who hate downloadable patterns – there’s only 4 pages of pattern to print, and only one join to tape together! I’ve written out step-by-step directions with a few diagrams, but there will also be some construction photos later this week to help out those of you who prefer them.


(If you’d like to spread the word about this pattern, please link to this post and not directly to the pdf file! thanks!)