Blog

The Peplum Top

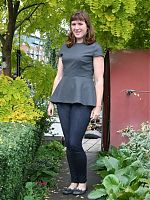
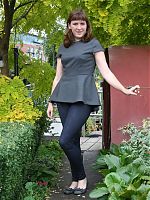
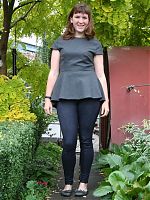
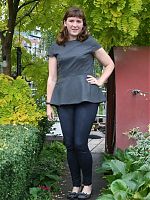
It should come as no surprise that I’ve been sewing this peplum top – after all, I shared my instructions on how to line this top already! But for those of you who are short in the memory department, this is #113 from the August 2012 Burda magazine, which is also available to purchase as a pdf download here (and you can look at the full instructions and layout diagrams on that site for free). There’s also versions with long sleeves or with a much longer peplum, extended into a dress, so there’s quite a lot of versatility here.

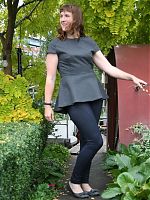
A lot of peplum dresses just feature a ring of excess fabric around the hips, but here, the curved waist seam plus the sloped hemline and bias-cut peplum on this particular pattern really sets it above the rest. I also like that it’s separates, so I can pair my top with a skirt, slim trousers, or leggings and get much more wear from it than just a single dress.

This is how I wore it to Karen’s V&A Ballgowns meetup, worn with my denim-look leggings I made a few months ago. I know peplums are really trendy right now, but I really like how retro 1950s this outfit looks even when made with completely modern patterns and fabrics!

Let the disco begin!

Because I’m a good wife, I promised James I’d make his reversible smoking jacket after I’d finished my peplum top (photos coming next week, sorry – it’s been impossible to organise a photoshoot around both our social schedules!). This week has been rather busy, even by our standards, but I did get two evenings to work on it, and so far I’ve completed the entire corduroy shell (including bound buttonholes and no less than three welt pockets!) and moved on to the interior. Or, because this is a reversible jacket, I suppose it’s just “the other side”.

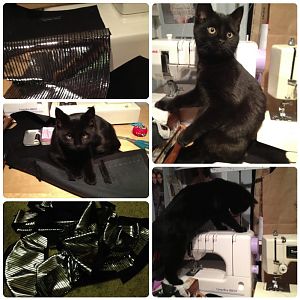
The other, disco side.

If you recall this is Betabrand’s disco fabric and it seriously is as bright and loud as the photos on their site suggest. I had to cut it with the black side facing out just so I wouldn’t go dizzy cutting it!

Manequim August 2012

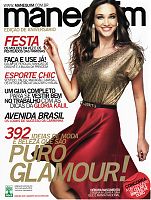
August is a funny transitional month in the fashion world – for Burda magazine, August is traditionally the first issue full of Fall fashions, but for Manequim in the Southern hemisphere, this August issue is the last of the Winter fashions!

I’ve had this issue scanned and ready to share for a while, but it was receiving the (very Spring-y) September issue in the post this week that really gave me a kick to post about August. Sorry for the delay – the magazine review posts get slotted in around my other sewing escapades, since I assume you’re all more interested in what I’m actually making!

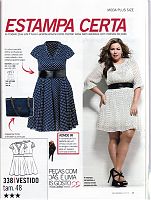
There’s only one Plus-sized pattern in this issue (with the inspiration dress modelled by the amazing Brazilian comedienne, Fluvia Lacerda!), and it’s a lovely shirt dress with pleated details around the neckline & sleeves.

I see a lot of classic button-down shirt patterns, but this one’s got an interesting twist – diagonal pleated inserts on both sides. It’d be an easy feature to add onto an existing shirt pattern you already have, too!

From the same feature, I totally love this sheath dress with square neckline where the bust pleats extend down from the neckline. It’s a really subtle bit of shaping, but I think this would translate nicely into a top, too.

Sew like a sailor, Run like a sailor!

I did indeed finish my peplum top in time to wear it to Karen’s V&A Ballgowns meetup on Friday, even though it meant sewing the hem over breakfast on Friday morning! You can see a sneak peek of it in the top photo on her site, though the peplum itself is hidden by my knees! Fingers crossed I can get a photoshoot done one evening this week, because my weekend was full of other activities…

As I shared with you last week, part of my preparation/reward for my marathon training was to run the Bacchus half marathon this weekend. It’s a half-trail, half-road, fancy dress (costumed) race through a vineyard in Surrey with wine tasting every 2 miles, plus a free glass of wine and hog roast at the end. See why I signed up??


Isn’t it funny that the sailor outfit is the first photoshoot in ages not to occur on a boat??

You’ve probably spotted it already, but the skirt is another Jalie running skirt – this is my third, and this is definitely my go-to for warm weather running bottoms (for cooler weather, you can’t beat the Ooh La Leggings!)

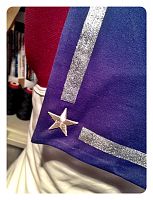
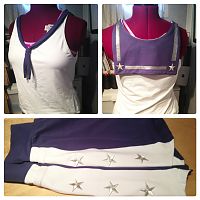
The top/vest/singlet is self drafted from my tweaked knit sloper, plus an added kerchief that I drafted from the sloper’s neckline. The kerchief is double layered, and attached to the neckline by overlocker, with the seam showing on the “right” side, which in this case is hidden under the kerchief. I tacked it down at the shoulders and that was enough to keep the seam hidden. Rather than physically tie a knot on the front ties, I instead made a loop to make it look a bit neater, and the “grabbiness” of the supplex was enough that it didn’t slip at all.

Coming up… peplums, sweat & booze, disco and smoking!

Lots of things going on at FehrTrade Towers, so it’s time for an update roundup!

Peplum top

After my last post outlining the lining instructions, there will be no points for guessing that this is coming along shortly! I’ve just got to handstitch the hem and the bottom of the lining and it’s finished, hurrah. Perhaps if I’m speedy I can wear it to the V&A Ballgowns exhibit meetup Karen is planning?

Bacchus half marathon costume

As part of my preparation/reward for my marathon training, I signed up to run the Bacchus half marathon this weekend. Not many people are familiar with this race, but it’s been rated exceptionally highly on Runner’s World, and the clue might lie somewhere in the description: a half-trail, half-road, fancy dress (costumed) race through a vineyard in Surrey with wine tasting every 2 miles, plus a free glass of wine and hog roast at the end. See why I signed up??

I’m regularly running much further than half marathon distance in my training runs, so even though this is only my second half marathon, I’m not that concerned about the distance, so instead I concentrated on the costume, making sure it’s entirely wicking and running-friendly!

I’m sure it will surprise none of you that I’ve also made another Jalie running skirt. Or, err, to be precise, two more, since I made another black one in parallel with my Bacchus one and forgot to photograph it! And a top based on my knit sloper (which I’m still tweaking after running in my sequin top for a few months now).

How to line the Burda peplum top

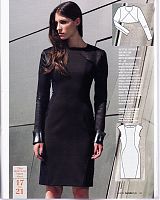
Peplums are a major AW12 trend and one that’s well within reach of most home sewists and high street shoppers. There are plenty of patterns out there, but one of the nicest I’ve seen so far is the cover design from the August 2012 Burda magazine, which is also available to purchase as a pdf download here (and you can look at the full instructions and layout diagrams on that site for free).
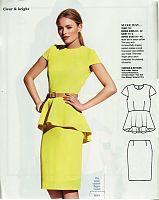
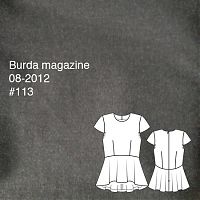
A lot of peplum dresses just feature a ring of excess fabric around the hips, but here, the curved waist seam plus the sloped hemline and bias-cut peplum on this particular pattern really sets it above the rest. I also like that it’s separates, so I can pair my top with a skirt, slim trousers, or leggings and get much more wear from it than just a single dress.

One thing I don’t love about this pattern, though, is that it’s unlined. Or rather, it has lined cap sleeves, a narrow bias edge on the underarms and a neck facing, but nothing further. It’s pretty straightforward to make lining pattern pieces from the shell and facings (see below), but the construction was more challenging to figure out. It is possible to do a nice clean finish almost entirely by machine (you still have to sew the hems by hand), but you have to do a bit of clever reordering of the construction…

Luckily for you, I made notes as I sewed so I can share my clever order of construction with you!

As mentioned above, you’ll need to modify your bodice pattern pieces after you’ve cut out your shell fabric. Place the neck facings on top of the bodice pieces (annoyingly, in this case they must be face-down so the shoulder seams and CB/CF edges line up), trace the neck facings onto your front & back bodice pieces and then cut these off before cutting your lining pieces. Remember to add seam allowances to these new cut edges, too!
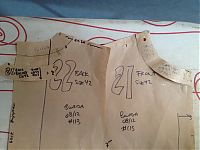
Be sure to interface the facing pieces, then attach them to the lining pieces and treat as one for the rest of the construction.

Instructions for a clean-finish lining!

  1. Sew all darts, attach peplum pieces to bodice on the shell, and sew at shoulders (but keep it open at side seams and centre back!), ie: the follow the first few steps of Burda’s instructions, but stop before the zipper insertion!
  2. Do the same for the lining
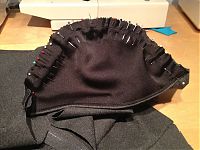
  3. Sew the sleeve shell pieces & sleeve lining pieces together at the bottom edge of the sleeve. Understitch, then baste around the other (armscyce) edge
  4. Baste the sleeve onto the shell with right sides together (beware of excess ease!! Don’t skip this basting step!)
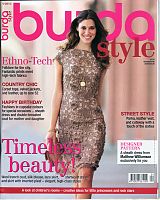
Burda magazine September 2012

Thank you so much for all your compliments on my Fuchsia party dress (and marathon legs, ha)! Apologies if any of you had trouble with the link – I’d originally categorised it wrong and had to correct it, which changed the URL.

Also, big thanks to everyone who entered my competition for the MyImage magazine – I was blown away by the number and wonderful variety of pattern request ideas in your comments! Now, if I ever had a chunk of time spare to draft them all, I’d be a rich woman… Anyway, the random number generator drew 32, which means Silvia is the lucky recipient!

The calendar might still say August for another day, but at least in London, there’s a definite crispness in the air that signals the return of Fall, and Burda’s already got this covered with another fantastic issue!

We had a similar (but A-line) dress in the May issue, but I actually prefer the lines on this petite dress instead, and that it can be worn with a bolero to give it sleeves is just a bonus!

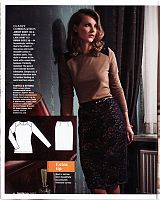
Both garment here are really simple, but as you can see from the photos that you can really create a lot of interest just with fabrics. The top is really just a long sleeved teeshirt with inserted seams at the shoulders (like my Knipmode rose and lace teeshirt!) and the skirt is just a basic pencil skirt, but together, they really work, and are within reach of most beginner sewists.

The Fuchsia party dress

Ooh I am so excited to show off this dress to you, and even moreso because it has a great origin story!

Did you know there’s a new sewing, knitting, and jewellry-making social network in town – Kollabora? It’s from some of the people behind the original BurdaStyle.com and I helped beta-test their new site a few months ago.

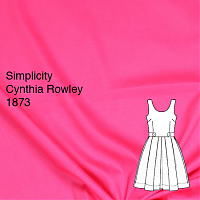
As a big Thank You for sending in tons of detailed bug reports (a nice side-effect of my day job, which involves a lot of online testing, is that I can write a mean Steps to Replication!), they offered to send me any fabric and pattern combo from their shop! They stock loads of great independent patterns like Colette, Wiksten, and Sewaholic, but I thought I should pick something I wouldn’t normally buy myself. So keeping that in mind, I chose this very! bright! fuchsia stretch cotton sateen from Mood + matching thread + Simplicity 1873 (one of the Cynthia Rowley designer patterns).

I made View C – the low neckline & short hem option, but without the button tabs at the waist. I ended up making size 14 instead of my usual Big Four size 16 because 14 was the biggest size in the envelope I was sent, but it turned out just perfect in the end – nicely snug at the waist, but not overly tight. With a skirt this full and pleated, I really think it needs a nipped-in waist, and that’s another reason I didn’t want to add any bulk in the form of the button tabs there, either.

MyImage Fall/Winter 2012 & Giveaway

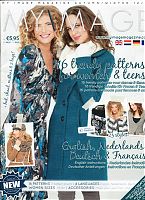
It’s the latest edition of the bi-annual, quadri-lingual My Image magazine! They’ve also got a new edition of Young Image magazine, too, but as I’ve not got many kids to sew for, I’m more interested in the women’s patterns.

It seems nuts that all the pattern companies and fashion magazines are into long sleeves and heavy coats already, but I suppose we’ll thank them when the weather cools down and we’ve got the perfect patterns already in hand!

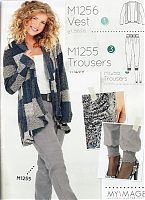
This cardi is nice (but nothing particularly new), but I’m mostly into the trousers. I’m not fond of the ankle shirring detail, though, so I think I’d just leave that off for a nice straight leg instead. Maybe that makes me boring, but there’s enough interest in the top half for my liking!

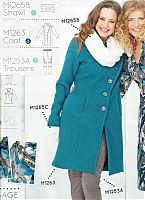
Contained in this one image are my two favourites of this issue I think – the coat is just amazing and I love, love, LOVE these slim trousers!! They’ve got some fantastic seaming on the legs and have added pleats to give great texture there and really play up the extra panels. These are for stretch wovens with an elastic waistband, in case you’re wondering (like I was, eyeing up my fabrics before the issue arrived!).

Pick Three

If you had to choose three (and only three!) things you’ve ever sewn to best represent what you can do, what would you choose?

I’ve recently been tasked with exactly this, and I found it incredibly difficult to decide. I mean, it’d be difficult enough if I was confined to just one type of garment, like “Pick three dresses” or “Pick three casual garments”, etc, but just three, from the hundreds of garments I’ve sewn in the past nine years?! This required thought.

Pick One…

Having said that, strangely, the first of my picks was pretty easy – my Winter Coat.

I made this coat two winters ago and I’m really, really proud of the finish on it. The wool is extremely thick, with bound buttonholes, metal buttons, single welt pockets, a thick silk lining, and (most proudly for me) I didn’t use a single bit of fusible anything in its construction. I wear it to death in winter and I love everything about it.

Pick Two…

Should I play my trump card and pick my vintage refashioned wedding gown? Well, alright then!