Blog

A linen & silver dress – ideas

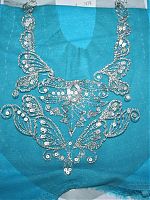
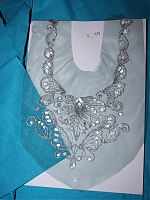
London has gone super sunny and warm over the past few weeks, so my thoughts have turned to spring sewing and using up some treasures from my stash. Remember the silver chain and sequin motif I bought in Paris last summer? Well I still adore it, and I thought it’d be a great showpiece for a spring dress.

Since the motif is mounted on blue netting, I thought it’d be best to pick a similar coloured fabric for the dress, so that the little spots inside the design which can’t be trimmed away wouldn’t look too out of place. Luckily I’ve had this turquoise linen/rayon mix in my stash for a few years, so its day has come!

I thought it looked good next to the motif, but wow! it looks amazing when I actually pull some through underneath it!

Has anyone worked with motifs like this before? I’m guessing I just get silver lurex thread to match and take tiny stitches the whole way around and trim off the excess netting? Is an embroidery hoop useful (or necessary)? I’m hoping to get the piece cut out and ready to work on during our French road trip over Easter, with any luck.

The next step is figuring out which pattern I’m going to use. I used my usual method for sifting through my pattern magazines (like I did for my wedding gown and my latest winter coat) – since I’ve got all my At-a-glance pages scanned in an online gallery, I flip through them all looking for a suitable pattern, and when I find one, take a quick screenshot of that pattern (Shift-Apple-4 on Mac makes it really easy!), and rename the file to be the issue number so I can find where it came from.

Recent gifts

My first gift is a very special one, because it’s from all of you!

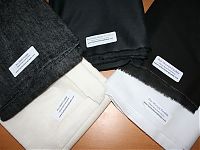
I recently received a Google Adsense payment, and I always try to spend these exclusively on sewing supplies to feed back into this site. The last payment bought me four Patrones issues and some Spoonflower knits, for example! But I’m trying to pare down my fabric to fit in my tiny sewing room, and I already have more patterns than I can sew, so I thought I’d spend the windfall on some really nice interfacings from Fashion Sewing Supply!

You bought me:

  • 2 yards Pro-Weft fusible interfacing, Natural
  • 2 yards Pro-Weft fusible interfacing, Black
  • 2 yards Pro-Tailor Deluxe fusible Interfacing, Dark Grey
  • 2 yards Pro-Woven Fusible Interfacing, White
  • 2 yards Pro-Woven Fusible Interfacing, Black

This should be enough to keep me in interfacing for a year years, and this stuff just feels incredible – the Pro-Tailor stuff especially feels so silky soft! I can’t wait to try this stuff out…

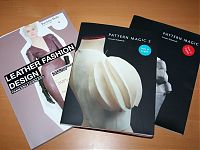
For my birthday, I received some sewing books that I requested!

(Vote for my) March Mini Wardrobe

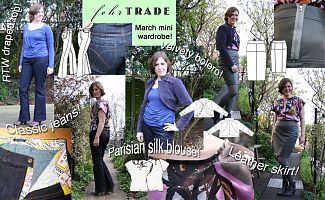
It doesn’t seem that long ago that I was first laying out my initial plans for this mini wardrobe, but now I’ve had some time to step back and have a look over what I managed to accomplish last month. I made this wardrobe mostly for myself, to use some luscious fabrics from my stash in combination with patterns that really appealed to me, but I also kept one eye on the contest requirements running over at PaternReview.com to make sure I remained within their rules, too. Here’s my entry into their contest, or you can just read on below…

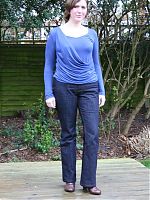
I started with a blue viscose, draped knit top that I’d bought from ASOS and really liked, but I wanted to wear with both casual and dressy bottoms.

To coordinate, I sewed:

1. Jalie jeans – I’d made a muslin but the waistband was horrible so I had my work cut out for me on this pair using great quality stretch denim from Mood in NYC, plus some London streetsign fabric for the waistband facings and pockets. I used my vintage hand crank Singer machine for all the topstitching, plus I got to use my vintage buttonholer attachment and high quality rivets for the first time! I fixed all the waistband issues in this pair and these are now my favourite jeans. Read more…

A Breton tee with a difference

Last week I had the great pleasure to be able to put my friend Cindy up at ours while she visited from LA. Cindy and I met while studying at Penn State, when we initially bonded over Fly Nap huffing jokes in honours biology lab (yet neither of us use our Biology degrees, hmmm), but we’ve stayed in contact ever since, despite a transatlantic move for me, and three different big city moves for her. With good friendships like this, within five minutes of being in the same room again, it’s like the years apart were never there.

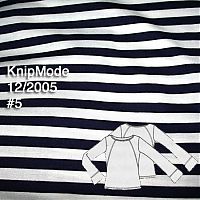
In any case, while she was over I said I’d make her something (though I did say something easy would have much more of a chance of actually being made!), and she chose this pattern from KnipMode Dec 2005 out of a lineup. If you remember, this is the same pattern I used for my rose and lace tee last fall.

Then we went through my knits stash looking for something that wasn’t already earmarked for a specific project and came up with this striped navy and white knit (which you may remember from my Breton tee, and the one I made for my niece). It was the perfect amount of fabric for this tee, and it was great to use it up since I couldn’t really justify another stripey top for myself…

After we decided on the main body fabric, we went through my fabrics again looking for something to use in the contrast shoulder panel, but the laces didn’t look right, and solid fabrics seemed strange, and so Cindy decided she’d just like a regular Breton shirt.

Me-Made March

Me-Made March has been in full swing for a month now, and as I stated in February, I’ve been playing along at home, but taking photos of what I wear every day is just completely infeasible for me, so I’ve just kept a record of what I’ve worn instead.

I did something similar a few years ago and it was really helpful in observing what I tended to wear throughout the week and which items I turned to most often. I can’t actually remember the last time I wore an outfit that didn’t contain at least one “me-made” item (not counting weekends, where I live in grotty, boat-DIY clothes), so this challenge isn’t really that challenging for me! It’s what I tend to wear anyway!

March

  1. Tues. Navy blue riding trousers & purple cashmere turtleneck (RTW)
  2. Wed. Taupe corduroy skirt & turquoise mohair sweater (layered over a RTW white long sleeved top) (so yes, I am wearing the exact same outfit as shown in my citizenship post, right down to the same tights and boots!)

  3. Thur. First Jalie jeans & plum and green lace Patrones top
  4. Fri. Foldover wool trousers (so warm!) & RTW black long sleeved top
  5. Sat. Two 40th birthday parties! Burda September cover dress

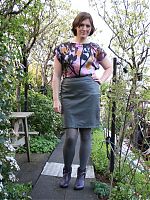
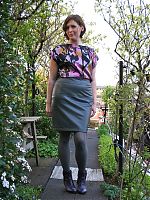
Grey leather pencil skirt

I’ve now finished the fourth garment in my March Mini Wardrobe plans and I think you’re going to love it as much as I do!

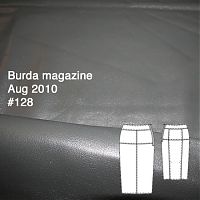
I bought some utterly luscious grey leather when I was in New York in September, and I’d thought about a few different patterns (even going so far as muslining one I never showed you), but I finally settled on the long, slim pencil skirt from the August 2010 Burda magazine (#128).

Since we’re talking about leather here and you cannot unpick any stitches once they’re sewn, I made a muslin, which revealed a few minor fitting issues which needed fixing in the final skirt. Other than that, I shortened the length to make it above the knee (which also eliminated the back vent) and removed the centre front seam to improve the look.

Manequim silk birthday blouse

I love this blouse!

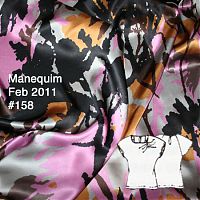
It all started in Paris last June when I saw this amazingly gorgeous silk satin (charmeuse) in Tissues Dreyfus that I just had to have. But it was €22/m (zoot alors!) so I only bought 1 metre. But even now I still love it love it love it love it so it was worth it worth it worth it!

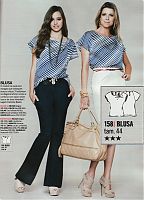
Ever since, I kept my eyes open for a good blouse pattern that only needed 1 metre of fabric, and along came Manequim Feb 2011 #158, which called for exactly the amount I had – 1 metre long and 150cm wide!

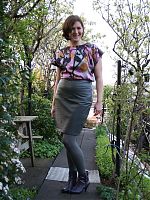
These two were clearly meant to be together! I don’t often do prints, but this one is just so gorgeous with the psuedo-floral/paint splatters of silver, black, orange, and fuschia that I wanted it to form both the centrepiece of my March Mini Wardrobe as well as be my special birthday garment this year!

Grey leather skirt – muslin

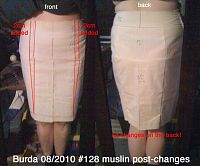
You’ll get to see my Manequim silk blouse tomorrow, but in the meantime I thought I’d give you a progress update on the fourth item in my March Mini Wardrobe, the leather skirt (Burda magazine 08-2010 #128 – though #127 is nearly identical).

I’m making this skirt in some utterly luscious grey leather I bought while on honeymoon in New York, and despite having sewn with leather loads of times before, this is my first real leather garment. So knowing what I know, I knew I had to make a muslin first because once you sew leather, it’s done – the needles holes are permanent so you can’t rip out stitches!

I made up a quick muslin at the end of February, and, unusually for Burda, the size 42 was too tight over my hips. Rather than trace a bigger size (boring!) I drew two long lines up the front of the skirt on either side of the centre front. On the waistband and yoke pieces, I added 2cm width to each line, and for the lower skirt piece, I made a triangular wedge which tapers to nothing at my marked hem.

A beginner skirt sewing lesson

Sunday afternoon was Lesson Two for my beginning sewing ladies, following along from the first lesson a few weeks ago when they learned how to operate a sewing machine and make a shopping bag.

At the end of the last lesson, Holly, Ness, and Veda were all begging to learn how to make a skirt, so how could I refuse? I decided they should follow in my footsteps and learn with New Look 6843, which was one of the VERY first patterns I ever made (then remade over and over again with a few variations!).

They picked out their own fabric and zippers, with Ness choosing a navy corduroy (so we got to talk about nap!), Holly choosing a beautiful navy wool suiting fabric, and Veda going for a bright and cheerful Liberty print.

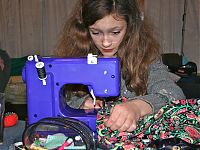
Here’s Veda sewing on her own purple JL Mini machine (like my red one!)

We talked through measurements, pattern layouts, what the symbols on patterns mean, and also how you don’t have to follow the directions if you don’t want to (since I thought New Look’s order of construction made it awkward to check the fit of darts, and their zipper insertion made things more difficult than they had to be!).

A velvety MyImage bolero jacket

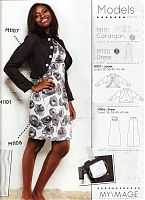
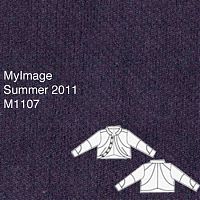
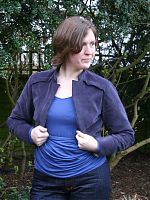
Ever since I saw the first previews online of the MyImage Summer 2011 issue, I knew that this cropped, pieced jacket (M1107) was going on my Must Sew list! I just didn’t know quite how quickly fate would throw us together!

Even though MyImage are a new pattern company, other sewers have reported that the sizing was pretty consistent, so I just threw caution to the wind here, made a size 42, and cut into my fabric!

And yes, it goes really well with the jeans I’d just made, too!