Blog

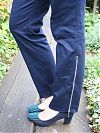
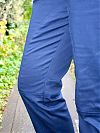
Navy blue riding trousers

Jacquie made these trousers as part of her recent wardrobe collection (she’s “dingyadi” on PR) and I instantly knew I had to make them, too. Like her, I was put off by how skin-tight these looked on the Burda model in the magazine, but in real life, they fit really nicely! Unlike her, I left off the front patch pockets, though, as I figured there was enough going on everywhere else!

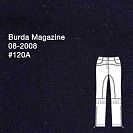
They’re from Burda magazine 08/2008 #120A:

They’re great trousers, but there’s just so many freaking pieces, omg! And the topstitching!!

Take the front leg, for instance. On a normal pair of trousers, it’s one piece (maybe three if you have a pocket). On these, the front leg is comprised of three pieces before you even get into the pockets (so 6 in total for mine, or 9 if you chose View B with the added pouch pockets with the flap!). There’s a scooped pattern piece at the inner thigh in the front and back, and lots of horizontal topstitching across the knees in addition to topstitching pretty much every seam of the trousers, too.

DIY Wedding Gown – Fitting

Pip came round last night for dinner, drinks, holiday food exchange (French cheese from me and Greek nougat from her!), and her final fitting on her bridesmaid dress.

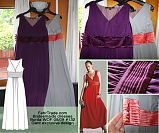
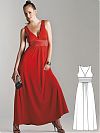
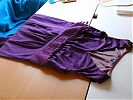
If you cast your mind back to April and May, her gown is the long, purple, silk jersey Gant exclusive design gown from the Sept 2008 Burda magazine.

I’d completed the gowns back in May, but I left off the tiny covered buttons on the cummerbund and finishing the hem until closer to the day so that they wouldn’t have to worry about gaining or losing a few pounds, or deciding on different shoes before now!

Happily, Pip’s gown fits her perfectly, with minimal overlap at the cummerbund, and really her hem was just about perfect with her chosen heels. But then we realised that if she switched to her comfort flip-flops on the dancefloor, the hem would drag, so I’m going to pull up the hem by an inch.

Then Pip wanted to see me in my gown, and since I hadn’t tried it on since the skirt was attached, I felt it was a good idea. But even though I was capable of wrestling into the boned bodice before, it was proving impossible (and more than a little claustrophobic) with the attached skirt. It was apparent that I had to remove the brass bar at the top of the zipper to allow the top to fully open and give me extra room to squeeze into the gown. I’d thought I might have to, but I kept it in until now since it wasn’t a problem. So now I’ll just need to add one or more hook and eyes to the top of the zipper to keep it all in place.

How to sew a narrow bias edge

I had a busy yet productive weekend – not only did I finish my Colette Patterns Beignet skirt, but I also made the Patrones 292 sleeveless bias cowl top, too! I didn’t have enough time for a photoshoot over the weekend, but I did remember to finally document my favourite way of finishing the edges of thin blouses like the cowl top so I can finally share this with you.

This technique is great for necklines and armscyes on sleeveless tops, and is my preferred way to finish any kind of blousey, lightweight fabrics like silk satins and the viscose (rayon) you see here. You get a thin, finished edge that looks good inside and out with a minimum of fuss, and you don’t have that awkward problem of facings flipping out or anything, either. As long as you’re okay with a small amount of topstitching on the right side, this is the technique for you…

So before we begin, sew one of your seams so you’ve got a C-shape. If you’re finishing a neckline, this means you sew one of the shoulder seams. I’m finishing the armscye of a sleeveless blouse here, so in this case I’m sewing both shoulder seams, leaving the side seams free.

Step 1


Cut out a bias strip that’s the length of your opening edge, plus a few centimetres just to be sure. For the width, I prefer a finished facing of just 1cm, so my width here is 1cm + (2× 1.5cm seam allowances) = 4cm.

Bridesmaids dresses – finished!

Both bridesmaids dresses for my September wedding are now finished! Since I’m sewing both of these plus my own gown, I stipulated that these had to be knit so that I could sew them early and my girls could feel free to gain or lose a few pounds without too much last-minute alterations hassle.

To refresh your memory, the three of us chose the Gant exclusive design dress from the Sept 08 Burda magazine:

The previous posts about these dresses spanned over a year (from our pre-illness, original wedding date), so to help you find them, here’s a handy list:

  1. Choosing the pattern
  2. Going fabric shopping and choosing their colours
  3. Tackling those pleated cummerbunds
  4. Finishing the first dress

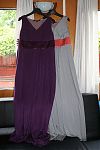
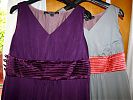
Here are both dresses together, so you can see how nicely their colours will go together on the day:

Summer sewing shortlist

Last week you got to see the newest Patrones that Aisling sent over, but you all have been far too good to me, because last week I also got a surprise parcel from Daisy!
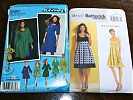
She did some awesome detective work and worked out my size and style and picked out Simplicity 2754 and Butterick 5317 for me! And she did a great job, because I really like them both! I always have a hard time seeing the potential with the Project Runway patterns because the pattern covers are so horribly done that you can’t see any details at all, and Simplicity’s site makes it really awkward to browse by technical drawing (what I do as a general rule with Burda magazine previews). Anyway, as it turns out, I really like the details of this one, and doing some research myself, I remembered that Trena made it a few months back and I absolutely loved it! And she’s so got the right idea with those back view enhancements! And the Butterick Maggy London dress is just screaming out for a border print, as far as I’m concerned – the skirt is just a rectangle with pleating, so anything with a border or lace at the edge would go perfectly as you don’t have any cut, curved hem or side seams. So it actually is as easy as it’s labelled, seeing as how you’re really just making the bodice…

These patterns all came at the perfect time, because not only did I finish the second bridesmaid dress this weekend (photos coming later this week), but London has stumbled into a mini-heatwave which always gets me raring to sew! After spending the last two months solid on these dresses for my girls, I’m more than ready to sew for myself now, and I’m not scheduled to start on my wedding dress muslin until July.

Sooooo, how much can I cram into the next month, eh? Granted, I’ll still want to make a few things here or there while I’m working on my gown, but I thought it’d be a good idea to get all the things I want to sew together in one place. I’m not calling it a wardrobe or SWAP since they don’t all go together, and I don’t want to commit myself to ALL of these since I tend to get bored easily, so let’s just call this a shortlist so I can choose from these at will…

The FehrTrade Summer 2010 Sewing Shortlist!
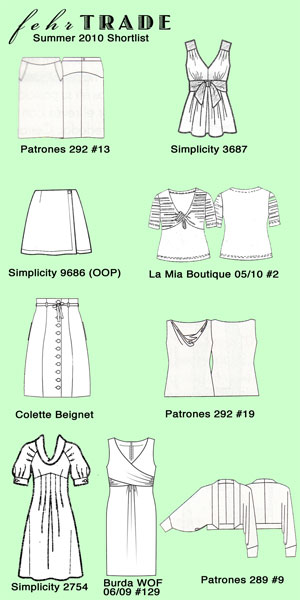
From the top:
Bridesmaids dresses – one down…

I made a big push on Sunday to get as much done on the first bridesmaid as I could, and between then and some “non-commuting” time yesterday and today (I worked from home both days so I put the hour I’d normally be commuting to good use!) I managed to finish Pip’s dress, apart from the hem and the covered buttons, which I need to purchase in town tomorrow.

To refresh your memory, I’m sewing the Gant exclusive design dress from the Sept 08 Burda magazine:

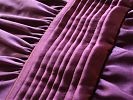
I tackled those pleated cummerbunds first to get them out of the way, but even the easier silk jersey portions were not entirely straightforward. With a design this simple, the glory is in the perfect execution!

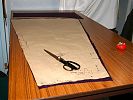
First thing I was grateful for is my newly-raised cutting and drafting table. Each gown takes four skirt sections this size (front & back, exterior & lining), and they take up nearly the whole table!

I didn’t take any intermediate photos of Pip’s dress, but I ended up doing the entire bodice on my sewing machine after all, so that I could understitch the neck and arm openings more easily. In the end, I only used the overlocker for the long skirt seams.

Double take!

Fashion has always been cyclical – we reinvent ideas from decades past and give them a new twist. But with everyone playing off similar influences, sometimes two designers independently come up with very similar ideas. So it’s really not a surprise that you can sometimes find very similar pattern designs across companies, too.

As I found out, once you start looking for “pattern twins”, suddenly you start seeing them everywhere!

Patrones vs Knip tops

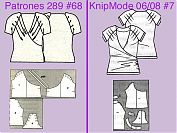
It all started when reader Hilde pointed out in my Patrones 289 review that this Plus top looks an awful lot like an older KnipMode design, so I decided to investigate further by comparing the shapes of the pattern pieces side-by-side:

(This KnipMode top was previously neglected because it was in the same issue as the fabulous swimsuit pattern…)

While the tech drawings look different, when you look at the pattern pieces you can see that most of that is just down to artistic interpretation and the pieces are very similar indeed!

Knip vs Burda blouses

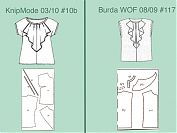
Then I noticed in my review of the March 2010 KnipMode that their ruffle-collared blouse was incredibly similar to one Burda released last year!

Bridesmaids dresses – I pleat the fifth

While I’ve been showing you all sorts of books and magazine reviews and drafting up free bag patterns for you, what’s been going on in the sewing room, I hear you ask! Well, I set aside April and May to sew my two bridesmaids dresses, and after a long muslin period, I’ve been getting stuck in with the most time consuming portion of the dresses first – the pleated, silk satin (charmeuse) waistband/cummerbunds.

If you recall, I’m sewing the Gant exclusive design dress from the 09/08 Burda magazine:

The fabrics were bought over a year ago, so I fished out the bag and got to work on the reeeeeeeally long pleated sections using Burda’s magazine instructions (which are surprisingly helpful) and a bit of info from my The Art of Manipulating Fabric book (thanks, Cindy!). These are knife pleats, one centimeter apart, and Burda called for seven pleats down the band, but after my test piece, it looked a bit sparse at the top and bottom edges, so I decided to go for eight pleats in the final versions.

So in order to help any of you attempting this on your own (and sadly, a Perfect Pleater is way too narrow to help me here), or those of you wondering why professional designers outsource their pleating to professional firms, here’s what’s involved…

How to pleat

Step 1 – On the reverse of the fabric to be pleated, mark chalk lines exactly 3cm apart, one for every “mountain” pleat.

Which Sewing Pattern Magazine?

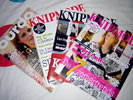
There have been quite a lot of people wondering about the various sewing pattern magazines out there and which they should buy or subscribe to. Since I’ve been primarily sewing with pattern magazines over the last few years, I thought some of you might appreciate my opinions on the major pattern magazines (and no, I’m not getting any kickbacks or referral money from any of these links, if it wasn’t obvious!).

For all of these magazines, you receive a glossy magazine with lots of nice photos of models wearing the various designs, and there will be a section containing the technical drawings, instructions, and fabric layout for each design. Patterns are included in a special folded bunch of papers (usually stapled in the centre so you can pull them out easily without damaging the rest of the magazine). The patterns come in a variety of sizes, but none of these contain seam allowances and you need to trace them off the sheets provided.

I trace my patterns using a serrated tracing wheel and brown kraft paper, but many others prefer to use tracing paper and pencils. I add my seam allowances when I cut out my fabric by simply cutting 5/8”/1.5cm away from the edge of my paper pattern, but there are double tracing wheels available to do this for you.

Christmas Present – yellow leather & tweed handbag

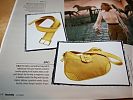
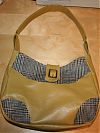
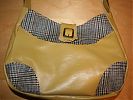
While my mom was staying with us over the summer, she absolutely fell in love with my mustard yellow handbag and called dibs on something (anything!) made from the remaining leather. Since I didn’t have enough to make another Nairobi bag, I started looking through my stash and fashion mags to get some inspiration, and lo! from the Feb 09 Burda WOF “Australia The Movie” accessories feature (not on the website I’m afraid), there was the perfect handbag, already in yellow even!

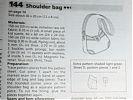
There were only two pattern pieces to trace – the main bag body (I doubled the paper pattern so it was the full size rather cut than on the fold to make it easier to lay out on the leather) and the small flap. All the other pieces were rectangles of various dimensions that Burda list in the instructions – the only one I actually used was the piece for the side and bottom of the bag.