Blog

Shocking Pink Trousers and a Cream Lace Tee

Summer in England is a rare thing, but we have had an overflowing bounty of gorgeous, sunny, and hot weather for the past three weeks and counting! So it’s natural that the heat would go to my brain and cause me to make some out-of-character sewing choices, right?

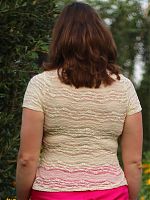
As I revealed last week, this manifested in the form of some super-bright pink trousers, and a teeshirt made from cream stretch lace:

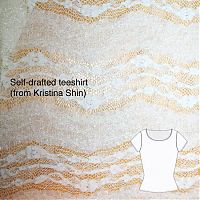
The lace teeshirt was ridiculously quick to sew up – I’ve had the lace in my stash for several years now after buying it at Tissu Dreyfus on one of my Paris trips, and some of you may even remember it from when I used it on a long-sleeved KnipMode tee. I love that those photos were in the snow and now I’m using it again in a heatwave! I just used my knit sloper I’d drafted from the Kristina Shin book, only I levelled off the sleeve hem rather than the usual scoop.

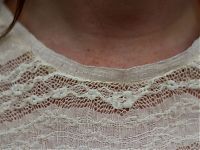
The construction was identical to any other teeshirt, and the only real point of note here is in the neckline binding – I didn’t have any matching cream jersey, and I didn’t want to just fold it under and topstitch, so I had the great idea to use the selvedge as a band, and just overlocked it in place. It matches, it’s lightweight, and it’s guaranteed not to fray!

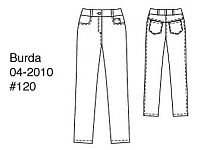
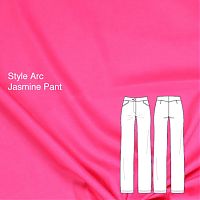
The trousers were much more interesting from a construction standpoint! I had a bunch of Mood fuchsia stretch cotton sateen leftover from my fuchsia party dress (which is still my go-to party dress btw – I’m getting lots of wear out of that!) and I knew I wanted some fun Spring/Summer trousers. In my original Spring/Summer 2013 ideas, I thought I’d reuse the Burda Jan 12 pattern I’d made in grey flannel, but then I really wanted to try a StyleArc trouser pattern, and I already had the Jasmine pattern to hand, and it’s for stretch wovens. Perfect!

Things I like about the Jasmine pattern:

Pattern Magic Stretch Fabrics course at Morley College

Some of you may remember that last year I took a course at Morley College on Pattern Magic 2 (my first actual sewing class, believe it or not!) and it was so interesting, useful, and inspiring that I just had to take the course on the third book, Pattern Magic Stretch Fabrics. I booked this something like 9 months in advance, I was that excited to take it!

The first two books are based on woven slopers, but since this third one is all for knits, I used my own knit sloper instead of the book’s – I’m rather proud of this bit of forward-thinking! I also got to show off my pattern drafting gadgets plus it was great to see so many familiar faces and meet new ones, too (hi Clover & Ingrid!!). For the second class though, Claire had taken the initiative to digitally grade up the book’s blocks to larger, more standard Western sizes! She says she’s going to share these on her site very soon, so keep an eye over there if you want a short-cut to a bigger knit block.

Over the course of two consecutive Saturdays, we drafted three designs from the book (chosen by our amazing tutor, Moni), and a fourth of our choice, plus a bit of time at the end to sew up a sample so we got to see the range in real life.

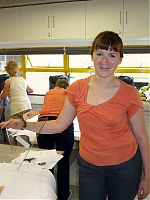
Here you can see me & Claire from the first Saturday! (I’m totally brown-nosing by wearing a design from the second Pattern Magic book!)

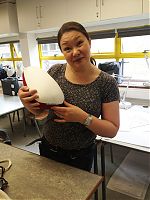
The first design we all drafted was “Crescent Moon“, essentially a giant donut that you wear. It’s so avant-garde that it doesn’t even use a knit sloper, just circles!

This did look a bit better once we got out a smaller, female mannequin, but it’s still not something I’m finding particularly wearable.

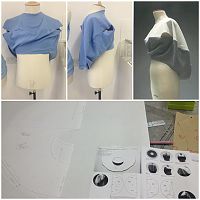
The second design we all drafted was “Sharp & Snappy“, which I dubbed “the stegosaurus”. The gist here is that you shift the side seams forward and add triangular points in the seam line.

Pattern drafting gadgets (plus discount code!)

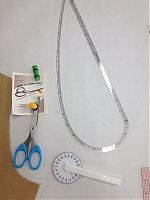
I had the final instalment of my Pattern Magic course at Morley College over the weekend (more on that later this week!), and since the majority of the class is in pattern drafting, it became apparent to me that I’ve got three pattern drafting gadgets in my arsenal that aren’t widely known, but that I consider to be essential!

On the left is the Seam Allowance Guide, little magnets which snap onto the side of your scissors to help you cut an even distance away from your line. I usually use this when cutting my fabric when using patterns that don’t have seam allowances at all, my on my course it was very helpful when cutting out the final pattern when I didn’t want to draw the seam allowances in. I got mine for review a while back but you can buy yours here.

On the bottom – I don’t know the technical name for this, but I call it my “pizza wheel measurer”. It’s a little wheel marked in centimetres which allows you to measure curves really easily. I use it most often when matching up seam lengths between sleeve caps and armscyes, but there are a number of occasions in the Pattern Magic books where you need to ensure two curved seam lines are the same length.Claire posted instructions on how to buy these from Japan a while back.

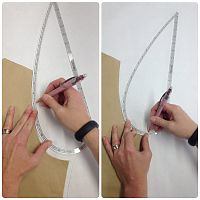
On the right – The newest member of my pattern drafting team is the SA Curve ruler – a narrow ruler with one straight edge and one curved edge. It comes in two widths – 5/8” (1.5cm) or 3/8” (1cm) and the idea is that you place the ruler along your seam line and then just trace the other side of it, et voilà! Your seam allowance is added on.

The Most Beautiful Bra in the World

…is one that finally fits after days and days of muslins and tweaks!

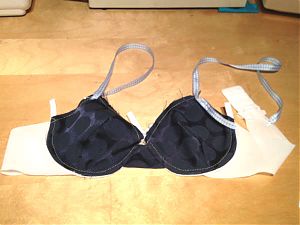
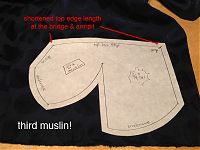
You see, this is the third muslin of my latest attempt to sew a Bra That Actually Fits and I think I’m finally happy with this one.

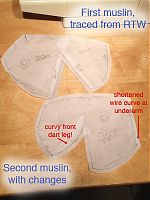
I started off by tracing a well-fitting RTW bra and I sewed up a muslin of it according to the fabulous instructions in Demystifying Bra Fitting and Construction. From that, I could see that the bottom of the bra cup was too long for my underwires, and, as I suspected, the straight legged dart was too pointy and I needed some room in front of it, so I made the front leg curved.

Apologies that the orientations are opposite between the two!)

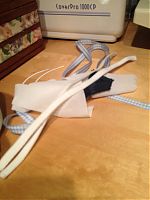
Then I ripped out the basting stitching of my muslin, sewed up new cups according to the second cup pattern, and reused all the other pieces from the muslin that were absolutely fine, namely the wings, bridge, straps (gingham ribbon here!), and underwire channels:

The cup shape of the second muslin seemed good (though it’s hard to be subjective in the mirror and selfies), but I had a bit of excess fabric along the top edge of the cup that needed pinching out. I didn’t want to create a dart at the top edge as I eventually want to make this bra from lace, so Norma suggested I take it out from the sides (bridge & underarm), making sure those lengths didn’t change as I did so.

Two pairs of marathon leggings

Word got round my running crew that I was starting to do some custom drafted leggings for a few people and my friend Lee Ann immediately came up to me and said “I want you to make my leggings for London marathon.” Holy crap – what an honour! It’s her first marathon, and the biggie, and she trusts me to make them for her?! I couldn’t say no to that, so I measured her up right then and there, then drafted out her pattern using the Shin book, and made her a test pair using some cheap thin lycra. She came round the boat and tried them on and amazingly, the fit was perfect, with no alterations needed, woo!

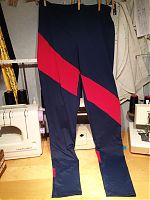
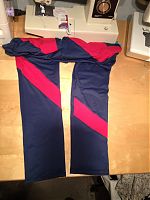
With the fit out of the way, I could then start in on the design lines, which she said she wanted to have a stripe/ribbon that started on her right hip and wrapped around to her right calf, and in navy and red to match her charity vest.

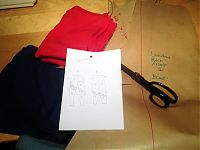
So, as I do, my first step was to draw myself a little plan:

Sorry for the crap quality there, but essentially I drew out the four big pieces (front right, front left, back left, back right) and the rough stripe shape, and realised I’d need 12 pieces in total, and as it’s asymmetric, I’d need to cut everything in single layer.

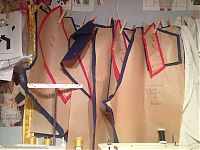
Organisation was the key, keeping the three pieces for each quarter pinned together on my sewing room clothes line!

I assembled each quarter first (ie: I sewed the front right top to the front right mid, to the front right lower until I had a full leg, and moved on to the front left). The cutting was really the most difficult here, but I managed to just barely squeeze everything out of 1m each of Tissu’s navy blue and red supplex lycras. Assembling it was much easier, but I had to be careful that the seam lines matched up over the left side seam!

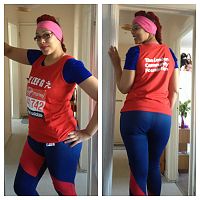
I was so chuffed to see them on LeeAnn when she ran past me during the race, and she said they were a dream to wear on the day, too! No tugging, no baggy ankles, no nothing, hurrah!

Don’t they look great on her?? And she’s totally caught the bug, too – already planning her second marathon!

Copying a favourite bra

You may have noticed that one of the items on my Spring Sewing Ideas list was a “self-drafted/copied from RTW” bra. I’ve sewn countless bras before, but really only been happy with the fit and look of one (a foam cup muslin, of all things!). I really want to try and get away from moulded foam cups for a number of reasons (which Orange Lingerie discusses here), so my dream bra drawer would be entirely lacey, gorgeous, self-made, frameless, underwired bras, with one nude moulded foam cup bra for when I really need a seamless look.

The problem is, I’d been buying foam cup bras for so long that I didn’t really have any non-padded ones I could clone, and on a whim last year, I bought a few M&S bras and was amazed to find that two (identical, apart from colour) all-lace, single-darted, frameless, underwire bras, fit me perfectly and gave me a great shape.

So in the back of my mind I’ve been wanting to clone these, since my last bra using the Elan pattern ended up fitting well (at first I thought I’d cracked it finally!!), but the cup shape looked B-A-D. Boobs like duck-bills, oh god no!

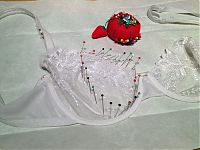
Anyway, so I started the process of cloning the white version of the M&S bra last night, by using my method of tracing patterns – placing the bra down on top of paper and running my serrated tracing wheel around it. This worked well for the band, but I wasn’t convinced I got an accurate trace for the cup, so I looked up an old Threads article, “Clone Your Favorite Bra” (Issue 99, Feb/March 2002 if you’ve got the archive DVDs), which suggested stabbing lots of pins around the bra edge until you got to a point where it would no longer lie flat. Then you unpin the first pins you put down, and re-shift everything using the latter pins (in my case, along the dart) as an anchor so it lies flat and you get all the edges pinned.
Then, in my case, because the dart stayed in place and everything shifted around it, I had to cut through the dart and open it back up. Because the top edge of mine was the lace edge, I knew this had to be straight, so it made it easy to re-adjust.

My wildest running leggings yet

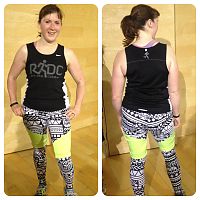
I try to show you all my finished garments in the order I make them, but I just can’t wait to show you my wildest running leggings yet! I only finished the hems on Monday night and stuffed them into my running bag to wear to Run dem Crew last night, and WOW, they got a glowing reception!

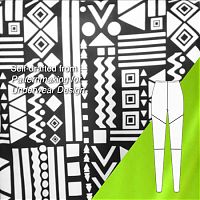
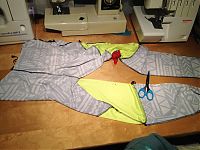
I made these with Funki Fabrics’ digitally printed lycra in “Tribal white on black”, plus fluorescent yellow lycra from Minerva Fabrics, inserted above the knee (and is WAY brighter than it appears in these photos!).

I liked the design lines of this McCalls leggings pattern, so I adapted my self-drafted leggings pattern to have similar sections above the knee, with angled thigh seams to be a bit more flattering (or, as flattering as you can get in neon yellow, ha!).

I had a friend take these photos after our run last night (a very fast 10km run with the Cheetah group around Victoria Park! Geeky stats here if you’re interested)

Gold Medal Running Leggings

I’ve had the idea of these “Gold Medal Leggings” in my head for months now.

I’d originally envisioned myself swooping through the Paris half wearing them, making Chanel-ed sunglasses tilt down as I sped past in a blur! “Oh my! Who eez zat magnificent femme with ze gold leggings??”

Or something like that. But then I got ridiculously sick with the shingles in January and still couldn’t run it come March, so these got their debut in the East London half on Sunday instead. Not quite as glamorous, but they did cause quite a stir.
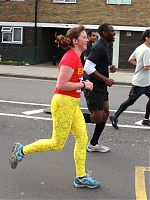
I used my leggings draft from the Kristina Shin book again, teamed with Suzie Spandex “Spirographix” lycra in yellow. This makes these sister leggings to my Liberace pair (which were in the comparatively sedate “charcoal” colourway!), which I wear ALL the time. I had Arielle buy this fabric, plus some Suziplex for me when she was in Montreal and they were hand-carried in a series of suitcases across multiple borders, so I’m very glad to make good use of it!

It also appeared that Suzie Spandex cut a very generous length because it was more like 1.4m than the 1m I ordered, woop (so there’s plenty left for accents on Jalie running skirts or tops). Believe it or not, I sewed these up on my jet lag day after our red-eye flight back from the States when I was trying to stay awake until local bedtime!

The leggings certainly got the reception I was after – I’m not exaggerating when I say that my leggings got more cheers on the route than I did, I swear!

Easter Weekend sewing and beyond!

Thanks very much for all your birthday wishes! I had a brilliant day, and the dress fared very well indeed at my mystery dinner – the waitress complimented it the second I sat down!

With the dark colour of the dress, I really need daylight for a photoshoot, though, so the first opportunity is tomorrow (Friday). I’ll try to get the post up later that day as I know you’re all waiting patiently to see it on me!

My thoughts are definitely drifting towards the upcoming long Easter Weekend, and what I’d like to sew during it. As usual, I’ve got mental plans for way more than I can possibly get completed in four days, but here’s what I’m hoping to make…

Leggings

I need to draft up leggings for two friends from my running crew, and sew samples/muslins for each from some cheap lycra I’ve got on hand for the purpose. One of them is popping over late in the weekend so I’ve really got to get hers ready by then!

I’d also really like to sew up two pairs for me based on my own draft, one in black supplex (with the aim of using that fishnet trim on them afterwards), and one in the tribal print from Funki Fabrics.

Once a pattern is set and ready, I can churn out a pair of leggings in a few minutes, though, so I’m not too concerned about fitting these in, it’s the drafting that will take the time (and desk space!).

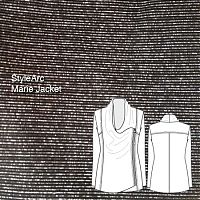
Style Arc’s Marie Jacket

My main task for the weekend, though, is to make Stye Arc’s new Marie jacket, especially since I’ve gathered all the necessary supplies over the past week or so – some fabulous black and silver heavy jersey from Minerva and a big separating zipper from Our Patterned Hand

My Satin & Lycra Weekend

My weekend mostly went like this…

Saturday

On Saturday morning I got up for a 2hr 45min (16+ mile) run in the rain with my two good friends, Chris and Juell. We got soaked, ran along Regents Canal to Camden and then through the heart of the city and back through Shoreditch to home. We were soaked to the bone, but had a great time and I furthered my knowledge of myself, my glycogen storage capacity, and my stomach’s ability to digest medjool dates as a gel alternative. That, and I feel a bit more confident now that I’ll be able to finish Copenhagen marathon now, having dialled back my expectations after being ill for so long.

Then Saturday afternoon I set out to do some more work on what will be this year’s Birthday dress (it’s next week, aaah!), the Burda Matthew Williamson sheath dress from the September 2012 issue:

The above uses the official photo from when I bought the “Ravissant Duchess Satin Plum” from Fabric.com three years ago, but below you can see the actual colour and exactly how much gorgeous lustre it gives off in the light. On the inside, I’m using a lovely floral lining fabric gifted to me from Veronica when I was in Paris last Spring.