Blog

Pattern Magic – Apple Peel leggings

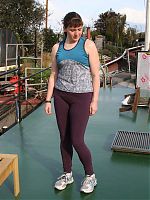
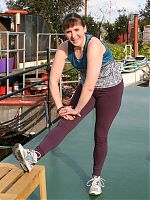
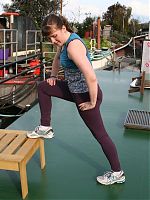
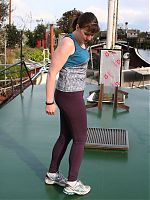
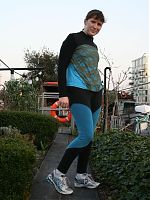
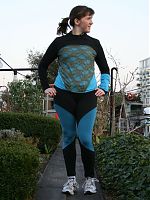
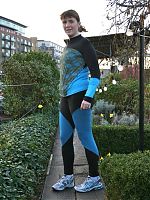
I gave you a sneak peek of these yesterday, but I doubt any of you were looking at the leggings!! You’re forgiven, though!

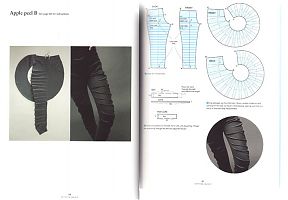
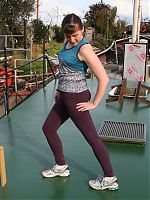
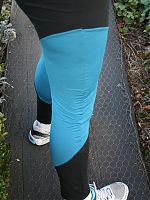
This design is from the third Pattern Magic book, and was super easy for me because I didn’t have to draft anything! I already had a great legging pattern to start with, from an old KnipMode magazine I’ve made a few times before. Note that you need a legging pattern with a separate front and back pieces, so the two recent Burda magazine leggings (in the June and January 2012 issues if I remember correctly) won’t work as a starting point. Or you can just draft one from scratch as the book suggests.

All the work here is in the measuring, slicing, and spreading of the pattern pieces – I very cleverly wrote the size of the spread between each of the pieces, so when it came time to do the other pattern piece, I could easily make it the same amount so everything matched up.

I’m leaning, like the book’s pose!

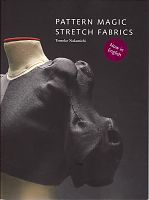
Sewing book review: Pattern Magic 3 – now in English!

I don’t buy sewing books very often these days, usually preferring to get my information and inspiration from the internet and sewing pattern magazines, but I’ve found so much inspiration from the Japanese design schools lately that I just can’t say no when these are translated into English.

If you recall, I reviewed the first two Pattern Magic books here, and then, just recently the first Drape Drape book was also released in English (with the second coming out later this year).

Drape Drape uses included patterns which you trace off and sew, but the Pattern Magic books all rely on instructions for altering your existing sloper, so they can work for pretty much any size or shape person.

The big difference in this third book is that all the patterns here are designed for stretch fabrics, which adds a whole new level of fun! But of course, this doesn’t mean you can’t use stretch fabrics for the designs in the first two books – I’ve already made the flip-turned top twice as teeshirts, though I did have a great boost in understanding the Pattern Magic instructions on the Morley College “Pattern Magic” course I took earlier this year (I’m eagerly awaiting the new course guide so I can sign up for the rumoured class on this new book next year!).

So enough intro, let’s have a look at some of the wonderful (and weird!) designs in this instalment!

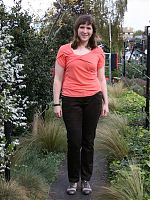
Peach flip-turned top and slim brown trousers

In addition to my exercise gear you saw yesterday, I actually made another top and trousers the weekend I got back from Montreal! Since I wasn’t in a fit state for a photoshoot until now, I kinda feel like I’m clearing out the cobwebs here…

This top is another “Flip turned for a draped effect” top from Pattern Magic 2 (drafted on my Morley College course!), this time using the tulip sleeves from Jalie 2806 for a more Spring/Summer look. This is the third time I’ve used these tulip sleeves and I really love the look and love wearing them – they really make a top much more special than just your average short sleeve! I used a lovely orange marl viscose jersey from Tia Knight here that’s just sooooo soft and lovely to wear! Hurrah for an impulse purchase!

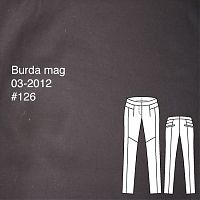
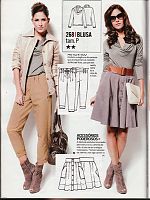
The trousers are from the March Burda magazine (#126), using some stretch cotton sateen I bought at Tissues Dreyfus in Paris last month. It looked black in the dark lighting of the shop, but I got it home to realise it’s actually dark brown, which was fairly annoying, as I wouldn’t have bought 3m of brown had I known!

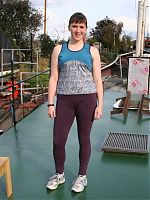
Sequin running vest and purple leggings

I’m going to break from tradition here and actually post my next two outfits out of sequence from when I made them, mostly because I just shared my elastic waistband tutorial with you, but also because I’m really freaking excited about sewing exercise gear right now. Honestly, it’s starting to become nearly lingerie-levels of hysteria with me – super quick to make, easy to fit, and lots of wild colours and patterns in small doses! But you’ll get to see my “civilian” top and trousers later this week, so no worries if you’re starting to glaze over at all the lycra…

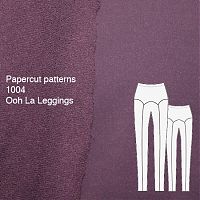
For this set of running gear, I’ve paired up the Papercut “Ooh La Leggings” pattern (UK stockist here) with my self drafted knit block (from Metric Pattern Cutting). And in the case of the top, I altered the seam lines and armhole shape to suit!

You may remember the ex-Prada sequin trompe l’oeil fabric from a few years ago when I used it to make a cowl top. I wear that all the time, but I only had a small piece leftover in my stash, and it was far too lovely to throw away. But with a bit of creative thinking, it was enough for this! Though I think I’ll lower the curve a bit for my next running vest so the peak is just at my underbust…

As you can see with the leggings (or maybe not, the purple fabric is quite dark!), there are no side seams here! The shaped front and back yokes give some really cool, curved seams, and they merge nicely into front- and back-leg seams instead.

Grey Pattern Magic "Flip Turn" top

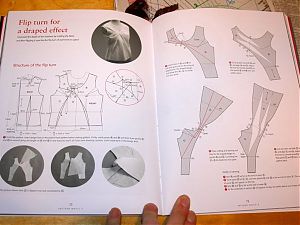
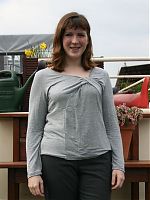
Ever since I first opened the Pattern Magic books, a few designs have been burning a hole in my sewing brain. One of these was the “Flip Turn for a Draped Effect” bodice from Pattern Magic 2, and I was so happy that I was able to draft this on my Morley College Pattern Magic 2 course last month! It wasn’t too bad to figure out, but I’m still really pleased to have the instructor there and because I muddled through (albeit with help), I feel much more confident about tackling other designs in the books.

The only problem was that we drafted all the course designs based on the largest Bunka sloper, which was still rather a lot smaller than me, so if I wanted to actually wear the designs from the course, I’d have to create them again off my own sloper, which just seemed a bit dull.

Or maybe… just maybe… I wonder if the Bunka sloper version would fit if I eliminated the back waist darts and made it in a knit?

OMG a toile for a fashion college dressform fits me!! :O 😀

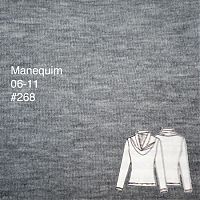
Since this was a total fit experiment, I wanted to try this first in a low-risk fabric, and I had just enough of this viscose grey marl jersey leftover in my stash from the Manequim “big shirt”.

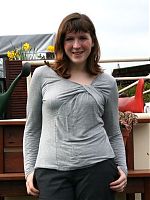
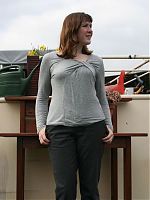
One interesting part of this design is that the reverse of the fabric is shown on a large portion of the lower front, and in this fabric, the reverse is kinda textured and loopy, but without any major colour change from the “correct” side. It means you get a subtle texture change on that panel, but without screaming “hey! I’m the wrong side!”.

To further play up the texture change and to make it look more intentional, I used the wrong side of the fabric on the neck band, too (maybe I’ll do the sleeves on the wrong side next time, too?)

Lycra & Lace running top and leggings

It feels like I’ve been talking about sewing my running gear for ages now, but I think that’s just because anything self-drafted and a bit custom tends to take a bit more time and head space than my average project! But I’m happy to report that two out of three of my first pieces are finished now (the sequin vest is awaiting more coverstitch binder practice, but more on that next week).

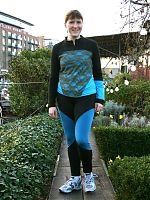
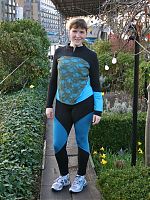
Both of these pieces are heavily modified (bordering on self drafted) from the originals, but the leggings are based on the Jalie 3135 skinsuit pattern and the top started life as my basic KnipMode long sleeved teeshirt.

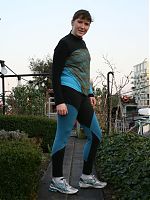
You’ve seen a sneak peek of the leggings earlier, but now you can see them paired with my long sleeved top, though the different turquoise shades mean I probably won’t wear them together often in real life.

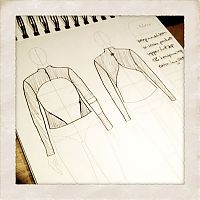
The long sleeved top needs three different fabrics in order to get a contrast on the upper body and again at the hip pockets. So I’ve used the black supplex for the top and sleeves, leftover turquoise for the lower back (which wraps around to the front hips), and the same turquoise but overlaid with olive green stretch lace for the front body.

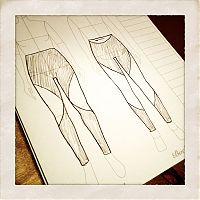
The leggings use black supplex and dark turquoise “silk touch” lycra for the contrast panels. You can see my cool seaming on the thighs below, and in getting design lines to match up, I favoured the outer seams matching. It means it’s not quite as cool on the inner thigh seams, but it means I get a nicer overall panelling.

First running gear muslins

I love it when different areas of my life start overlapping! I’ve been a runner for about 7-8 years but I’ve only really sewn running gear a few times (mostly because my mom knows what I like and gets good stuff on sale for me!). But I’ve got the itch to sew the lycra again, and so I made the first steps towards making my own running gear designs a reality.

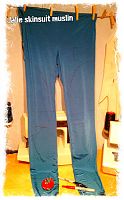
First step was to make quick and dirty muslins to check the fit and mark style lines. The Jalie 3135 skinsuit pattern was my basis for my running leggings (minus the top half and the front zipper opening!). I used the “silk touch” lycra jersey from Tia Knight as my muslin fabric here since it was the cheapest 4-way stretch she had, but it’s surprisingly really nice! It’s got a hand like a silk jersey, but seems a bit too drapey to be ideal in exercise gear, though it should be fine for the occasional accents or panels if I want to.

So I made my muslin, tried it on, and while I was wearing it, drew lot of placement and design lines straight on the fabric with a Sharpie:

  • I drew in my waistline just under the pattern’s torso double line
  • I marked the knees on front & back, and also where the curve of my bum lies (helpful for placing design lines later!)
  • I took out some excess in the ankle (no cankles here!) and about 4 inches off the length (the legs are reeeeeeeeally long – maybe to cover skates?)
  • And then, finally, I drew in some curved design lines where I thought they might look nice around my thighs and calves

The end result looks a bit like a liposuction patient (which is why I’m not modelling it!!), but it definitely served its purpose!

The Pattern Magic 2 course at Morley College

This weekend was my eagerly-awaited “Creative Pattern Cutting 2” course at Morley College in London, which was a two day class based entirely on the second “Pattern Magic” book. I’ve owned the Pattern Magic books for a while, but I’ve only tried one design (with discouraging results), so I was really excited to have the opportunity to explore them further.

I’d have no idea this course was even offered if it wasn’t for Tracy blogging about attending the course on the first book, either. So a big THANK YOU to her for bringing it to wider attention!

And seriously, this course was FANTASTIC! The tutor, Moni, was simply amazing, I can’t say enough good things about her – she does a lot of other Fashion/Sewing courses at Morley and I’d sign up for one of her other classes in a heartbeat (and I see she’s doing one on the Colette Wolf book “The Art Manipulating Fabric” soon, too, which sounds very cool)!

The facilities at Morley were great, too – lots of room to spread out, domestic Berninas and ironing stations, plenty of cross paper and cheap calico/muslin, and it was super easy for me to get to, and easy walking distance from Waterloo Station and surrounded by great pubs for lunch, too. It really was jawdropping that the whole weekend course only cost £48, especially when you consider most sewing courses in London are a) on the same old three dull topics over and over again and b) usually in the range of £300-400!

Believe it or not, this was also my first “formal” training ever in sewing!

We ended up with only eight students in the class so we all got a lot of individual help, which was great. I never really felt like there was any point where I was struggling and I couldn’t ask the tutor – she really did a fantastic job at spreading her time evenly amongst us. We also got to choose which projects we wanted to work on, which was ideal because it meant there wasn’t the usual classroom thing where some people were too fast and others too slow, etc. All the students there was really sharp with their sewing and drafting so I think everyone got a lot out of the class, too.

Morphing the Manequim sweater pattern to my size

If you remember from earlier in the week, my next project is to make this collared sweater from the June 2011 Manequim magazine:

Since the pattern is only in one size, “Small”, my strategy was to take an existing long sleeved teeshirt pattern that I know fits me well, trace that, then trace the neckline area from the Manequim pattern overlaid onto it and morph the two together. For simplicity’s sake, I wanted to keep the collar piece as unaltered as possible.

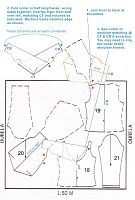
Here’s that wonderful diagram again showing how the Manequim pattern fits together, so we all have an idea in our head of what we’re aiming towards:

While overlaying the Manequim pattern onto mine, I wasn’t quite sure what I should use as the “frame of reference” to align the two patterns together – should I use the Centre Front & Centre Back? Or the shoulder seam/armscye corner?

In the end, it turned out that sorting out the Back first was the key to making the bigger changes on the Front piece work, since the Back of my teeshirt and the Back of this pattern were much more similar.


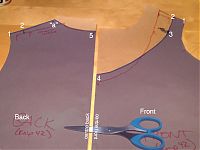
I’ve shaded my final pattern shapes in blue here to try to make it clearer. The original teeshirt pattern is (mostly) at the cut edge of the paper. Ignore the red lines – they were misaligned tracings!
Totally discouraged…

I’ve been hard at work on my slow-moving self-drafted shirtdress, creating bound buttonholes for the spaces the collar passes through before tying, making french seams everywhere, double checking all the darts so they all line up, and finally I tried it on last night to check the hem and button placement.

And it’s horrible. Dumpy, unflattering, and just bad.

All I could think of was Trena’s “prison matron” dress, and like hers, mine’s got pockets, but that’s about it. I don’t even know if I can bring myself to finish it, but it’s sitting on my dressform for a while so I can mull over whether any of it is even salvageable. I just know there’s no way in hell I’m ripping out a million french seams! It’s got nothing to do with the Pattern Magic directions, as the collar is okay, it’s all down to the fit of the rest of the dress…

And the shirting is Prada, too! *whinge* And I made three muslins! *whinge* I did everything right, and the dress is just so very wrong. Which mostly discourages me from pattern drafting altogether. I mean, what’s the point in pattern drafting if the fit is worse than what I get straight off a pattern sheet? Because, really, Burda, Knip, and even Manequim fit me straight off the sheet, no alterations needed. Do I really need the extra hassle in my life to end up with a sub-par result even with all my designer finishing techniques? Am I happy to never be a pattern designer? These are the sort of questions I’m asking myself right now anyway.