Blog

The Burda Armani coat strikes again

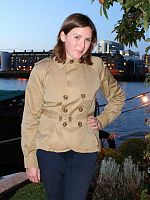
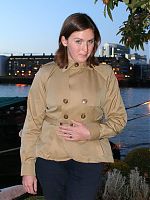
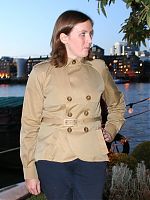
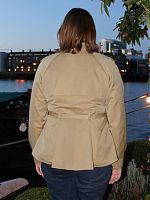
Remember back in November when I made a muslin for the Burda Armani knockoff coat and found it to be absolutely, unforgivably awful? Well, even at the time, I could see that my main problems with the coat weren’t necessarily likely to be problems with the shorter, jacket version of the same pattern (Burda 09/2010 #117).

So while I’ve been contemplating my Fall sewing options, going through my stash, and tidying up my tiny sewing room, I decided it was time to alter it to evaluate the jacket.

The main differences from the coat are:

  • It has no collar
  • It has extended sleeve bands instead of the awful dropped sleeves
  • It’s cropped at the hips

Believe it or not, I still had the muslin tucked away from last year’s coat FAIL and I came across it again when I was tidying up my sewing room. In about 15 minutes I had adapted the earlier muslin to be the jacket – and most of that time was spent pressing 10 months of wrinkles out of it!

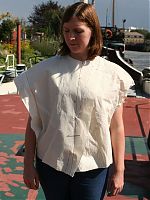
The front view kinda looks okay:

A fuzzy pink bolero

Following on from last week when I showed you the shirt I made for my nephew, I also wanted to share the super-belated Christmas garment I sewed for his cousin, my niece.

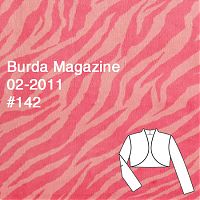
When I saw the cute boleros in the February Burda magazine, I just knew I had to make one for Megan. Bolero #142 seemed to be the most wearable version for Spring and Summer, and I had just enough of this incredibly soft, pink zebra print minkee I’d bought for her at Fabric.com!

Honestly, how great a model is this girl??

(Vote for my) March Mini Wardrobe

It doesn’t seem that long ago that I was first laying out my initial plans for this mini wardrobe, but now I’ve had some time to step back and have a look over what I managed to accomplish last month. I made this wardrobe mostly for myself, to use some luscious fabrics from my stash in combination with patterns that really appealed to me, but I also kept one eye on the contest requirements running over at PaternReview.com to make sure I remained within their rules, too. Here’s my entry into their contest, or you can just read on below…

I started with a blue viscose, draped knit top that I’d bought from ASOS and really liked, but I wanted to wear with both casual and dressy bottoms.

To coordinate, I sewed:

1. Jalie jeans – I’d made a muslin but the waistband was horrible so I had my work cut out for me on this pair using great quality stretch denim from Mood in NYC, plus some London streetsign fabric for the waistband facings and pockets. I used my vintage hand crank Singer machine for all the topstitching, plus I got to use my vintage buttonholer attachment and high quality rivets for the first time! I fixed all the waistband issues in this pair and these are now my favourite jeans. Read more…

A velvety MyImage bolero jacket

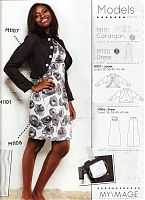
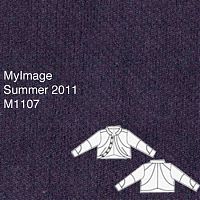
Ever since I saw the first previews online of the MyImage Summer 2011 issue, I knew that this cropped, pieced jacket (M1107) was going on my Must Sew list! I just didn’t know quite how quickly fate would throw us together!

Even though MyImage are a new pattern company, other sewers have reported that the sizing was pretty consistent, so I just threw caution to the wind here, made a size 42, and cut into my fabric!

And yes, it goes really well with the jeans I’d just made, too!

James's fantasy jacket

I’ve been calling this James’s “fantasy jacket” because he’s asked me to recreate a beloved unlined, simple, waterproof jacket that was stolen from a pub on the night he met me all those years ago.

He recalled it from memory while I attempted to create an accurate tech drawing, and then once that was agreed, I compared this against my vast pattern magazine archive (made much easier since I started tagging my At a Glance scans online, so I just had to shuffle through those issues tagged “menswear”!).

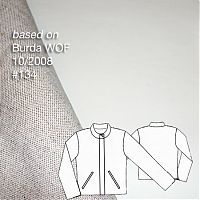
I decided that BWOF 10/08 #134 was a pretty good starting point for what James wanted, and I went from there. The muslin went well, so around Thanksgiving I started on the final jacket, made from a very cool laminated linen from Mood in NYC, with bias binding made from some dark red and black tie silk bought in Dublin three years ago.

How to sew welt pockets

It may be FREEZING in London, but the heat is on for me to sew James’s fantasy jacket in time for his birthday on Saturday!

I’m calling it his “fantasy jacket” because he’s asked me to recreated a beloved unlined, simple, waterproof jacket that was stolen from a pub on the night he met me. So he recalled it from memory while I attempted to create an accurate tech drawing. Then I compared this against my vast pattern magazine archive and decided that BWOF 10/08 #134 minus all the bells and whistles plus a few different whistles and bells was the best starting point. The muslin went well, so this weekend I started on the final jacket, made from a very cool laminated linen from Mood in NYC, with bias binding made from some dark red and black tie silk bought in Dublin three years ago.

The rubberised coating on the fabric means any and all pin holes show, so I needed to treat it like leather – pattern weights and rotary cutter for the pieces, and since it’s unlined, I also needed to create metres upon metres of bias binding for the exposed edges. I used a continuous bias binding method for the first time ever and it was very quick, though not very intuitive.
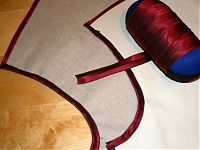
(I wrapped the binding around a sunglasses case to avoid creases. And because it was handy. Let’s face it – I’m not going to be needing the sunglasses any time soon!)

After binding most of the edges, I then set to work on the front welt pockets, which were rather tricky on a fabric that requires a press cloth (I’m paranoid that the laminating will melt!) and can only be basted where it will never be seen. So I thought I’d document the process and give you all a little welt pocket tutorial.

This is also exactly how I do bound buttonholes, but because the scale is much larger here, it’s easier to try welt pockets first to get the technique down and then just do the same thing on a smaller scale for buttons once you get the hang of it.

How to sew a double welt pocket

My pockets here are 7 inches long (6” is standard but I wanted to make sure his big man paws would fit in), and the opening is a total of 2cm wide (1cm on either side of the centre opening line). So the welts I cut out were 4cm wide (folded in half, they’re 2cm wide so straddle the stitching line nicely), and 8 inches long (so I get some overlap at the ends). You’ll need two welts per pocket. I folded each of these lengthwise and machine basted close to the cut edges to keep them together. If your fabric frays or shifts in anyway, you may want to interface the welt pieces in addition to the area around the pocket opening.

Step 1
Hand baste the pocket edges and central line. When you’re basting (in general), never turn a corner with your hand stitches, but leave the tails free at the corners. Also, you should extend the short edges here two centimeters or so beyond the long lines. I haven’t here because the needle holes would show!

Silver tweed jacket

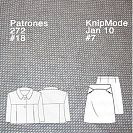
It’s time now to turn our attention to the upper half of this silver tweed Planned Partnership, the little boxy cropped jacket (#18) from Patrones 272:

You saw the jacket as part of a classy suit, but how does it work with jeans?, I hear you ask.

As it turns out, even better!

I actually prefer this jacket hanging open instead of buttoned up (which is why I left off the button loop at the very top of the collar stand and the small button hidden under the collar that the pattern suggested).

Silver tweed suit

Last week I finished the first half of my second Planned Partnership, so I think that makes me exactly one half finished (right, Sharon, resident maths professor?). Though I suppose if you’re counting individual garments, I’d be slightly over halfway finished…

But I digress. You remember the silver tweed fabric and my plans to make a cropped jacket that I could wear with either a matching skirt or with a nude sheath dress (yet to come)?

Well, I’m so delighted with the way both the jacket and skirt turned out that I couldn’t wait to show you! So in the tradition of that other tweed suit, you get a sneak preview!

Silver Tweed beginnings…

With the first Planned Partnership done & dusted in the form of my techno skirt and sequin top, it’s been time to start concentrating on another pairing – the pale silver tweed to go with the nude stretch suiting…

I decided to go with the bottom jacket seen above, so I traced all the pieces of it and the skirt pattern, playing it very carefully and was able to fit BOTH the cropped jacket and the skirt out of the 1.5m of tweed I’d bought! Woohoo! It was by no means certain, but my powers of fabric Tetris prevailed and I’m rather proud.

Lime running jacket, mittens & hat

I really really liked this fleece jacket, KnipMode 12/2008 #21, ever since the issue came out, and I’ve been waiting for the right time to grab some bright fleece and make it ever since.

It uses lycra edging tape (which Pennine Outdoor thoughtfully stock in addition to all the right high quality fleeces and chunky zips!) to bind the sleeve and neck edges as well as act like a sort of piping-without-the-pipe along the princess seams and that top yoke edge.