Blog

My Mexico travel wardrobe

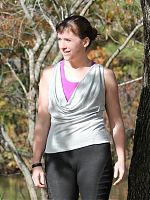
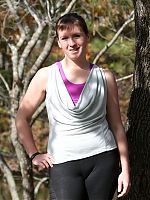
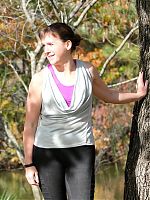
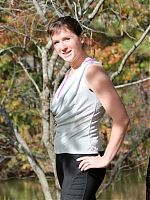
I’ve made a few mentions of it over the past few weeks, but James and I are off on a grand holiday to Mexico at the end of September! We’ve been talking about going for years and we’re so excited to have finally booked everything. We decided on the Intrepid “Mexico Unplugged” trip since it stops everywhere we want to go, is a small group & eco company, and provides the perfect mix of taking care of booking hotels and transportation, but doesn’t tell us how to fill our days. Which will mostly be filled with eating and visiting ruins!

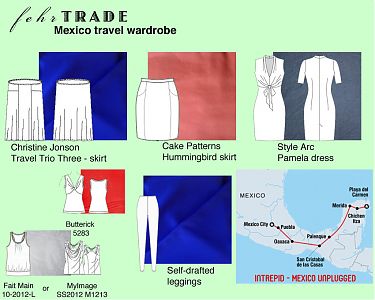
Anyway, as this is a different sort of holiday than the past few we’ve gone on, and I have a few weeks left to prepare, I thought I’d share with you the few pieces I’d like to sew before we leave…

As you can see, I’ve included lots of bottoms as those are what I’m most in need of right now after losing weight for my track race! My tops still fit reasonably well, though so I’m happy to just bring along ones I’ve already made to pair with them.
I’m hoping to sew:

(I’m cheating a bit by posting this after I’ve started sewing – two of these are done already!)

Plus if I can fit them in before I go, either of the two workout tops from my SS13 Sewing Ideas, or the jeans which I keep delaying

Neon tribal running shorts and sports bra

Wow, thank you all so so much for all your hearty congratulations on my double gold medals at the British Transplant Games! It was definitely a confidence boost winning the first one, enough that I had the courage to wear my rather-more-revealing-than-I’m-used-to new running shorts & bra set for the second days’ track races.
I used the Jalie 2563 pattern for both the sports bra with racer back (View A) and the shorts with thigh insert (View C), and there’s also another bra view included in this pattern, too, so it’s great value to get three usable views in one!

I’d made this set after completing the swirl sheath dress, but before the super simple skirt, so I’m glad we waited for a photoshoot to be able to use Sheffield’s amazing Don Valley Stadium as the backdrop, even though it’s scheduled to be demolished next month for lack of maintenance funds (so, so sad!).

Even though I’m wearing these as a set on their own here, I think for regular runs I’m more likely to wear them as separates – a great sports bra to wear under a low-cut vest to let a pop of colour peep through, and a great pair of running (or cycling!) shorts I can pair with a longer top.

Jalie actually call this a “crop top” and not a “sports bra”, but I found it really easy to turn it into a compression-style sports bra that’s actually supportive enough to run in! If you’ve got a larger bust, your mileage may vary, but for me, this is the perfect mix of support, style and comfort.

My first change was to line both the front and back in power mesh. However, when I tried it on (before adding the elastic edges), it didn’t pass my “bounce test”. So I consulted with a sewing/running industry friend, who recommended I try adding a second layer of power mesh lining, with the stretch running in the opposite direction to the first layer (power mesh is stretchy in one direction, but rigid in the other).

An incredibly simple skirt

Last night I reconnected with the magic of sewing. I’d already done a bunch of boat chores, done some alterations to take in a pair of leggings that are now too baggy (great result, but so tedious!), and I wanted something quick to wear. Since I upped my training regime for the British Transplant Games track race tomorrow (omg), I’ve lost a rather incredible amount of weight and girth so nothing fits me anymore. Which feels nice for about 5 minutes, and then it’s annoying because you have nothing to wear in the morning!

So I pulled out a bit of the black and silver lurex ribbed knit that I’d had leftover from my Marie jacket. The fabric was originally from Minerva, but is sold out now in this black colourway. I nearly gave it up in the Goldhawk Road swap, but then I had second thoughts and pulled it out of the bag. I’m glad I did, because it’s become a cute and very simple skirt!


Sorry about the quality – quick photos before work and it was raining, and my hair’s wet from the shower still!

This is literally the quickest, simplest skirt you could possibly make. Not only is there no pattern, but there’s no measuring or drafting, either! I simply took the fabric, wrapped it around myself like a skirt, marked with pins where the overlap was, then cut along the pins.

This gave me a long rectangle, and I sewed the sides together to form the only major seam of the skirt. I wear the seam at the back, but it could easily go at the sides or front since it’s all the same!

Open-backed Splatter tank top

It’s not quite a “Quick Knit Top” in my eyes, but I wanted to try out one of the running top patterns I selected in my Spring/Summer 2013 Sewing Ideas before I jumped headfirst into sewing another pair of jeans. I pulled out KwikSew 3672, which my mom bought for me a while back in one of the pattern sales you all get in the US. Otherwise KwikSew tend to be pretty expensive over here and I’d probably never got around to trying it!

Despite being a fairly recent pattern, it’s already OOP so act fat if you like the design lines! I’ve only made the top this time, but I think the skirt could be perfect for travelling if made in a hefty jersey. The splatter-print jersey I used here is from Minerva – it’s a bit 80s but I thought it’d do nicely as a test-top as its soft and has a nice weight. For the shelf bra lining I used a lingerie nylon(?) but in future I’d suggest something more supportive yet breathable like power net. Obviously for heavy-duty running I’d use a wicking supplex for the exterior, but for several reasons I’ll go into below, this pattern isn’t suited for running anyway.

I never trust Big 4 sizing any more so even though my measurements matched up perfectly with size Large, I still laid my jersey sloper over the nested pattern and ultimately decided Large was probably the best bet anyway.

Even though my fabric isn’t anywhere near as stretchy as the guide on the pattern envelope (who actually uses those, anyway??), the fit is still very nice, and as far as I can tell, very true to size considering I was smack-dab in the Large measurement range! I’d definitely describe this as close-fitting though, and the length feels just about perfect to me, too. The only fitting issue that surprised me is how high the neckline is in front! This feel seriously matronly to me – I’d normally have this at least 3 or 4 inches lower in a running top!

This pattern has an shelf bra, which contains the bulk of my problems with the pattern: the finishing of the under-bust elastic leaves exposed elastic against the skin (what?), an unfinished (albeit small) top edge inside, and unflattering and bad gathers that neither support nor make for clean finishing.

Striped Cabarita collared tee

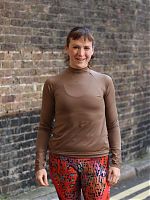
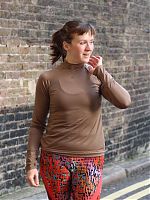
As soon as I saw Cabarita, I knew I had to sew it. It’s got some really unique features I’d not seen in other knit tops – the vintage-inspired collar is the most obvious one, but the back V-neck and choice of short or long dolman sleeves really do make this a cut above the average teeshirt pattern.

Cabarita is the first of the “RiFFs” range from Cake Patterns and is available either printed or as a pdf from Etsy (I opted for pdf!) (Though note that if you ordered the printed version, you need to download the back neck binding piece here as it was accidentally omitted!)

Cake Patterns usually have lengthy and descriptive, very beginner-friendly instructions, but Steph started a side-range of “RiFF” patterns that have the same level of professional drafting, but with brief, text-only instructions and no layout diagrams, intended for more advanced sewists who just want the pattern (hello, that sounds like me!). Crucially, though, they still feature the (now signature) “draw your own side seams” method. When I compared my drawn pattern pieces to my knit sloper, they were scarily close (from the bust down), so this method really does work!

Now, a bit of a confession: I wasn’t entirely sold on the the collar at first. I thought maybe it might look a bit too costume vintagey, and might get in the way or flop around a bit. But I’m glad I included it as I really like it now, and it really does add to this pattern, which might be a bit too plan in front otherwise.

When I sew this top again, though, I’ll a) use lightweight knit interfacing on the collar so it stays in place a bit better (rather than the edges folding over, like you can see below right) and b) attach it so that the seam is on the right side and therefore hidden under the collar as it hangs, negating the need for any understitching on a narrow serged seam allowance.

This fabric is a lovely and soft viscose jersey in brown and turquoise from Minerva (and also comes in brown/pink and brown/orange colourways). Minerva don’t do half metres so I took the plunge and only ordered 1m, and I’m happy to report that I could easily fit the shorter-sleeved version into it.

Bridge the Gap refashioned race tee

Following on from yesterday’s Boston Street Running refashioned top, I thought I’d show you the other refashioned race tee I made from my starting pile, the “BTG” one in the centre:

This one has a whole lot of meaning for me – the urban running crew I’m part of, Run dem Crew, has a bunch of sister crews all over the world with a similar ethos, so when we go to races in other countries, the host crew lays on parties, sightseeing, and pre-race hospitality. When crews get together like this, it’s called “Bridge the Gap”, and the Copenhagen crew even designed special shirts to commemorate the Copenhagen marathon weekend.

But I was a bit late to the Expo, and they ran out of Medium shirts, so I asked to be given the largest size they had, which was XXL! (Why they thought they needed to print any that big for marathon runners is another question entirely!). So this one was ripe for refashioning, and I had a lot of fabric to work with, which was great.


When I Bridge the Gap, I really bridge the gap!

The original shirt had the blue NBRO man on the front, with BTG and the date underneath, and the back had “The Peloton of Awesome” and all the participating crew logos across the shoulders. There were also mesh panels running down the sides, which I used in the Boston Street top instead. Unlike that top, however, here it was absolutely essential that I preserved the original designs.

Orange and Pink tie-back teeshirt

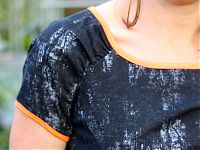
I’ve got so many finished garments to show you this week, and I thought I’d start with one that I actually made back in February (while I was in a drug-addled shingles haze of pain). This top was a gift for my niece, from the Young Image SS2013 magazine.

I loved it as soon as I got this issue, and I went and traced and sewed it right away! The front has got a subtly curved yoke seam, but the back is where all the action is – a double layer with a tied yoke! It’s kinda hard to tell in the magazine photos though, because they don’t show the back at all, even though it’s the standout feature of this pattern!

I made size 164 and lengthened it as everyone says she’s so tall and thin, but those were the only changes. The only thing I’d change in future is to remove a ton of ease from the sleeve cap – there’s way too much in there, arrgh! Jersey tops really don’t need any ease at all, let alone several inches!

So even though I made this back in February, I had to hold onto it until I visited her in Baltimore in April. The shirt was a big hit, but I didn’t want to impose a photoshoot on the kids there and then, so my dad took these back in Virginia, and they only just came through a week or two ago. Thanks Dad!

A gathered merino wool cardigan

It’s June, I hear you cry – why is she sewing a wool cardigan in June??!? Well, I selected this cardigan in my Spring 2013 Sewing Ideas because I’m a realist, and I recognise that I need a lightweight cardigan for 80% of the British summer! I’m grateful to not have the disgustingly hot & humid East Coast summers I grew up with (nor the swarms of mosquitoes everywhere!) but it does mean some wardrobe concessions must be made.

This cardigan appeared in the March 2013 Burda magazine (or it’s available for purchase as a pdf here) and I thought it was one of the nicest, prettiest, and most versatile cardigan patterns I’d seen in a long, long time.

This is a basic, slim-fit cardigan with shaped, faced bands, front gathers, and button closure. I love the slim fit, the beautifully drafted, curved bands, and the delicate and pretty gathering. I get annoyed when patterns have skimpy gathering, but there’s a nice amount here, which is a great detail and offers bust shaping.

THIS PATTERN RUNS VERY SMALL! One reason I sew so much Burda is because they’re always so consistent, so I’m very, very glad I read the other reviews first.

When I compared the front and back to my self-drafted knit sloper, which has 10% negative ease (perfect for tight-fitting running tops, which is my usual usage), this cardigan pattern was even smaller still! If you can – go up a size, but if you’re the largest size already, like me, I recommend cutting larger seam allowances throughout the waist and hips at the very least. I personally tapered to about 1” allowances on the waist and hips in the side seams, then sewed ~3/8” (1cm) from the edge.

Two pairs of marathon leggings

Word got round my running crew that I was starting to do some custom drafted leggings for a few people and my friend Lee Ann immediately came up to me and said “I want you to make my leggings for London marathon.” Holy crap – what an honour! It’s her first marathon, and the biggie, and she trusts me to make them for her?! I couldn’t say no to that, so I measured her up right then and there, then drafted out her pattern using the Shin book, and made her a test pair using some cheap thin lycra. She came round the boat and tried them on and amazingly, the fit was perfect, with no alterations needed, woo!

With the fit out of the way, I could then start in on the design lines, which she said she wanted to have a stripe/ribbon that started on her right hip and wrapped around to her right calf, and in navy and red to match her charity vest.

So, as I do, my first step was to draw myself a little plan:

Sorry for the crap quality there, but essentially I drew out the four big pieces (front right, front left, back left, back right) and the rough stripe shape, and realised I’d need 12 pieces in total, and as it’s asymmetric, I’d need to cut everything in single layer.

Organisation was the key, keeping the three pieces for each quarter pinned together on my sewing room clothes line!

I assembled each quarter first (ie: I sewed the front right top to the front right mid, to the front right lower until I had a full leg, and moved on to the front left). The cutting was really the most difficult here, but I managed to just barely squeeze everything out of 1m each of Tissu’s navy blue and red supplex lycras. Assembling it was much easier, but I had to be careful that the seam lines matched up over the left side seam!

I was so chuffed to see them on LeeAnn when she ran past me during the race, and she said they were a dream to wear on the day, too! No tugging, no baggy ankles, no nothing, hurrah!

Don’t they look great on her?? And she’s totally caught the bug, too – already planning her second marathon!

Mustard and Grey slouchy Ivy tee

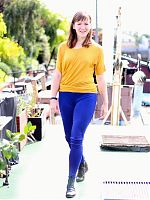
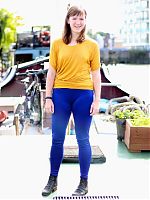
How great are Style Arc patterns?? One thing I love about them is that each month there’s a free pattern that comes with every order. In February, it was the Ivy tee. With its angled side seams, dropped shoulder, slightly forward shoulder seam, and banded sleeves, it’s so great for colourblocking that I just couldn’t resist! The good news is, like all of their freebies, it’s available to buy after the month is done, so you can go and get your own now, too.

I ordered a size 14 as per usual (I’m a Burda 42, for comparison), since StyleArc patterns are single-sized. This is my 3rd Style Arc pattern and I can totally understand how they’ve gained so many fans so quickly! Each one has come together beautifully, and is as comfortable and enjoyable to wear as it was to sew.

I did have a bit of trauma in the making of this, however. I did something I haven’t done in 9 years of sewing – I lost a pattern piece!! I checked everywhere, but I think the sleeve piece must’ve accidentally gone into the recycling when I threw out the paper scraps. This pattern has a dropped shoulder, otherwise I would’ve just used the knit sleeve off my Marita dress or Marie jacket patterns, so in desperation I emailed Chloe at StyleArc asking if she could possibly send me just the sleeve piece by pdf… and she did, so quickly, saying she knew I’d probably want to work on it at the weekend! How great is that?? Anyway, her scan plus some added measurements worked like a charm, and I have a completed Ivy tee!

I used two of Tissu’s viscose lycra jerseys here (again!!) – the Mustard colourway leftover from my Drape Drape tee, and 1m of Marl Charcoal I bought specifically to coordinate with the mustard.