Blog

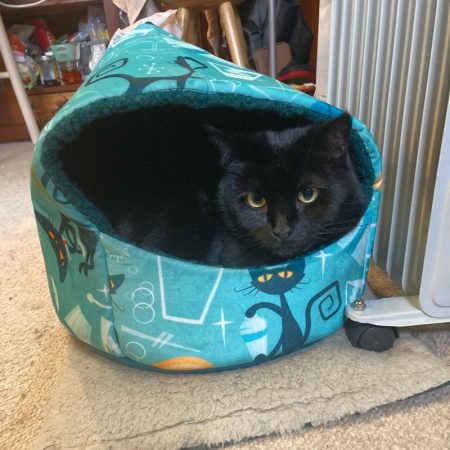
A new cave for Nishi

For the last few years, Jalie Patterns have released a “Galaxie” pattern around the holidays that is usually gift-themed. One year it was cooking-focused, another on travel, but this year the focus was on pets, and, reader, I bought it immediately! Galaxie 4 contains several little projects for pets – collapsible bowls, zippered pouches, a poo-bag dispenser, and a pet bed – and one for humans, too – a bum bag. My Instagram followers will know that I made some of the other views of this pattern literally the next day, but as those are presents you’ll need to wait to see those!

Today we’re talking all about the “Coquette”, a pet padded bed/cave/house/etc. It comes in a range of sizes that would be suitable for a guinea pig, rabbit, cat, or small dog, but you could likely scale it up for larger dogs if you really wanted to. After some deliberation, I ended up using the second-to-largest size, 35cm, and I think this is the right size for an average sized cat, though you could probably go down one size further in a pinch if you had to, too.

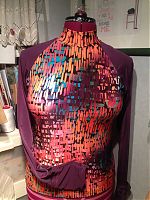
Purple & print long sleeved running top

You can understand why I need a bit of a breather now after sewing so much workout gear, right? I sewed a lot of samples for the development and testing of my two patterns, and then once I finished those, the only real hole in my wardrobe was for long sleeved running tops, so I found myself back in the lycra pile anyway!

Just like the mocha running top you saw a few weeks ago, this one is again the Christine Jonson “Travel Trio Three” Raglan top pattern with a half-height collar and some hand mitts of my own devising.

I only had a bit of the printed lycra from Minerva leftover after already making leggings and a workout top from the 2m I bought, so I cut the front and back body and the collar in the printed lycra, then used some purple “silk touch” lycra from Tissu that I found in my stash for the sleeves and hand mitts.

Forgive me for not doing a proper photoshoot on this – I was a bit photoshooted out at this point so you just get some action shots and selfies instead!


Yes, I usually am this annoyingly happy when I run!

The current Sewing Queue

I’ve found myself at the end of yet another extraordinarily busy week, one where we’ve been out pretty much every single night, and we’ve had a friend over from the States, too. However, I have managed to make progress, albeit slow, on my swirl sheath dress in a series of 10 minute segments snatched here and there.

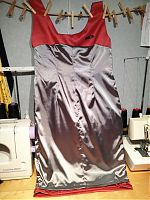
Since I bought my silver stretch lining fabric on Goldhawk Road last Saturday, I’ve managed to sew and press all the darts (the lining uses the original base pattern so no swirls inside), attach it to the facings, sew the side seam, and attach it to the invisible zipper.

Here’s the back of the dress hanging flat in my sewing cave:

I did the lining hem by machine, but the coral fabric hem needs doing by hand, possibly in the car this weekend. The right side strap also needs a little bra keeper snap strap to keep it in place as it’s a pinch too long. Otherwise it’s done!

It doesn’t quite fit as well as the muslin did when I made it last summer though, but that’s down to me rather than the pattern – I’ve got a big track race next weekend in Sheffield for the British Transplant Games and my trainer has put me on a training diet to shed as much excess weight as possible before the race, as this translate directly into seconds on the track.

She and I were both taken aback by how successful this has been – I’ve lost 4cm (1.5 inches) off my waist and hips and 4.5kg (10lb) in four weeks! If it wasn’t for the hours of running up hills I’d suggest she sell it as a diet plan (the running would reduce its popularity somewhat!). And really, don’t be concerned, as I’ve been stuffing my face with fruit and veggies and lean meats pretty much continuously all month, so I’m not on some idiotic juice cleanse starvation diet or something.

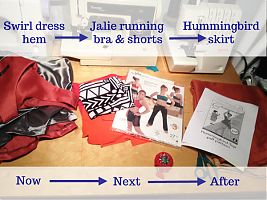
The downside of this is that all my trousers and skirts are hanging off me (my poor Beignet skirt has a cinched paper bag waist now!) and I’m in desperate need of new bottoms. I was planning on sewing up a few pieces for our upcoming Mexico trip next month(!!) but now it’s clear I need to sew as many bottoms as possibly and just pack tops I’ve got already.

I’m still mentally putting together a nice travel wardrobe plan (which I shall reveal in good time), but my immediate sewing plans are thus:

Attention Londoners: Morley College new course list

Ooh it’s my favourite time of year! No, not new pattern announcement time, but new Morley College course details!

You can see all the fashion/sewing courses here and some of you may also be interested by the textiles courses, which include things like crochet, knitting, quilting, dyeing, and fabric manipulation.

They do the usual basic courses on using a sewing machine, drafting basic blocks, basic draping on the stand, etc, that loads of colleges offer, but they also offer some really interesting niche classes that don’t seem to be offered anywhere else.

Looking at the full lists above, there’s everything from historical wear to hats to shoes to lingerie to dancewear! Most courses only cost around £60, too, which is really reasonably priced, especially when you consider that most of the fashion courses in London start at £300! The facilities at Morley are great, too, with big tables, plenty of light, and ample Bernina machines and dummies, and there’s some seriously good pubs for lunch nearby…

You can read my review of the Pattern Magic 2 course here or my recent review of the Pattern Magic Stretch Fabrics course here.

Ones that pique my interest:

Too cold for photos – just sewing instead!

As I write this, London is in the midst of the second snowfall of the year (if you count Monday’s over-hyped yet under-delivered snow, that is) and I’m bundled up in a full-body thin layer of silk (long johns), plus my wool foldover trousers, my bamboo turtleneck, two pairs of socks, and my Russian greatcoat for my 35min walk into work today. It’s nothing on the Pennsylvania winters I grew up with, but at least I feel prepared!*

The good news is that, while it’s freezing outside, my sewing cave is one of the warmest spots on the boat, so I’ve been busy!

Papercut Peter & the Wolf Trousers

The new trouser pattern from Papercut Patterns was burning a hole in my To Sew list, so I just had to try them out! I finished these before last weekend, but Saturday I was covered in mud (another cross country race) and Sunday it was freezing and I didn’t fancy a photshoot.
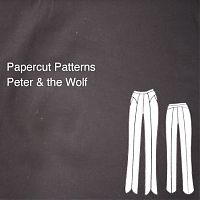
I did an awesome job lining up the seams on the side invisible side zipper, if I do say so myself!
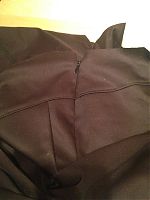
I really like that they have you topstitch all the mid-leg vertical seams as well as all the yoke seams – that topstitching really makes the seaming stand out nicely. It also meant I actually finished a huge 1000m spool of black Gutermann thread! I thought those things were infinite!

I’ve not yet worn these to work (the tulip hems mean my long johns are visible in front, the horror!) but I can tell already they’ve got a nice fit throughout – I especially like the trouser hems and the hip yokes, though they do mean the pockets are placed further down the leg than I’m used to…

I’ll try to get some photos this weekend, even though the details will be lost in the dark brown stretch twill (hey, it was in the stash alright!?) I’d bought in Paris last Spring. I didn’t have any particular attachment to it and it was a stretch woven as per the pattern requirements, so I made these as a trial version (or wearable muslin if you prefer). I might fancy making these again in some stretch wool suiting in my stash from last winter…

Another Chic Sweatshirt

When my parents were visiting in October, my mom looked through all my recent makes and decided she’d like a chic sweatshirt for her belated Christmas gift, and she picked out a lovely lavender sweatshirting for it while she was here. Remember how lovely she looks in lavender? I think it was a great choice. For my gift, she re-taught herself to crochet and made me a wonderful hat in mustard wool I picked out. Hooray for our little skills exchange!

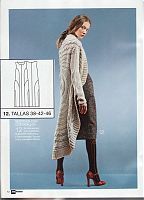
Patrones 22

Remember back before Christmas, when the in-laws travelled to Spain and brought me back Patrones 320? Well, at the time I was too flu-ridden to scan the second issue they bought at the same time, so I’m sharing it with you now.

This second magazine is labelled “Casual” but is more the size of a typical Patrones “Extra” issue. These lower numbered Patrones issues started a few years ago and are reprints of previously-published patterns. In this case, I haven’t seen any of these before so it’s fine by me!

It’s a terrible magazine photo (why cover up the pattern dress with a massive cardigan?) but I absolutely love the tech drawing for this curved seam dress. Funny, but it really reminds me of a Patrones designer skirt I made in 2008 and then never really documented on the site (which I tend to not do anymore, you see everything!)

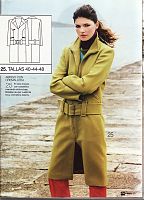
There are tons of amaaaazing coats in this issue (remember that I swear by Patrones’ coat patterns!!), and I especially like this one with a zipper opening, and three separate zippered welt pockets, too:

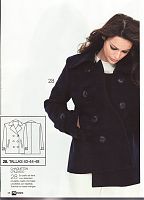
The short, naval pea coat is such an iconic piece of clothing, but strangely, not one you see patterns for very often. For me, this would make a fantastic transitional coat I could wear 9 months of the year…

Pale pink Burda December cover dress

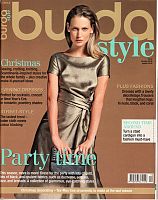
Are you excited yet? I sure am, because this dress is the last in my one-Burda-per-issue challenge for 2012! I set out to sew one pattern from each issue, and I’m pleased to reported I completed it (though much more on that in a bit – I’ve got a rundown post coming).

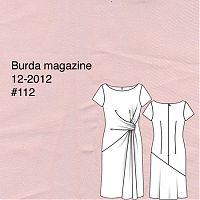
The final garment in the challenge is the Burda December cover dress (Burda Dec 2012 #112) even though I technically completed in on New Year’s Eve, I’m counting this in 2013’s tally since I’d already written up my end-of-year post by that point!

You may remember that I sewed up a muslin of this over the holidays, but I took inspiration from the long version shown in the magazine and made my final version in some pale pink viscose crepe from Stone Fabrics Super wonderful – flowing, drapey, takes a nice press (though that means it also wrinkles readily!), and has one crepe side and the other rather smoother (I used the crepe on the outside). You really can’t beat it for £6/m! It’s fairly narrow though at 137cm wide, so if you also choose to make the shorter hem length with long sleeves, note that you’ll need 3 meters of it.

This pattern (which also has a longer hem length with long sleeves) has the illustrated instructions for this issue, and man do you need them! It reminded me of one of those Vogue designer patterns where it doesn’t actually look like a dress until the very last step. Note that if you buy the pdf pattern from the Burda Style site, you get the same full, illustrated instructions that appear in the magazine.

Warm on top, disco down below…

Thank you all for your lovely messages while I was ill. I started to feel slight improvements little by little last week, and when I need a pick-me-up I tend to sew knits, and especially ones I’ve sewn before. So it should come as no surprise that in my flu-addled state, I should sew some more running gear, in ten minute segments while I could sit up without getting dizzy and having to lie down…

There was a reason I wanted some new winter-appropriate running duds, too – my running crew has recently become affiliated with England Athletics and this Saturday was the Met League Alexandra Palace (“Ally Pally”) fixture, where all the Serious Runners from Proper Clubs go to wear their tiny short shorts and club vests in “the off season” (otherwise known as Winter to you and I).

This was the first time we participated in such an event, and the first time I’d ever run cross country, so I wanted to wear something that stood out, and most definitely showed that RDC is not a “Running Club”! First, I needed something long sleeved and warm to layer under my RDC vest, so I chose the Christine Jonson Travel Trio Three Raglan Tee. I’d made the shirred turtleneck version of this before, and remembered how much I liked the first in the body and sleeves and thought it’d do well for running. Bonus points to Previous Me for tracing out the raglan front piece at the same time I traced the shirred version pieces!

The top was sewn in the remains of my muted purple Suziplex (seen in my original purple leggings!), and the leggings used BetaBrand Disconium fabric for the sides (the same fabric used in James’s reversible jacket), and black Suziplex for the remainder. I had plenty of Disconium to do the entire leggings, but I two-toned it as a design choice, rather than because of fabric constraints. Which also means I have plenty leftover for more disco items. bwahahah!

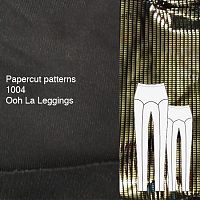
If you’re keeping track, this is the sixth time I’ve sewn the Papercut “Ooh La Leggings” pattern (UK stockist here)! So far, I’ve got the purple Suziplex pair, the Liberace leggings, the Run Dem Crew Refashioned pair, then my pale grey Suziplex Olympic leggings, and finally, the “Not Jeggings” so I could actually wear one and not run!

So here I am looking fresh-faced and warm before the race, in a sea of short-shorts and club vests, ha!

Let the disco begin!

Because I’m a good wife, I promised James I’d make his reversible smoking jacket after I’d finished my peplum top (photos coming next week, sorry – it’s been impossible to organise a photoshoot around both our social schedules!). This week has been rather busy, even by our standards, but I did get two evenings to work on it, and so far I’ve completed the entire corduroy shell (including bound buttonholes and no less than three welt pockets!) and moved on to the interior. Or, because this is a reversible jacket, I suppose it’s just “the other side”.

The other, disco side.

If you recall this is Betabrand’s disco fabric and it seriously is as bright and loud as the photos on their site suggest. I had to cut it with the black side facing out just so I wouldn’t go dizzy cutting it!

How to line the Burda peplum top

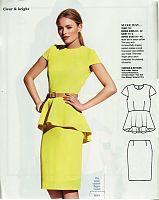
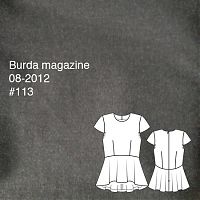
Peplums are a major AW12 trend and one that’s well within reach of most home sewists and high street shoppers. There are plenty of patterns out there, but one of the nicest I’ve seen so far is the cover design from the August 2012 Burda magazine, which is also available to purchase as a pdf download here (and you can look at the full instructions and layout diagrams on that site for free).

A lot of peplum dresses just feature a ring of excess fabric around the hips, but here, the curved waist seam plus the sloped hemline and bias-cut peplum on this particular pattern really sets it above the rest. I also like that it’s separates, so I can pair my top with a skirt, slim trousers, or leggings and get much more wear from it than just a single dress.

One thing I don’t love about this pattern, though, is that it’s unlined. Or rather, it has lined cap sleeves, a narrow bias edge on the underarms and a neck facing, but nothing further. It’s pretty straightforward to make lining pattern pieces from the shell and facings (see below), but the construction was more challenging to figure out. It is possible to do a nice clean finish almost entirely by machine (you still have to sew the hems by hand), but you have to do a bit of clever reordering of the construction…

Luckily for you, I made notes as I sewed so I can share my clever order of construction with you!

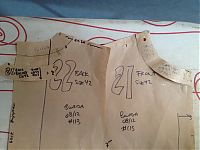
As mentioned above, you’ll need to modify your bodice pattern pieces after you’ve cut out your shell fabric. Place the neck facings on top of the bodice pieces (annoyingly, in this case they must be face-down so the shoulder seams and CB/CF edges line up), trace the neck facings onto your front & back bodice pieces and then cut these off before cutting your lining pieces. Remember to add seam allowances to these new cut edges, too!

Be sure to interface the facing pieces, then attach them to the lining pieces and treat as one for the rest of the construction.

Instructions for a clean-finish lining!

  1. Sew all darts, attach peplum pieces to bodice on the shell, and sew at shoulders (but keep it open at side seams and centre back!), ie: the follow the first few steps of Burda’s instructions, but stop before the zipper insertion!
  2. Do the same for the lining
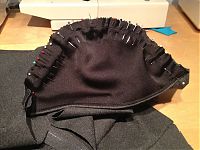
  3. Sew the sleeve shell pieces & sleeve lining pieces together at the bottom edge of the sleeve. Understitch, then baste around the other (armscyce) edge
  4. Baste the sleeve onto the shell with right sides together (beware of excess ease!! Don’t skip this basting step!)