Blog

Golden silk asymmetric blouse

From a total loser of a silk blouse to a triumph of a silk blouse, all in one afternoon! After the Burda FAIL, I turned around, cut into my gorgeous butter yellow floral silk charmeuse I bought at Ditto in Brighton last weekend, and sewed up this blouse in about two hours flat!

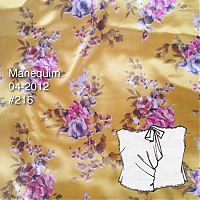
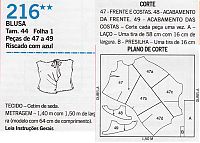
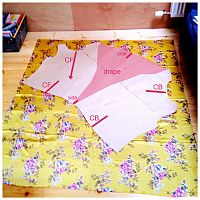
The layout of this blouse is really cool, and the entire blouse is just one piece, with only one side seam (and two shoulder seams). I took a photo of my fabric when it was laid out on the floor, and I added some annotations in pink (below) to help show where the drapey side comes into play. I hadn’t realised it from the diagram, but the CF neckline is on the straight grain, and the CB neckline is on the cross-grain, with the only side seam on the bias. Very cool, and the design feels quite Bunka.

I used the leftover silk in the bottom left corner to make several bias strips about 4cm wide, as I prefer a narrow bias edge on my silk blouses instead of finicky facings. I also left off the shoulder bow, as I felt there’s enough going on in this blouse already!

We were very lucky to catch the “golden hour” on Monday evening, which just makes this silk come alive in these photos! I’ve paired it here with my grey leather skirt to try and give an edgier look to the twee floral of the silk.

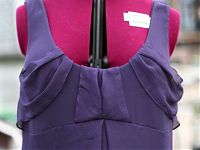
A rare dud of the highest order

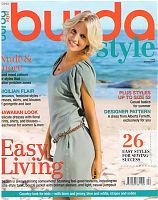
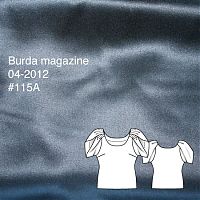
Last weekend I cut into cut into one of the oldest fabrics in my stash, a dark turquoise silk charmeuse bought in January 2009, to make the cover top from the Burda April 2012 issue:

There are so many things wrong about this pattern that I’m going to revert to list form to get the rant out of my brain:

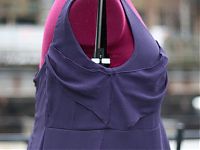
  • The recommended fabric is silk, yet the instructions don’t tell you to sew French seams, or indeed finish the raw edges at all. As far as I can tell, even if you follow their insane instructions, you’re left with a triangular area of raw seams at the shoulder. If I’d liked the top enough, I’d have had to make my own weird facing to handstitch on to cover this.

  • There’s a ridiculous amount of ease in the bodice – way more than Sorbetto, for example, and that’s also a non-bias, slip on shell. I ended up cutting this with the front and back pieces a centimeter or two off the fold simply to fit it onto my narrow silk, but I checked first to make sure it’d not be too small. And having completed the shell, I can say that it’s still on the loose side, even with my reductions!
  • Facings on a silk. WTFOMGBBQ? Why?? I said Nuts! to the facing and did a narrow bias edge (in leftover silk from my birthday top which I still had lying around) on the neckline, and did a two-step narrow edge for the hem.
  • Burda tells to to cut an extra wide hem allowance on the sleeve edges, press in and out (and shake it all about, do the hokey pokey- oh wait) and mess about with it until the sleeve is entirely completed… and then sew an invisible hem by hand. On silk. And it’s a reeeeeeally long hem. I’d rather eat glass, Burda. The much better option here would be to cut a regular hem allowance, and machine-stitch a narrow edge or rolled hem before basting any of the sleeve pleats. Realising they’re crazy and trying to do this later is much more difficult (ask me how I know).
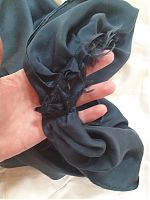
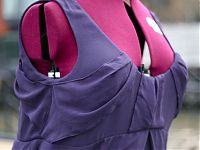
  • The sleeve instructions are absolutely incomprehensible. Burda would have you flip the entire pleated edges around the neckline and back to the armscye at the shoulder, which a) completely contradicts the photos, and b) there isn’t enough seam length to do. So I had to try and make the best of pre-basted pleats, attach to placement lines that may as well have not existed (since the pleated edges didn’t match up anyway), and a mess of raw edges (see above). My best attempt was not good enough.
  • And finally, when I tried the top on to see if I even wanted to carry on finishing the raw edges, the sleeves are just ugly. Less “quirky chic” and more “80s shoulder pads”. Ugh.

Brighton & Bank holiday sewing

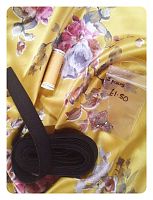
We had a long weekend here in the UK this weekend, and I’m pleased to report that I made the most of it! On Saturday, James and I made an impromptu trip down to Brighton, and we stopped off at Lewes on the way down. Our main objective in Lewes is always the Harveys Brewery shop, but I also discovered The Stitchery just across the road upstairs in the Riverside Centre, which stocks a wide variety of fabrics, embroidery floss, yarn, and haberdashery. I checked my handy “sewing shopping list” on my phone, and bought black waistband elastic and trouser hooks, both of which I needed. Very sensible of me, I know.

But the real temptation was walking right past Ditto in the North Laines in Brighton, and I told myself I was only allowed to buy ONE fabric there, so it’d better be a good one! In the end, this gorgeous butter yellow floral silk charmeuse won out over a similar yellow coloured, textured, ex-Blumarine crepe.

Florals really aren’t my usual fabric choice (and I would’ve never bought it from the terrible photo on Ditto’s site), but in real life, I was just captivated by it, and I’m thinking I’ll need to pair it with some edgier like jeans or my leather skirt to diffuse the twee-ness.

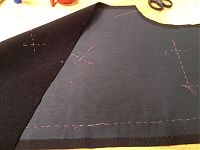
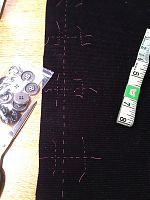
After our big day on Saturday, on Sunday we didn’t leave the boat at all! I spent most of the day doing sewing stuff, starting off with fusing all the interfacing onto James’s reversible smoking jacket pieces. I find fusing interfacing to be really boring at the best of times, but it’s beyond teeeeedious with a mini ironing board and mini iron! Once that was all fused, I then moved on to hand basting all the pocket placements (it’s a fantasy jacket, so there are five pockets!) and then basted the bound buttonhole placements, too.

Temporary sewing

While our boat is in drydock for maintenance, we’re temporarily living on a very kind neighbour’s boat. Packing for a month (though possibly 2 weeks) was a challenge in itself, as you want to to give yourself choices (in clothing, entertainment, comforts, and cooking), but yet you’ve still got to physically move everything, so you don’t want to overpack, either.

I brought the bare minimum of sewing supplies, which for me means my JL Mini sewing machine, which is great for travel and beginners alike (speaking of, I have a friend who’s selling her identical red JL Mini as she’s upgraded to a fuller-featured machine. If anyone’s interested in buying it from her for £30, please leave a comment and I’ll put you in touch!).

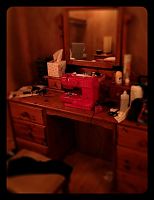
I also brought a few patterns and the fabrics to go with them, and I set up a temporary sewing station in the bedroom we’re staying in:

I thought it was quite amusing that the only place in the boat that was suitable for sitting and sewing was a pretty dressing table, and my boudoir sewing station inspired me to start one of my transported projects last weekend – another Ruby Slip!

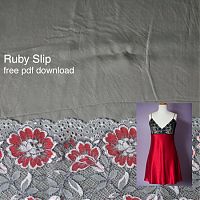
My first Ruby Slip was seafoam green with brick red lace and I loved it so much that I knew I’d be making another. If you missed the discussion then, Sherry offered a free pdf pattern and fantastic photo tutorials, which I highly recommend, even for beginners, as it’s beautiful and quite easy to sew (especially if you choose a thin cotton lawn).

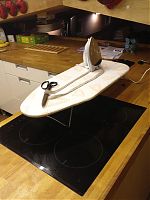
To match my sewing station, I set up a pressing station in the kitchen, with a travel iron and mini ironing board which live on the boat.

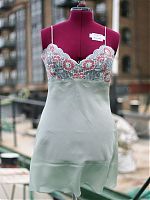
A seafoam green Ruby Slip (and matching panties)

The Ruby Slip is a free pdf pattern and comprehensive set of tutorials over at Pattern Scissors Cloth, and as soon as I saw it, I knew it was just the most perfect pattern ever for me and I had to sew it ASAP!

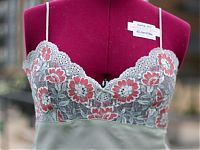
I had 2m of seafoam green silk in my stash that I’d bought at Bhopal Fabric on Brick Lane over the summer (at £6/m), so I took a swatch of that along with me to MacCulloch and Wallis just before Christmas to buy lace specifically for this. Their lace selection isn’t great, but I totally fell in love with this stretch lace, made up of seafoam green, grey, and brick-red flowers, and it was the required 18cm for the pattern. It was pretty eye wateringly-expensive at £14/m, but I ended up with a silk matching lingerie set for £40 exactly, so I think the economics of my decision were sound.

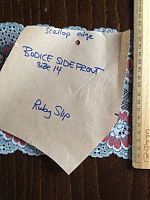
Sherry has done an incredible job going through all the ins and outs of lace cutting, bias silk sewing, how to do an FBA, etc, but I did get a surprise when I found that 18cm lace is not wide enough for the side front:

Since I went out and bought the lace specifically for this, I was a little annoyed, but I was also feeling flu-ish so I sat down with my copy of Bridal Couture and hand-pieced some lace from my scraps to make up the missing corner. It involved a ton of tiny hand stitches in both seafoam and brick to get everything to match seamlessly, but I’m pleased with the end result (she’s since posted some ways of dealing with narrow lace).

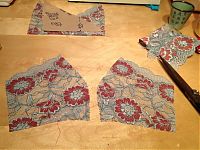
I also wanted to demonstrate how much you need to pay attention which cutting lace. I was paying heed to all of the scallops in order to get them in join up nicely at the seams, but I totally didn’t see that my motif was off at first. Happily, I had enough to re-cut that piece to have a nicer join over the seam (seen on the right).

Right, all that aside, and let’s see some finished photos! But, er, not modeled on me since there’s see-through lace and I’m not an exhibitionist. So you’ll just have to take my word that I squealed with delight when I first tried this on, because the fit is just perfect! The bias skirt really just hugs my curves without being tight, and everything just fits like it was meant to be. I made the “short” version, and the hem lies about 3-4 inches above the knee, which is perfect for me.

The silk chiffon maternity maxi gown

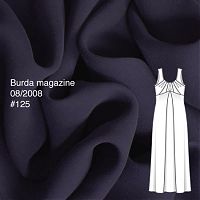
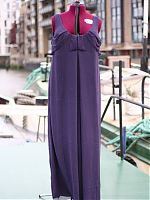
I finished Holly’s silk gown on New Year’s Eve, so this is officially my last project from 2011. If you recall, it’s Burda 08/2008 #125 and is one of the designer maternity patterns from this issue (and in my opinion – a really nice maxi dress whether you’re pregnant or not!).

We muslined the bodice portion of this (minus the drape pieces) back before Christmas, and made a few changes: taking a few tucks out of the neckline here and there, and increasing the bust space on the standard size 44.

I totally missed the chance to finish this for her Boxing Day birthday, but I figured I’d be still in time for any January parties before the birth in late January, and we were even scheduled to go over for dinner last Friday, where I was going to bring the dress along and sew up the hem on my little red machine after we ate (the hem is just raw here, as I can’t do that without her wearing it).

Upcoming Fall 2011 sewing – the fabric

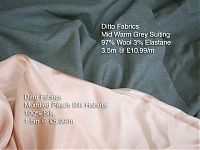
I posted about my Fall sewing pattern plans weeks ago, but I never quite got around to showing off my lovely Fall fabrics at the same time, and then I went and bought a little more since I sewed through enough of my stash over the past year to make space for more.

Indeed, the first two fabrics were bought long enough ago from the superlative Ditto Fabrics that I’ve actually already used them!

This grey stretch wool suiting is finding a life in my Draped Jacket and Skirt Suit you’ve heard so much about lately, and I’m sure you remember this peach silk habotai from my recent blouse, right?

Well, the day after I bought the above from Ditto’s website, we determined I’d actually be going down to Brighton later that week, so I stopped into their store on the Saturday morning and picked up two more fabrics (along with a good gossip with Ditto’s lovely owner, Gil!).

Peach silk shell blouse

As I mentioned last week, I made this blouse the weekend we got back from Hungary. It was a really quick make, with only a few seams and minimal closures, so even including some thread tracing and french seams didn’t really lengthen the project time. In other words, it was exactly the sort of project I needed right after a holiday!

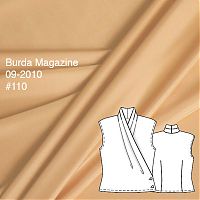
Burda 09/2010 #110 is the sleeveless version of this top and one of the, oh, eleven must-sews for me from this September 2010 issue. It’s been one of my absolute favourite issues since the moment it came out, so it was nice to make something other than the cover dress for once!

I mostly made this to coordinate with my upcoming grey wool skirt suit, but with our unexpected hot and sunny October (29C/88F!!!) in London, you’ll get it see it worn now in a summer style, paired with my silver tweed KnipMode skirt. I imagine the weather will cool off enough by the time I finish the suit that you’ll get to see it layered underneath the jacket as I intended!

A silk chrysanthemum Sorbetto blouse

Every now and then I mention a few people from my personal life when they enter into my sewing world for whatever reason, but regular readers will probably recognise the name of “Neighbour Helen” more than most. As a neighbour, close friend, and convenient fashion industry alumni, she’s helped me assess muslins, balance proportions, learn how to rotate darts, and she even drew the amazing illustration for my free ruffled wristlet pattern!

So I was very saddened to hear that she and her husband are moving their barge to France in a few weeks’ time, to travel through the French canals for the foreseeable future (ok, saddened and jealous!). Since it was also her birthday, my gift to her was to make her a silk blouse of her choosing.

She chose the gorgeous chrysanthemum silk that was leftover from my blouse and I even let her try mine on, but she felt my top was too blousy for her and requested a simple shell instead.

So I turned to the new (and free!) Colette Patterns Sorbetto top!

I made a few changes, though – the most obvious is that I eliminated the central pleat (which would have been too busy with the large scale print), and I lengthened hem by 3” as others said this came up short.

The silk chrysanthemum blouse

As I discussed in my post on “pedestal fabrics” last week, I’ve had a ridiculously gorgeous silver and black chrysanthemum print silk in my stash ever since AllisonC gifted it to me two years ago when I was about to go into hospital.

But I’d brought it out again recently and thought about how I’d best like to wear it and I decided that I love and wear my silk blouses so much (and my birthday blouse in particular!) that I should sew this into a blouse to get the most wear and love out of this “pedestal fabric”!

In this case I chose to use the same pattern as my birthday blouse, Manequim Feb 2011 #158, because it fits great, I love the style, and I knew it worked well with a drapey silk.

You know what? I am so happy I took the plunge and cut into this fabric, because I just adore this blouse!