Blog

Our DIY wedding – the dresses, makeup, and final photos

Either groan or rejoice, but this is the last of the wedding posts!

The bridesmaids dresses

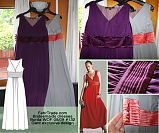
If you cast your mind back, you’ll remember the selection process, how I fitted and then hand-pleated, the lined, silk jersey dresses for my two bridesmaids, but even after I finished them, there wasn’t a chance to see either P or G wearing their dresses, let alone together!

It was really nice on the wedding day to be able to see both of my great friends looking so happy and nice, and comfortable, too, in the bridesmaids dresses I made for them.

Their colour choices really suited them both, too, and even though I offered to shorten them after the wedding, I know P (in purple) is definitely keeping hers as a wonderfully posh maxidress. (S was my Man of Honour, but no, I didn’t make his suit!)

My dress

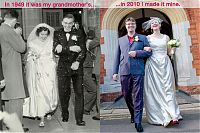
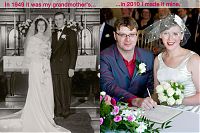
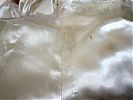
You’ve seen it in pieces and finally, in comparison with my grandmother’s original gown, but here’s some more photos where you can see the seamlines particularly well:

Our DIY wedding – refashioning my grandmother's gown

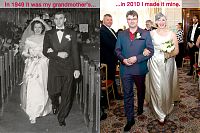
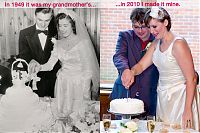
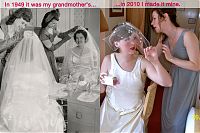
I’ve got many, many more wedding photos to come, but as I was slowly going through all the photos from friends and our professional photographer, I realised that there were a lot of parallel poses between my grandparents’ photos and ours.

Big thanks to my Dad for taking the time to scan in my grandparents’ wedding album in hi-res format, and also to our truly INCREDIBLE and AMAZING wedding photographer, Paul Tanner. I’m pretty sure he was the best money we’ve ever spent.

Confetti toss:

Post ceremony posing:

Walking back down the aisle:

Cutting the cake:

Pre-wedding girly preparations:

If you’re new to this site, let me back up a minute and explain what went on here. First of all, yes, I sewed my own wedding gown. But that would be too easy (ha!), so I decided to sew it from my grandmother’s gown.

Final wedding "in progress" update

This will be the last update you’ll get before the wedding on Saturday, so after this it’ll all be finished photos, which is rather exciting!

I almost winced trying on my gown for the final time on Monday night – I thought for certain there’d be some niggling problem I’d have to fix, but no, phew! Everything’s still good. My sister-in-law marked out a nice curve in the train, trimmed it to within an inch or so of the pins, and then I did the hem last night. As it turns out, I’ve still got a good two feet of train left, and the thumb loop is intact, so I’ll be able to easily lift it up for the dancefloor.

The original hem was just a narrow turned hem that’s stitched by machine, so I did the same thing on the new area to keep it consistent. First I folded the allowance over so the fold was at the marked hem line, and I machine stitched as close to the edge as I could get. I pressed this (with the indispensable silk organza press cloth!), then carefully trimmed away the allowance as close to the stitching as possible. I then folded over the hem again and stitched about 1/8” away from the edge, then gave it another good pressing.

But this wasn’t the only hem I sewed last night, no no! I also hemmed both bridesmaids dresses! My sister-in-law was a huge help here, too, by hand basting the hem of each dress very close to the cut edge of the fabric. So when it came time for me to send them through the coverstitch machine, not only did I have a nice line to follow, but the basting kept the silk jersey from twisting underneath like it loves to do.

DIY Wedding Gown – Fitting

Pip came round last night for dinner, drinks, holiday food exchange (French cheese from me and Greek nougat from her!), and her final fitting on her bridesmaid dress.

If you cast your mind back to April and May, her gown is the long, purple, silk jersey Gant exclusive design gown from the Sept 2008 Burda magazine.

I’d completed the gowns back in May, but I left off the tiny covered buttons on the cummerbund and finishing the hem until closer to the day so that they wouldn’t have to worry about gaining or losing a few pounds, or deciding on different shoes before now!

Happily, Pip’s gown fits her perfectly, with minimal overlap at the cummerbund, and really her hem was just about perfect with her chosen heels. But then we realised that if she switched to her comfort flip-flops on the dancefloor, the hem would drag, so I’m going to pull up the hem by an inch.

Then Pip wanted to see me in my gown, and since I hadn’t tried it on since the skirt was attached, I felt it was a good idea. But even though I was capable of wrestling into the boned bodice before, it was proving impossible (and more than a little claustrophobic) with the attached skirt. It was apparent that I had to remove the brass bar at the top of the zipper to allow the top to fully open and give me extra room to squeeze into the gown. I’d thought I might have to, but I kept it in until now since it wasn’t a problem. So now I’ll just need to add one or more hook and eyes to the top of the zipper to keep it all in place.

Honeymoon lingerie – two more nightgown muslins

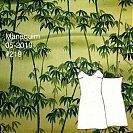
After my first muslin of a potential honeymoon nightgown knocked that pattern out of the running, I turned to the slip dress pattern (#219) from the May 2010 issue of Manequim magazine as my next candidate.

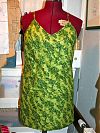
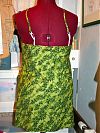
This is a simple bias dress with bust darts and bias edge on the neckline. The pattern calls for you to have two lengths of bias edging – the longer one finishes the neckline from the front bust peak, under the arms, around the back and up to the other bust peak. The shorter length of bias finishes the neckline in the centre front portion and continues up to form the straps. Since I didn’t have any suitable lightweight muslin in my stash, I sacrificed this bamboo-printed Robert Kauffman cotton I’d bought on a binge at equilter.com about 6-7 years ago. I hadn’t decided what to do with it between then and now so I figured it’d be good for a wearable muslin.

DIY Wedding Gown – attaching the bodice and skirt

Finally I can give you another progress report on the wedding gown! Don’t worry, as you can see below, I’ve been continuing to work on it on my weekends and Wedsnesdays, so I’ve got a lot of progress to cover!

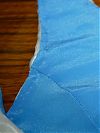
For the first time I got to turn my attentions to the skirt, which is exactly as it was when it was attached to Granny’s dress, albeit separated from the bodice at the (very gathered) waist seam. But there was a prominent blue stain in the centre front (CF) panel at about thigh-height from the blue tissue paper it was wrapped in for 60+ years, so the first step was to unpick and remove that entire panel. I then moved the two triangular sections that had been on either side of it together to form a new CF:

I actually prefer the way these two look together, forming a beautiful triangular, almost art-Deco detail at the CF!

But back to the bodice, where I had completed prickstitching along the entire neck and arm edges. I just free-handed this without my post-it guide and I actually think this looks better than my zipper insertion!

Bridal bodice – buttons, lining and shopping!

Ok after that little lingerie diversion (and a day spent being filmed for BBC1!), we’re back on the wedding gown!

First up was a quick fitting of the shell with all the boning pieces inserted and the waist stay hooked. And I can breathe a sigh of relief, because it’s looking good. A tiny bit of horizontal pulls around the zipper (which can be fixed by laying off the ice cream a bit) and a bit of boning show-through at the centre front (which I’m going to hold off worrying about for now, but I may just shorten that boning piece so it stops below the bust).

So I can push on ahead, safe in the knowledge that there’s no major fitting issues…

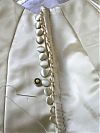
First up – I sewed on all 13 original covered buttons along the right side’s zipper, matching up with the original satin loops I placed along the overlap during the zipper insertion step.

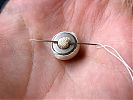
On the surface, these look like ordinary covered buttons, but look at the underside!

I’ve never seen buttons like this before in my life! Instead of a shank with a hole, there’s a mound of stuffed fabric to sew through! What a strange vintage detail! I’ve learned so much from taking the original gown apart…

Bridal bodice – finishing the edges, waist stay, and zipper

The next step in my epic wedding gown project was to properly finish the neckline and armhole edges in advance of the lining. Instead of most lined garments where you construct the outer shell, construct the inner shell, then place the two together, right sides facing and sew around the opening edges, in this case Bridal Couture advises us to construct the outer shell, fold in the opening edge seam allowances, then create the lining, with the opening edges similarly folded inside, and then place the two together wrong sides facing and very carefully fell-stitch along the opening edges, prickstitching the lining where necessary.

So here are the neckline and armhole opening edges, nicely clipped, pressed, and catchstitched:

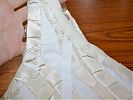
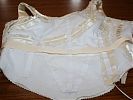
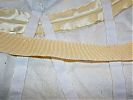
The next step was to add the waist stay, tacked to the boning channels with bottom edge of grosgrain on the marked waistline:

Bridal bodice – Piping and basting

…in which I work with more piping than a plumber and more basting than a Thanksgiving dinner!

When I last checked in, I had cut and prepped all the pieces of the bodice, so it was now the point in my plan to sort out the piping if I was going to do so (and you’ve probably rightly concluded from the title that I did!). I had about 80cm of piping from the original dress’s waist seam, but I realised this wouldn’t be enough to pipe both sides of pieces #2 and #7 like I’d planned. So before I could do anything, I had to make some piping!

Luckily, the dress’s collar pieces were nice and long and on the bias, so this was a piece of cake. I cut four strips of 5cm wide and joined the edges together to make one long strip, then inserted my 2m of satin rattail and ran the whole thing through the sewing machine with the zipper foot.

But as I’ve already established, I can’t be making errant needle holes nor can I afford to use the seam ripper any more than what’s absolutely necessary, so in order to get the piping inserted perfectly on the first try, some hand basting was in order.

First, I basted the piping to one of the pieces, aligning the piping’s stitches with the basted seam lines:

And I did that for all four piped seams: