Blog

Bridal bodice – Piping and basting

…in which I work with more piping than a plumber and more basting than a Thanksgiving dinner!

When I last checked in, I had cut and prepped all the pieces of the bodice, so it was now the point in my plan to sort out the piping if I was going to do so (and you’ve probably rightly concluded from the title that I did!). I had about 80cm of piping from the original dress’s waist seam, but I realised this wouldn’t be enough to pipe both sides of pieces #2 and #7 like I’d planned. So before I could do anything, I had to make some piping!

Luckily, the dress’s collar pieces were nice and long and on the bias, so this was a piece of cake. I cut four strips of 5cm wide and joined the edges together to make one long strip, then inserted my 2m of satin rattail and ran the whole thing through the sewing machine with the zipper foot.

But as I’ve already established, I can’t be making errant needle holes nor can I afford to use the seam ripper any more than what’s absolutely necessary, so in order to get the piping inserted perfectly on the first try, some hand basting was in order.

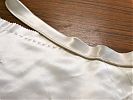
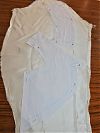
First, I basted the piping to one of the pieces, aligning the piping’s stitches with the basted seam lines:

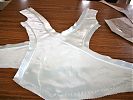
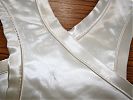
And I did that for all four piped seams:

Bridal bodice – Prepping the pieces

I finally got the muslin fixed and finished! Thanks for all your advice, though I haven’t had a chance to reply to hardly any of you, for which I do apologise…

Muslin #3 changes –

  1. Unpinned the shoulder change, took off the waist stay, and since it seemed to be pulling everything upwards before, I reasoned that it must be too low. I repinned it a little higher and everything seemed to sit nicely and correct those weird problems it threw up before.
  2. I’ve said it before but I’ll say it again – I detest Rigilene boning! Only someone who hates women could’ve come up with those tiny, needle-like implements of torture. My spiral steel boning for the finished dress arrived and it just feels wonderful.
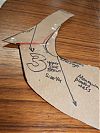
  3. No one actually came up with the fix I needed for piece #3’s weird bubble. As it turns out I just needed to flatten the curve a bit below the inset corner. (Before and After are below)
  4. There’s no way I’m muslining the skirt. It’d literally take a whole week of sewing time to even approximate the panels on the existing skirt, plus the drape and weight of the muslin fabric is totally different, and it won’t achieve much of anything I won’t learn in the actual skirt attachment anyway. End of story.
  5. Yes, I know about wearing proper undergarments. I’ve been wearing the bra I intend to wear on the day all along (though I got sharpie on it during my muslin marking process so I need to buy another copy of it, boo.). I was not being serious about the push up bra.

So with the muslin done, on with the dress itself!! Hurrah!

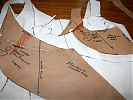
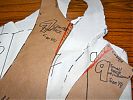
First step was to lay the pattern pieces onto the wrong side of my flannel underlining, fuzzy side down (I’d been transferring all my changes onto them and I prefer paper with no seam allowances over muslin with allowances). Once pinned in place, I then chalked the seam lines, waist, centre back and fronts, and the two notches onto it. Then I cut out the pieces with eyeballed seam allowances (when you’re dealing with seamlines, the size of the allowances are largely unimportant).

Next I laid the flannel pieces onto the wrong side of the satin, pinning only in the seam allowances because all the pin holes show on this fabric.

Yet another bridal bodice muslin

I’m no big fan of muslins and fitting tweaks, so the title is really reflecting my impatience at still being in the fitting stage. I want to get on with the fun stuff! But I also really want to get the fit and design perfect here as I can’t really go unpicking the vintage satin (the needle holes remain), so here I am, still soldiering on, though hopefully not for much longer…

Yesterday was my day off so I devoted pretty much the entire day to this dress. Right after breakfast I made up Muslin #2 (not shown because no one was around to photograph me), which incorporated the neckline changes and better-drafted add-on straps. There’s no photos, but essentially, I just needed to pinch some fabric out in three places, which you can see here shaded in orange on my pattern pieces:

So I made those changes to my paper pattern, unpicked pieces 1 and 3 from the muslin, cut new ones out, and reattached them, bringing us to Muslin #3. And I was pretty happy with the fit, apart from a bulge above my right breast which I immediately knew the cause of and fixed it on the paper pattern.

Vintage wedding gown photos

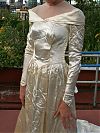
So you’ve already seen a bunch of detailed photos of my Granny’s gown (from 1949) laid out flat, but I wanted some on a real person so you could really see the style lines and how it falls. And this way I can get some nice Before and After shots when I refashion it into my gown for September.

Big big big HUGE thanks to my neighbour Kate who not only fit into this tiny dress (respect!) but actually humoured me and let me take photos of her in it to post to the internet (Secretly, I think she had fun!). Kate’s also engaged and I was thrilled to learn that she’s not having wedding colours, either!

So let the vintage dress photos commence!

Bridal Bodice update

When you last heard about my wedding gown, it was two years ago(!!) and I was leaning towards turning my Granny’s gown from 1949 into something with a cowl neck, deep back, and sleek lines, using Vogue 2965 as my starting point.

But recently I’ve been looking more closely at the fabric I’ve got to work with in my grandmother’s gown, and my recent cowl sewing adventure has reminded me that cowl necks need pretty huge amounts of fabric, can’t easily be pieced together, and on top of that, the silk satin in her gown is more of the heavyweight duchesse variety than something very drapey that would cowl nicely. And while I love a low back, it does make things awkward for bras and any sort of shapewear, too.

So I had a bit of a wake up call and told one of my bridesmaids to keep reminding me that “This is just one dress. It is not all dresses.” (thanks, Stacy!). Yes, I like cowls. But I also like other things, too. And I do not need to put everything I like into one dress!

Free ruffled wristlet pattern!

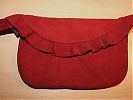
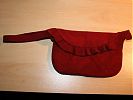
This might possibly be my longest running project-to-post duration since I drafted and sewed up this cute wristlet last February using some scrap leather and some vintage lingerie fabric for a lining. I made it as a gift for a neighbour who wanted to remember a dear departed friend who left her a stash of vintage fabrics, and I loved the resulting wristlet purse so much that I felt compelled to share it with all of you! But I had problems digitising the pattern so it languished… but recently I was inspired to take another stab at it and I love the way it turned out!

The great thing is that because it’s a small purse, you can really make this out of leather scraps, or even an old leather skirt or jacket from a charity shop (thrift store or op-shop)! Or it doesn’t even have to be from leather at all, it’d work equally well in corduroy, denim, or even felt! And because it’s a wristlet, you can keep your hands free for drinks & canapes, or for beers & barbecues!

Download the free pattern by clicking the image below!

To anyone linking – please link to this page, not directly to the pdf file!

I hope you all enjoy this and please email me any photos if you make one for yourself! I’d rate this as an Advanced Beginner project just because of sewing the zipper, but it’d make a GREAT first leather project if you’ve never sewed with it before.

Illustrated instructions!

Text instructions are included in the downloadable file, but I wanted to provide photo instructions to make it easier for beginners to sew this, too. But when I put the photos in the file itself, it turned out way too big so I compromised and I’m offering them here instead!

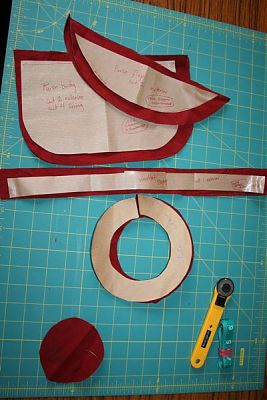
Step 1


Using the exterior fabric, cut out two copies of the purse body, two copies of the flap, one of the ruffle, and one of the strap (or omit the strap for a ruffled clutch). The interior circle from the ruffle is unused and can be turned into a decorative flower by pinching the centre and securing with a few hand stitches.

Addicted to sewing

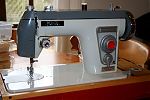
This weekend James and I took a trip out to Oxford to celebrate our friend Dori’s birthday. While we were there, she showed me her newest pride a joy, a “Jones” vintage sewing machine that she’d just bought from a charity shop for £4!

It’s a real beauty, with a sturdy wooden case with folding arm and attached wooden base, nice solid steel construction, and a compartment full of random accessories. She was a bit disappointed to learn that it only does straight stitches (no zigzag), but I assured her that straight stitch machines usually do that one thing really, really well and that she still got a bargain.

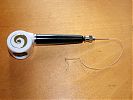
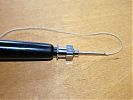
Included with the machine was a variety of machine feet which I was able to identify, but the true mystery was this tool, which to my eyes really looks like its purpose must be to inject thread straight into a vein!!

Vintage Navy uniform detail photos

I realise I’m an entire week late for Veterans Day and Remembrance Day here, but I thought that my dad’s vintage 1960s Navy uniform would still be just as interesting today.

Here’s my dad leaving Boot Camp in 1960:

(Compare that to his Santa-look these days – he blames it on all the beer and bratwurst when he was stationed in Germany!)

My dad was cleaning out his closet and thought I might like his old uniforms, so he dry cleaned them up and sent over the navy wool dress uniform first (the whites are coming later!). Much to my surprise, his old uniform fit me exactly – it was almost eerie, I tell you! Apart from the arms being an inch or so too long in the cuffed-sleeve top, it’s like it was made precisely to my measurements. And apart from one worn hole in the trousers, they absolutely look like new…

Me in 2008:

Vintage Sewing Books

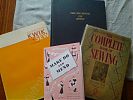
I recently had a spate of vintage book buying, and I’ve finally had a chance over the last month or so to properly digest them. Most of them were purchased from AbeBooks.com, which I’d used and loved years ago and then promptly forgot existed until they sent me a “come back to us!” voucher out of the blue. Well, it worked because I ended up with Kwik Sew Method Swim Wear and Kwik Sew Method Lingerie, both by Kerstin Martensson, plus The Complete Book of Sewing by Constance Talbot, and a reproduction of the famous WWII pamphlet Make Do And Mend (bought from Bletchley Park‘s gift shop).

Vintage wedding gown detail photos

My grandmother’s wedding dress arrived safely on Friday! I person, it’s absolutely jaw, droppingly gorgeous, even 59 years later. The preview photos I drew the technical drawing from didn’t do it justice, so I’m hoping these photos on James’s DSLR will help to show some of the amazing vintage details.

The dress is entirely silk satin with no lace, embroidery, or beading (just from a mesh panel around the neckline), and the weave of the silk is still perfectly and soft and so very strong still. Granny told me she bought this in a shop on South Street in Philadelphia in 1949, but I’m afraid I can’t tell you the designer as there’s no label and she’s long since forgotten the details. But the workmanship speaks for itself, and it’s very interesting for me to see that they’ve not wasted any silk where it couldn’t be seen – the mesh fabric is used for all facings, the seam allowances are only 1/2 inch, and there’s no lining.

Laid out on our table: