Along with making my first pair of socks a few months ago, I got to tick off another First this weekend when my friend Sophie came over and we made shoes! These actually weren’t her first pair of shoes – last year she took an intensive shoe-making class where she got to use lasts and industrial shoe-specific sewing machines, but making espadrilles using home-friendly methods was new for us both.
I’ve been wanting to make shoes for a while, encouraged by other sewists like Jasika who make very professional-looking shoes that you’d actually want to wear! So when the opportunity arose to choose some Prym products (aka Dritz in the US) to try out, their espadrille-making supplies were high on my list, and they kindly provided the soles in my size (EU40) as well as in EU37 and EU45 for good measure. The other sizes, miraculously, correspond to Sophie’s shoe size and James’s, so they’ll all get put to good use!
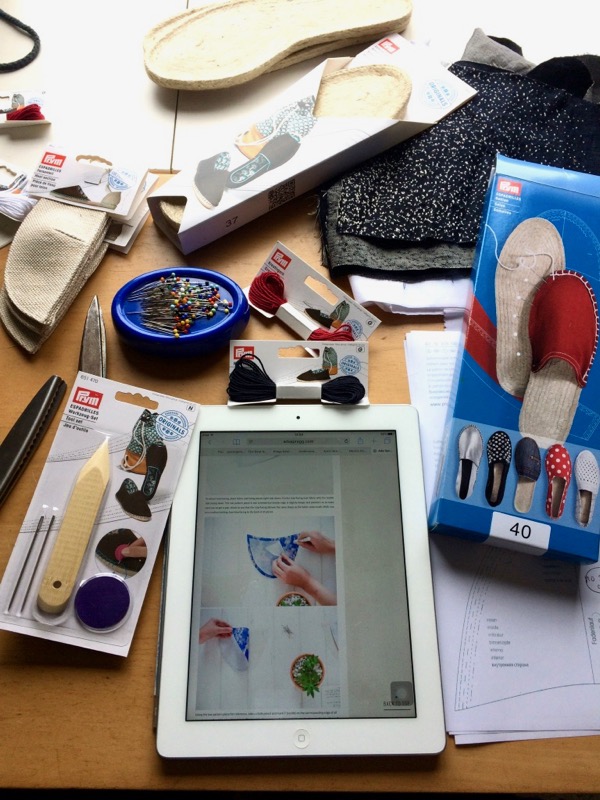
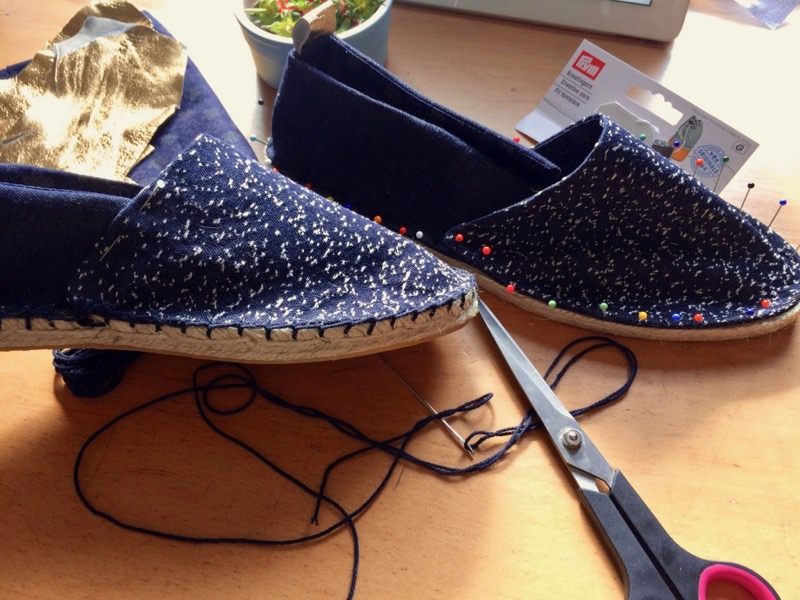
When you buy the espadrille soles, you pretty much just get the pair of soles (with a nice rubber bottom fused onto the twine/cord base) and a pattern piece sheet, but no instructions! So after a bit of googling, I found Ada Spragg’s very helpful tutorial so we used that as our instructions for the day. It’s worth noting that the pattern pieces do NOT include seam allowances, and both of us found the soles to be true to size, albeit slightly longer and narrower than we prefer (but the end results fit great). Sophie actually used the next pattern size up for her front piece to account for her wide feet, which worked well, and you can similarly experiment a bit to perfect your fit.

The first step was to cut out three pairs of both the front and back pattern pieces, in exterior fabric, heavy interfacing, and lining fabric. After fusing the interfacing to the exterior, you then just sew the exteriors to the matching lining pieces, right sides together, with a hole to flip right side out. This was all pretty quick and easy on the sewing machine, with some heavy duty pressing afterwards to make the edges crisp.
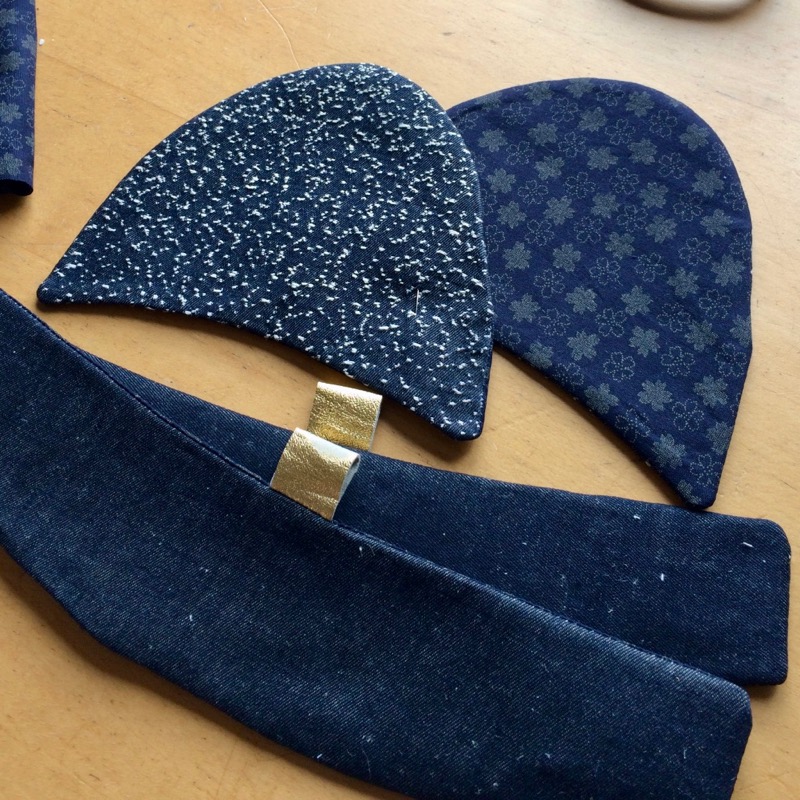
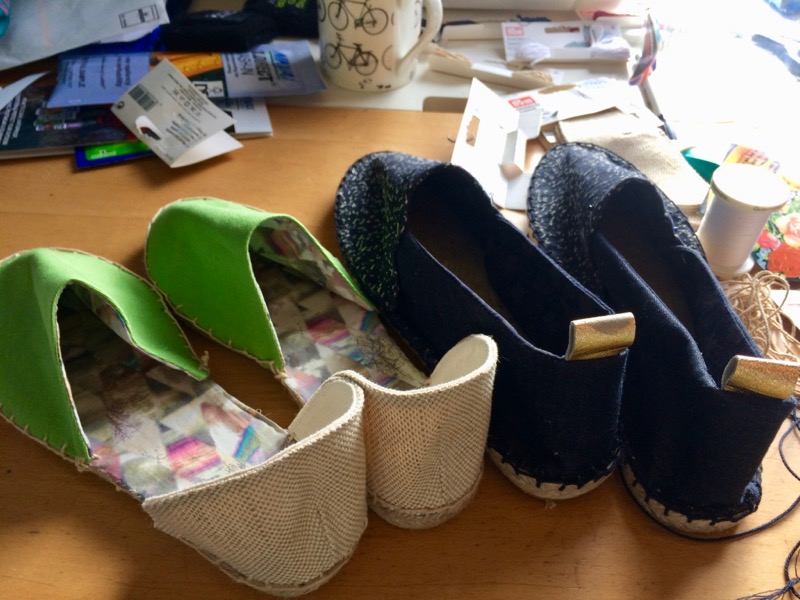
I opted to use some of the amazing starfield ombre denim fabric leftover from my Gimlet dress for the exterior, and Japanese cotton leftover from my Almada Robe for mine, and Sophie brought her own green twill and chose to line hers (and an extra sole lining!) with Liberty lawn leftover from my Vogue shirt. Having bought traditional espadrilles in the past and not worn them, she opted to use the pre-made heel pieces and then attach an ankle ribbon later.
Once the pieces are constructed, you then pin them to the soles, pretty much just using the base as one big pin cushion and making sure everything’s centred and sitting nicely, with an inch-or-so overlap where the two pieces meet at the sides.
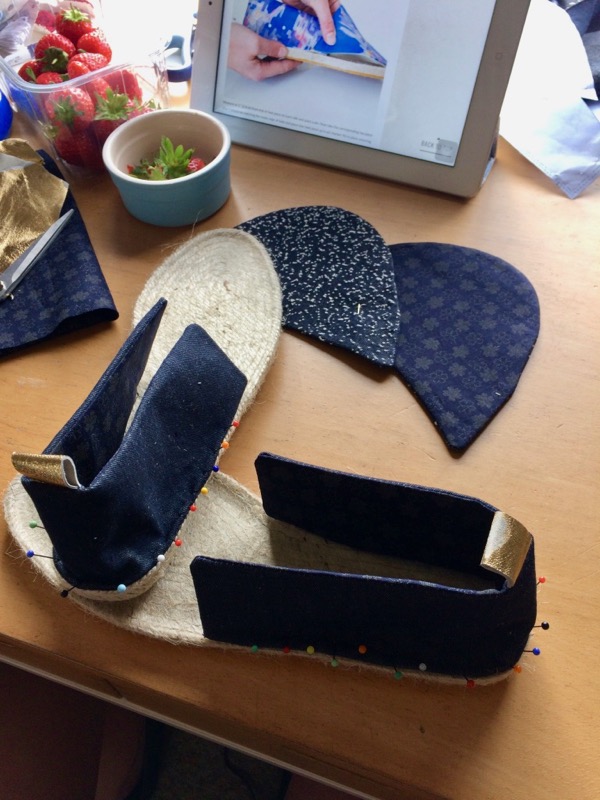
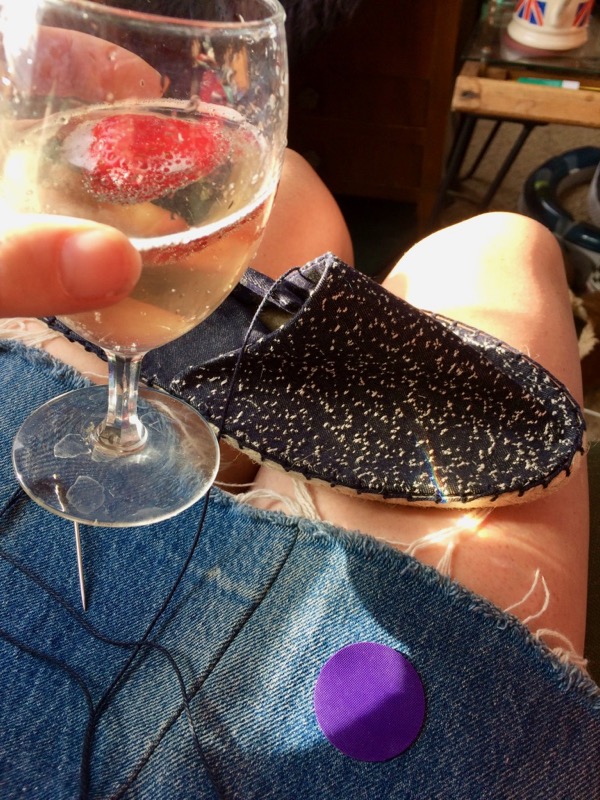
Then came the hand sewing! I was toying between the navy thread and the red, but I’m glad I went with the less-contrasting navy just in case my blanket stitching wasn’t quite even! This was by far the slowest part of the whole process, and we both agreed that the Espadrille Tool Kit made a huge difference here, as it contains two little circular rubber grippers that make it sooooooo much easier to pull the needle through the base & thick fabrics without totally killing your hands (So it’s annoying that I can’t find the Tool Kit in stock anywhere in the UK! Please share in the comments if you know of somewhere.).
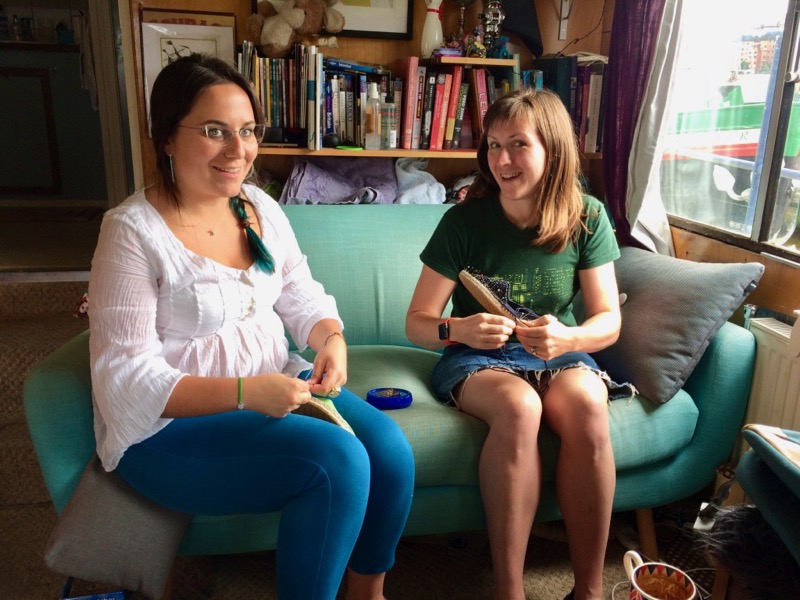
This was a really great activity to share with a friend, since we could do the cutting together, the sewing and pressing portion one at a time swapping off in my sewing room, and then do all the hand stitching on the sofa over a glass of bubbly!
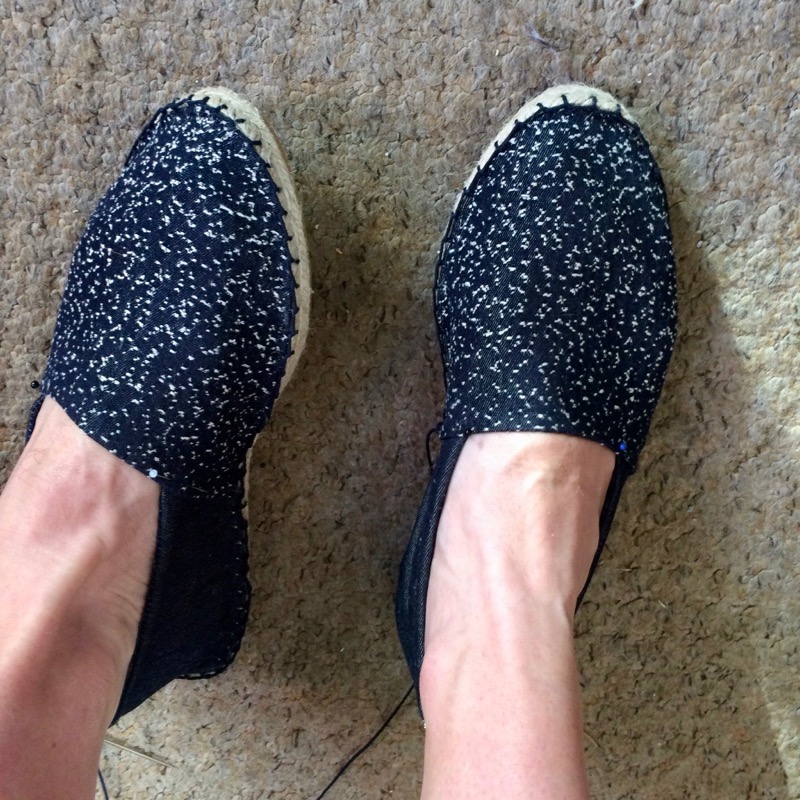
Once the uppers are hand stitched onto the soles, the last step was to try them on (they fit! phew!) and pin the overlap in place to perfect it. I found that mine were most comfortable with only a tiny bit of overlap at the opening, and they stay on my feet nicely (well enough to cycle in!) as well as being super comfortable!
In all, it took us around four hours with an awful lot of chatting and design decisions so it’s totally doable for a social sewing activity (or even as a class, as I’ve seen some places offer). The soles cost about a tenner for a pair, and even if you add on the tool kit and specialty thread on top (which I’d recommend), they work out to be a very economical pair of shoes!
I was so chuffed with the end result that, as our menfolk joined us in the evening, I decided to wear these out to dinner! I think my biggest surprise with the whole process was exactly how comfortable these are – I’m a big fan of barefoot shoes (like Vivobarefoot) and I wasn’t sure how my feet would like the stiffer sole, but I’m actually wearing them all day to the office today and it’s like wearing slippers. But stylish slippers!
I’ve still got two more soles, so I’m definitely thinking one’s got to be made from my green pearlised leather scraps, and I might even play with the design of the upper to incorporate in a twist or tie in some way…
You can buy all the supplies to make your own espadrilles at a variety of stores, including Minerva and Guthrie & Ghani here in the UK.
Note: Prym kindly supplied the materials for these shoes, but in no way pressured me to post about them or any part of the process.