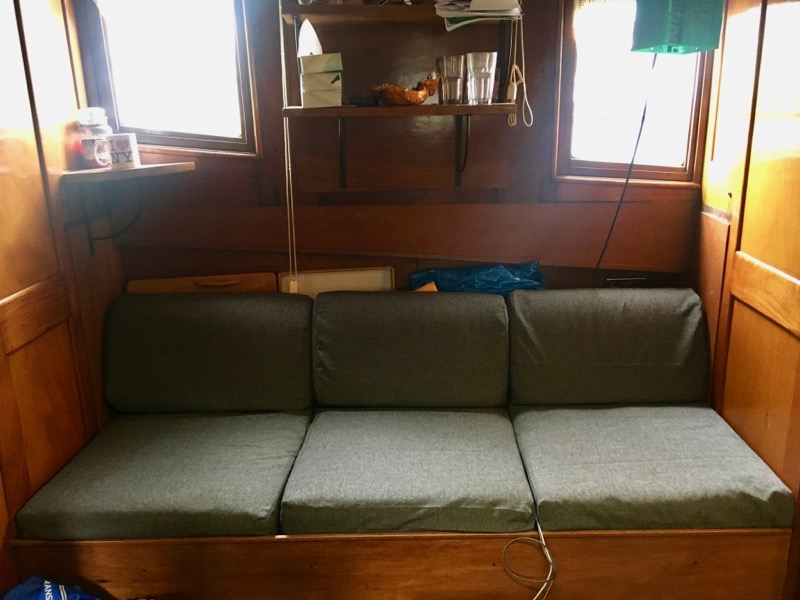
After wrestling with the sticky velvet upholstery fabric last summer to make a set of slipcovers for our sofa, I swore it’d be a long, long time before I voluntarily sewed home dec again. But that was before we moved back into the tiny Captain’s Cabin on our boat (while renovations are still ongoing in the much larger, main living portion), and I had to stare at the hideous sofa fabric every single day.
I mean, how ugly is this? It belongs in a 1980s caravan!!

Unlike our other, freestanding sofa I covered last year, this one is built-in and consist of six separate cushions. So I couldn’t drape a complete cover over the whole thing – I’d need to construct six separate covers – one for each cushion. I set about measuring them and getting a plan together to figure out what the shapes would look like and how much fabric I’d need to buy.

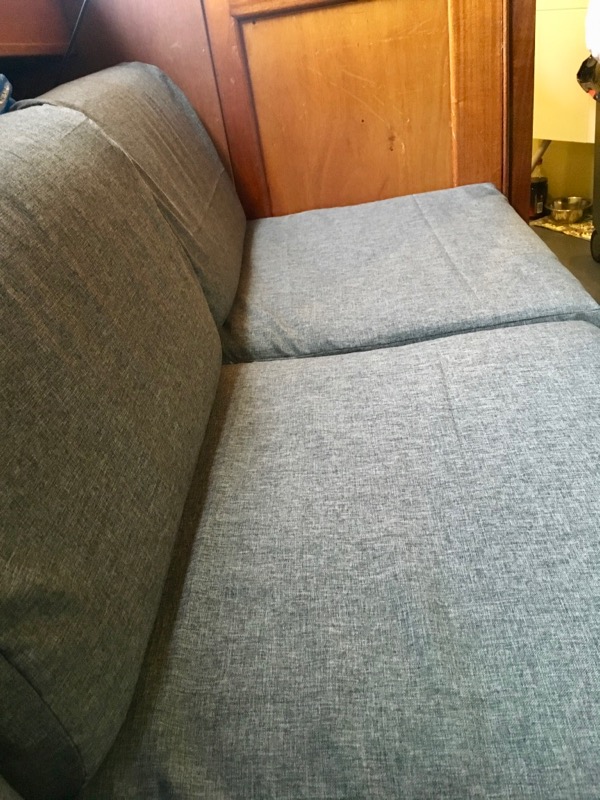
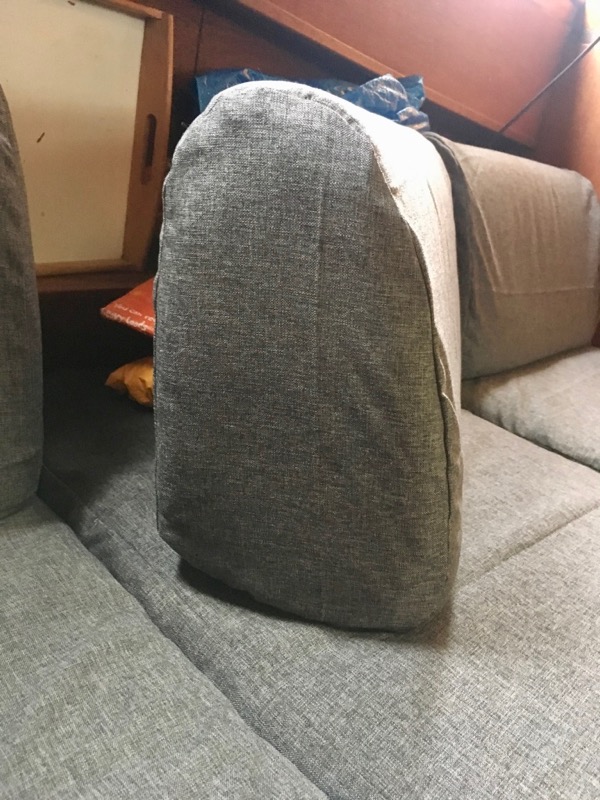
The sofa has two different cushion types – a rectangular, flat cushion which you sit on, and a weird, kinda-triangular back rest cushion that you lean against. The upright cushions have a really weird shape at the sides, which I found easier to adjust in Illustrator in order to get the outside measurement to be exactly what I needed it to be to match up. This shape I actually printed out and used as a pattern, but I just measured directly onto the fabric for the other rectangles. Thankfully, by using Illustrator it meant I could place the pieces into one of my yardage templates and worked out that I needed 2m of fabric for each cushion set, so 6m in total.
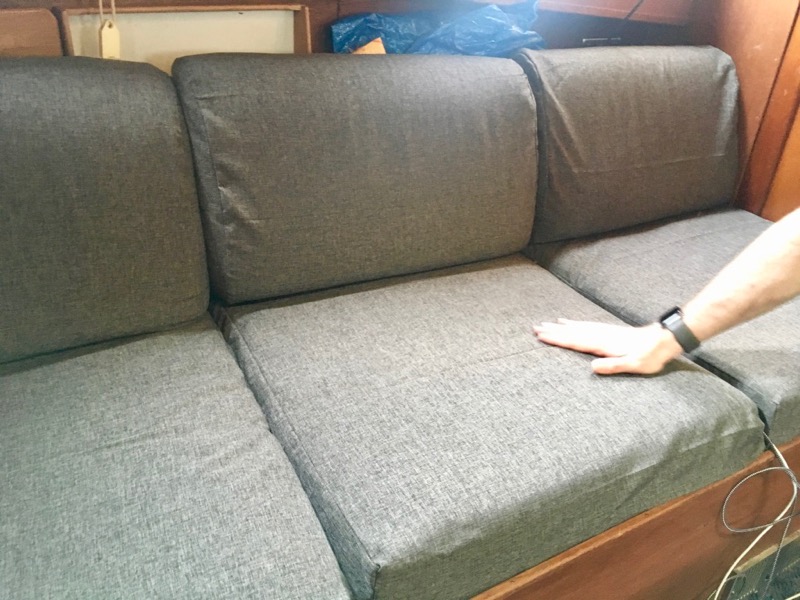
Having learned from the previous slipcover, I bought 6.5m just to be sure. Stoff & Stil have a fantastic variety of upholstery fabrics, but J and I settled on the non-offensive-therefore-perfect-for-renting dark grey/black upholstery fabric. We normally rent out this cabin and will do so again after we can move back over into the main part of the boat, so being able to hide stains, wear, and not be some wild colour some people might not like was key.
6.5m of fabric along with 6 long, chunky black zippers came to £90 in total, which certainly isn’t cheap but is certainly worth more than that in the rental value of the cabin.

Unlike the velvet last year, this upholstery fabric didn’t have a sticky underside that gummed up my needle and stuck to my presser foot, thank God! But it did fray quite a bit, so I had to overlock the edges of all the pieces before I started, but other than that, it was pretty stress-free to sew, even with all the zippers and sharp corners.

The only advantage to the sticky backing is that it keeps the cover in place against the cushions underneath. Despite these covers being a super close fit (it took the two of us to wrestle each one on!), you still get a few wrinkles during use just because the fabric can slide around a little. But if that’s the trade-off for not wanting to scream continuously through the construction, I’ll take it!
I don’t find home dec sewing to be enjoyable in the slightest, but I really can’t fault the result – the cabin is so small that the sofa is pretty much inescapable and these covers have meant that what used to be “ugh, the previous owners had the worst taste!” is now “ah, I’m glad I made those – it’s so much better!”