Blog

PSA – Freezer paper and laser printers don't mix!

This is a bit of a Public Service Announcement, but as I couldn’t find this information easily myself, I thought it was really important to get it out there to save some other poor sod the frustration and money I just spent.

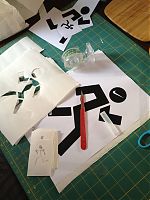
Freezer paper stencils are great – fast, fairly easy, you get good results, and you can reuse the stencils a few times. Search for freezer paper stencil tutorials online, and you’ll get tons of results, all saying you can either print directly onto the freezer paper, or lay your design on top of the freezer paper, and trace around it with an exacto knife.

The latter is what I’ve always done in the past, but for my upcoming RDC refashioning project, I have a ton of stencilling to do, so I thought if I could cut out the step of taping the paper layers together, it’d go a bit quicker.

Only thing is, clearly none of the well-meaning tutorials out there own a laser printer. Laser printers use heat to print. Freezer paper uses heat to bond to the fabric. You see where this is going…?

DO NOT PRINT DIRECTLY ONTO FREEZER PAPER WITH A LASER PRINTER!

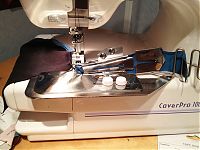
Coverstitch binder attachment tips & tricks

Way back when I was making my first muslins of my new running gear, I realised that the methods I’d previously used to finish knit necklines (elastic, FOE, serged bindings, etc) were just NOT going to cut it on slippery exercise lycra. The results were awful and sloppy, so I allowed myself to be convinced by Pattern Review that a coverstitch binder was the way forward.

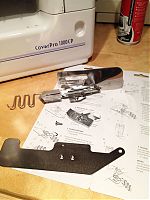
At £80 a pop, they’re not a purchase to be taken lightly, and they’re probably about the most expensive thing you can buy for your sewing room, short of a machine or a dressform! But I wanted to ensure the most hassle-free experience, so I went for a brand-name Janome attachment rather than one of the cheaper, much more hacky eBay jobs. I bought mine from Jaycotts and Janome shipped it directly to me:

Unlike a lot of the eBay binders, this comes with everything you need to get started – the big metal plate, the shorter foot, and a big set of instructions on top of the binder attachment itself. So it’s expensive, but you don’t need to then go and buy all the non-optional bits separately – but I can understand the allure of just buying the binder for your second or third if you’ve already got the plate, foot, and instructions!

Beforemath & Aftermath sewing

Thank you all so much for your sympathy and condolences and kind thoughts regarding Bosco’s sudden death. Last week was one of the worst of my life and I’m sorry to say that his departure was only one of a long line of awful things which happened to myself and those I love, so please bear with me while I piece things back together. I’m going to be more fragile than usual for a while.

In an attempt to clear the slate and document some blogging-accumulation guilt, here’s a catchup on the sewing-related events over the past fortnight…

Montreal

I was in Montreal for a few days for work immediately after my birthday, and I managed to shoehorn a very brief visit to Suzi Spandex into my 18 hour work days (in preparation for the launch of Zik.ca – Canadians, go see what I’ve been slaving over for the past 9 months in my day job!).

The shop itself was a bit of a PITA to get to – it doesn’t look far from downtown on the map but was a metro ride + 15-20 minute walk through a really dull neighbourhood, and I’m glad I had the address because the setup was very much like the NYC Garment District – an unmarked, nondescript office building with their premesis several floors up, with a front office and enormous warehouse full of rolls of fabric.

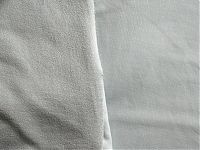
The setting may have been sparse, but I got such a warm welcome and the lady really helped me to choose the best wicking exercise fabric, which by all accounts seems to be their version of supplex, “Suziplex”.

It’s got a great hand and recovery, and fabulously soft inner, loopy side:

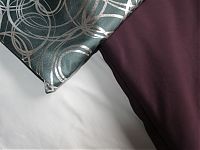
I bought 2m of dark, muted purple and 1m of pale grey Suziplex, and then another metre of some muted turquoise lycra with silver foil swirls.

Yet more lycra…

Are you bored with lycra yet?

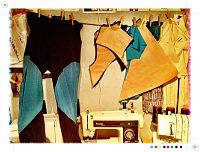
If you recall, I’m sewing three different pieces of running gear – leggings, a vest top, and a long sleeved top. The vest top has stalled while I wait for my new coverstitch binder to arrive, but I was able to finish my leggings this weekend and cut out all the pieces for the long sleeved top.

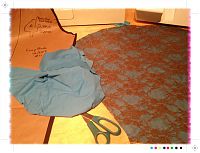
When I went to look through my stash for fabrics, though, I realised that the long sleeved top needs three different fabrics in order to get a contrast on the upper body, and again at the hip pockets. So I’m using the black supplex for the top and sleeves, leftover turquoise for the lower back and front hips, and the same turquoise but overlaid with olive green stretch lace for the front body. I’m thinking a bit of lace in the running community won’t go amiss.

But now this top is stalled while I await more short, black invisible zips (which should arrive with my binder!) for the pockets and the upper front!

It’s realistically looking like I’ll only have my leggings ready for the Paris half marathon on Sunday, so I needed to take them out for a test run last night prior to the big event.

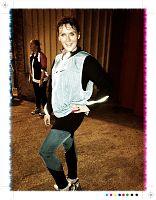
Be prepared for a totally unflattering, post-hour-long RDC session photo…

(I’m wearing the blue Nike pinny over my jacket ‘cos I’m a group leader!) Overall, I’m really happy with the fit. The ankles are still a bit baggy (even after I took them in a bunch!), but the fit everywhere else was perfect. I was a bit concerned about chafing since I don’t have a flatlock machine so my overlocked seams make small ridges inside, but they were absolutely fine, and the waistband was very comfortable and sat exactly where I wanted it to be with no shifting or tugging. Result! I’ll totally be making more of these from my customised base pattern…

First running gear muslins

I love it when different areas of my life start overlapping! I’ve been a runner for about 7-8 years but I’ve only really sewn running gear a few times (mostly because my mom knows what I like and gets good stuff on sale for me!). But I’ve got the itch to sew the lycra again, and so I made the first steps towards making my own running gear designs a reality.

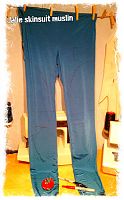
First step was to make quick and dirty muslins to check the fit and mark style lines. The Jalie 3135 skinsuit pattern was my basis for my running leggings (minus the top half and the front zipper opening!). I used the “silk touch” lycra jersey from Tia Knight as my muslin fabric here since it was the cheapest 4-way stretch she had, but it’s surprisingly really nice! It’s got a hand like a silk jersey, but seems a bit too drapey to be ideal in exercise gear, though it should be fine for the occasional accents or panels if I want to.

So I made my muslin, tried it on, and while I was wearing it, drew lot of placement and design lines straight on the fabric with a Sharpie:

  • I drew in my waistline just under the pattern’s torso double line
  • I marked the knees on front & back, and also where the curve of my bum lies (helpful for placing design lines later!)
  • I took out some excess in the ankle (no cankles here!) and about 4 inches off the length (the legs are reeeeeeeeally long – maybe to cover skates?)
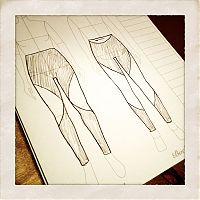
  • And then, finally, I drew in some curved design lines where I thought they might look nice around my thighs and calves

The end result looks a bit like a liposuction patient (which is why I’m not modelling it!!), but it definitely served its purpose!

A bit of everything

Housekeeping time! I’ve got lots of little bits to update you on, either with my in-progress project, upcoming things, or small projects I managed to gloss over at the time…

So in no particular order:

My purple coat

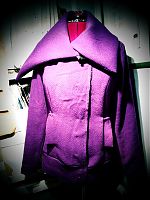
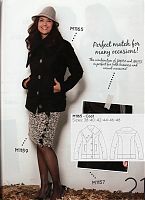
Progress is slow on my purple jacket/coat from the Winter 2011 MyImage magazine, not because of anything to do with the coat, but because life keeps getting in the way. I’ve finished the shell and I’m onto the lining now, so I’ve just got to finish constructing the lining, attach the two together, flip, and sew the buttonholes.

I’d prefer to do the buttonholes on my vintage buttonholer attachment, but the templates I have aren’t big enough for my enormous (2.5 inch?) buttons. Anyone know a clean way around this? Can I set the buttonholer to do double-length holes somehow?

In any case, I should be able to finish this coat this weekend and (hopefully) get a photoshoot in. Not long now before I can do evenings photos again – it’s already light out when I go running before work!

Gift update

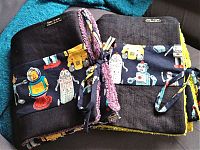
My go-to baby gift is to sew a changing mat, with a hand towel on one side, and nice fabric on the other with big, deep pockets and ties to fold it all up. I had two baby boys arrive in January, so both sets of parents got changing mats with this awesome Alexander Henry vintage robot fabric. 1 meter of it wasn’t quite enough to stretch to the pockets, too, so I filled in with some scrap denim.

MyImage Purple coat – in progress

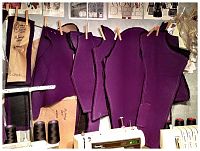
Yesterday I mentioned that I’ve started sewing the asymmetric, collared coat from the Winter 2011 MyImage magazine, and after a prep period that felt like forever (probably exasperated by the fact that my ironing station is hovering around 0C/30F), I’ve now got some progress to show you!

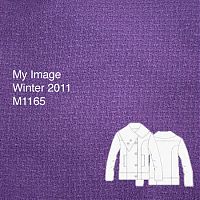
I’m sewing this up in a wonderful purple basketweave/boucle coating, which was another gift from Claire (she’s so good to me!) at the end of last winter. I always like to underline my coats when I can to just add that little bit of extra warmth, but it made even more sense here as it will help to stabilise the coating fabric and prevent any bagging out that might otherwise occur with looser-weave fabrics. The alternative is to block-fuse the coating with a lightweight interfacing, like I did with my Patrones duffle coat.

For this coat, all the facings were interfaced (the usual front and back facings, plus the front and back hip band facings), and pretty much everything else was underlined in black cotton flannel. This meant there was a lot of prep – everything but like 3 pieces needed underlining or interfacing! I love sewing, but prepping is dull dull dull work!

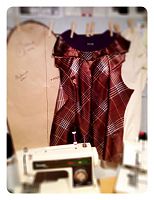
I machine-basted the flannel underlining to the coat pieces here, because frankly, the prep work was tedious enough as it was. I normally hand baste my underlinings, but in this case, the coating and the flannel “grabbed” each other quite nicely, so this, plus the walking foot, plus a long basting stitch meant it felt okay to do it by machine. I still made sure to never turn any corners though (when basting underlinings, you always stitch to the edge, cut the threads, reposition, and stitch the adjacent side so that you don’t create puckers at the corner)!

Morphing the Manequim sweater pattern to my size

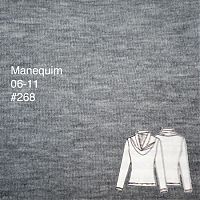
If you remember from earlier in the week, my next project is to make this collared sweater from the June 2011 Manequim magazine:

Since the pattern is only in one size, “Small”, my strategy was to take an existing long sleeved teeshirt pattern that I know fits me well, trace that, then trace the neckline area from the Manequim pattern overlaid onto it and morph the two together. For simplicity’s sake, I wanted to keep the collar piece as unaltered as possible.

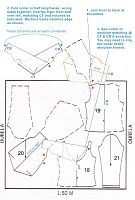
Here’s that wonderful diagram again showing how the Manequim pattern fits together, so we all have an idea in our head of what we’re aiming towards:

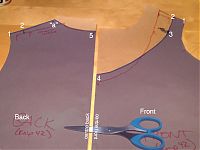
While overlaying the Manequim pattern onto mine, I wasn’t quite sure what I should use as the “frame of reference” to align the two patterns together – should I use the Centre Front & Centre Back? Or the shoulder seam/armscye corner?

In the end, it turned out that sorting out the Back first was the key to making the bigger changes on the Front piece work, since the Back of my teeshirt and the Back of this pattern were much more similar.


I’ve shaded my final pattern shapes in blue here to try to make it clearer. The original teeshirt pattern is (mostly) at the cut edge of the paper. Ignore the red lines – they were misaligned tracings!

Upcoming January sewing

I’ve finally emerged from the craptacular flu (which then turned into bronchitis) that I’ve been under since Dec 28 – thank you for all your well wishes! For me, it really feels like the new year, 16 days late!

The Ruby Slip was my first garment of 2012, but my second and third aren’t far away…

Grey flannel trousers

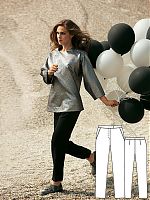
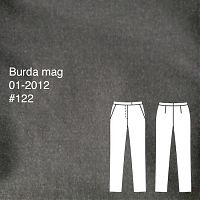
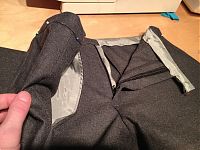
Just before Christmas, I met up with Claire for lunch and she gifted me a massive length of wonderful dark grey flannel. It’s so soft and lovely that initially I thought a dress, but then realised I’m likely to get much more wear out of a really chic, comfortable pair of dress trousers. So on Friday night I traced and cut Burda Jan 12 #122, mostly because the issue was handy, but also because they looked to be a great basic. These have the illustrated instructions for this issue, but I could sew trousers blindfolded by this point, so the instructions didn’t make much difference to me.

I sewed this on and off over the weekend and nearly completed these despite hardly being at home. As a nice tie-in to my previous garment, the pockets, fly underlap, and waistband lining are all done in the pale green silk leftover from my Ruby Slip.