When you find yourself literally patching the patches on your first pair of cycling jeans, it’s the world’s way of telling you that you need to drop everything and make a replacement pair ASAP. Since I started cycling to work in January 2016, I’ve found my own balance of form and function to make cycle commuting work with my casual office. Since my commutes have only ever been 30-35min, it’s not really worth cycling in full lycra, so I tend to wear whatever bottoms I’d plan on wearing at the office (unless the forecast is wet, in which case I do wear lycra & pack a full change of clothes in my backpack).
I’ve been sewing my own jeans for over ten years now, and I’ve got the techniques pretty much down. The patterns I’ve used have changed over the years, but the techniques and tips and tricks as well as the order I sew things in have remained the same for the most part.
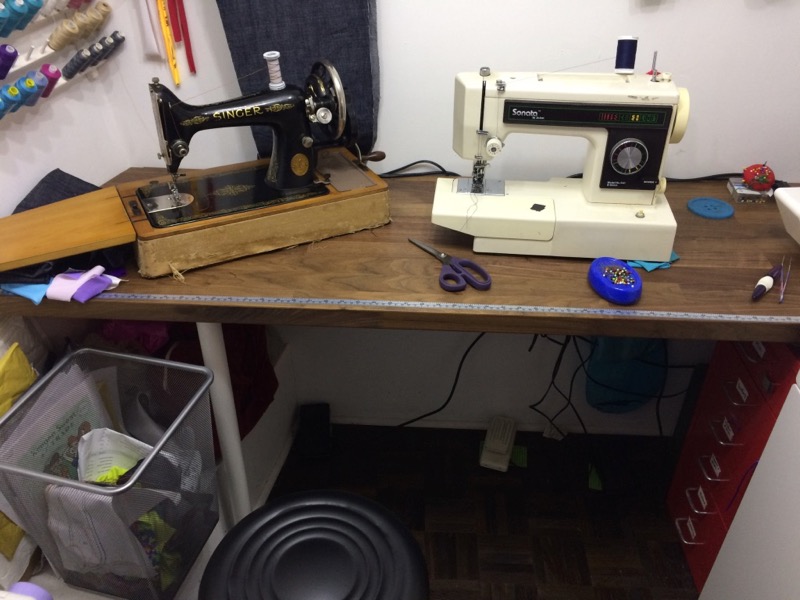
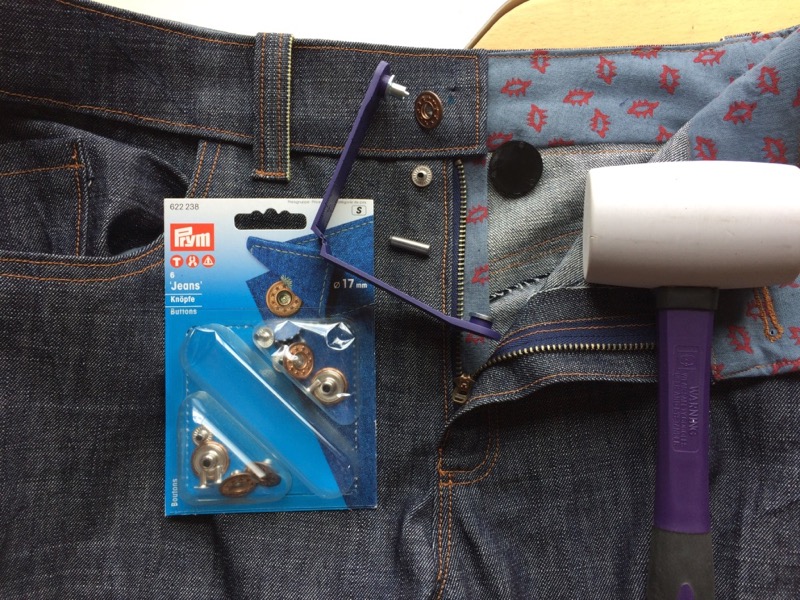
It does feel like I repeat the same old things every time I make another pair, but for the new readers out there, the biggest takeaway tips are a) to buy quality denim (I’ve been almost exclusively using Ditto Fabrics‘ Italian denims for the past 5 years), b) have two machines set up to avoid having to re-thread constantly (my vintage hand crank Singer is THE BEST topstitching machine ever), and c) use quality rivets as the cheap ones will pop off and shred your coat linings and upholstery (with castbullet.com permanently closed, I’m not sure who to recommend, however).
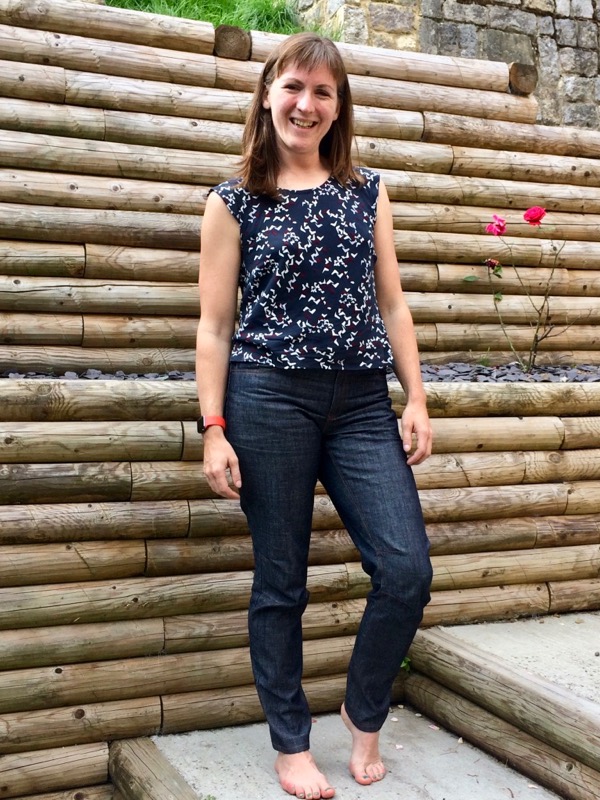
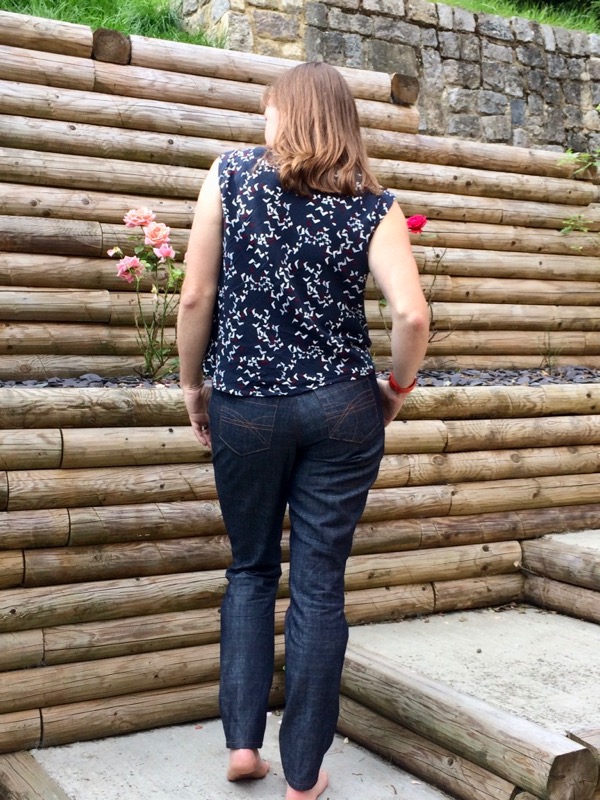
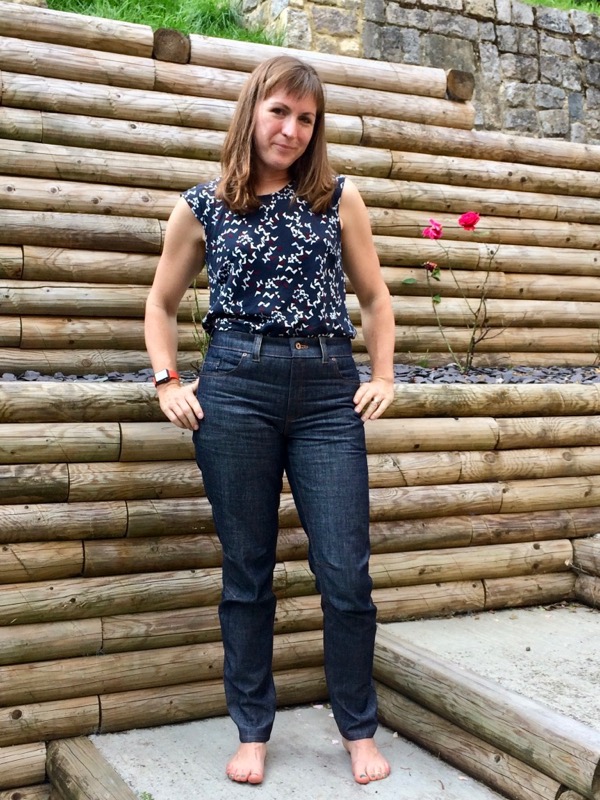
(Seen here with the Burda bias-cut top I made recently!)
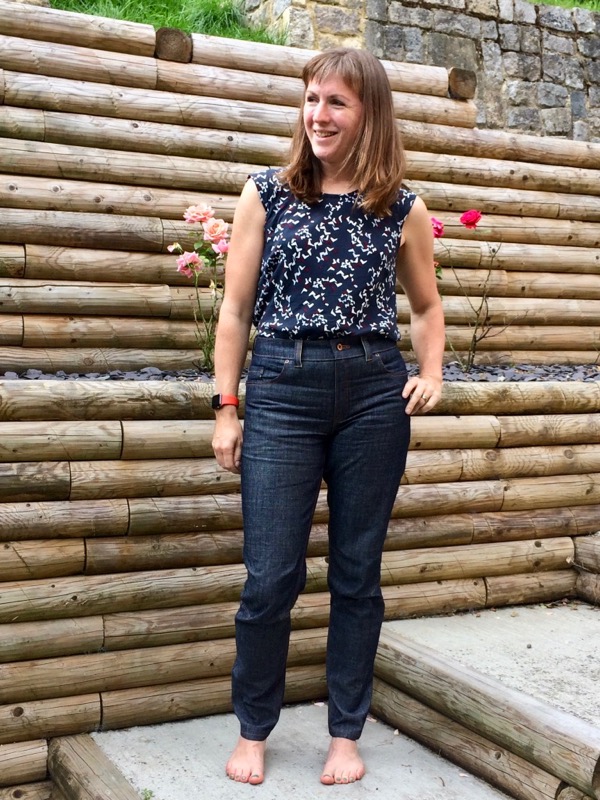
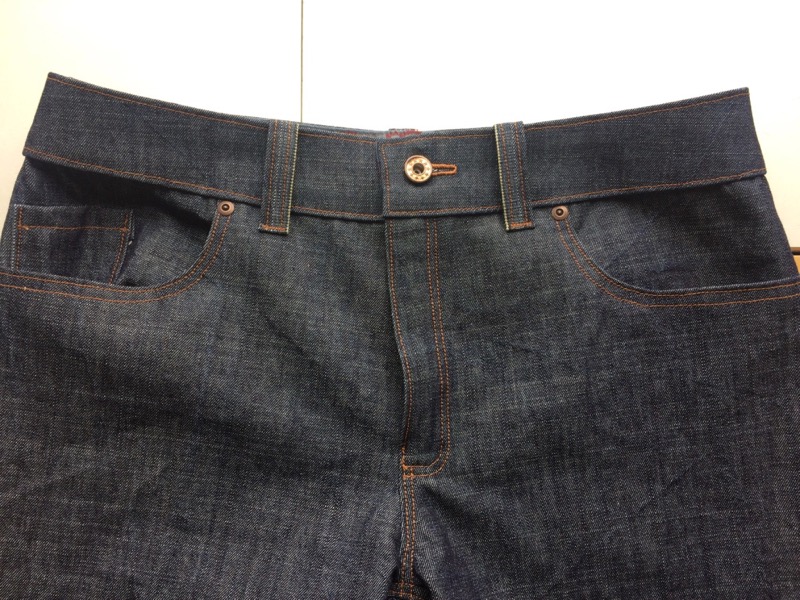
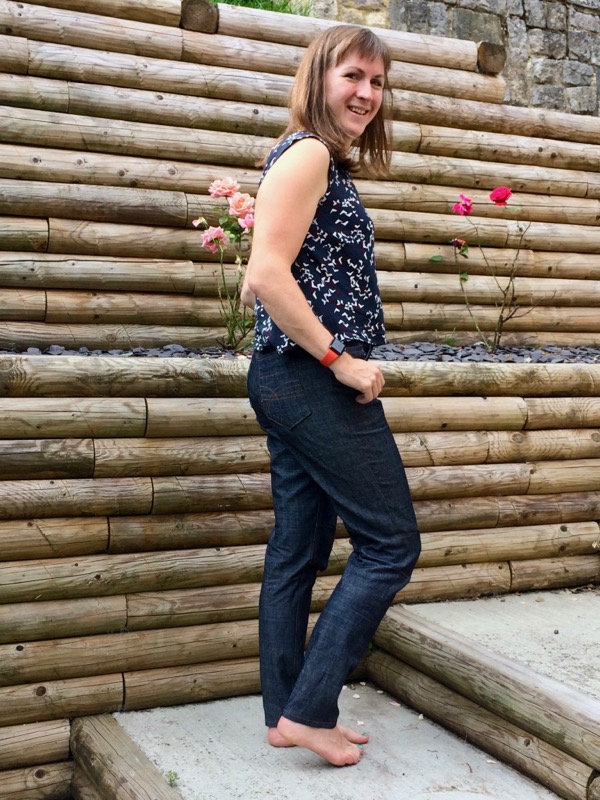
I used my same self-drafted jeans pattern as before, with a few tweaks introduced to make these easier to cycle in, but still look normal enough to regular casualwear. Most noticeable are probably the pleats at the knees, which this time I decided to sew as topstitched darts instead. This gives your legs plenty of room to flex while pedalling without pulling and stressing the fabric and seams.
I also added some length to the CB rise to avoid a “plumber butt” situation while seated in the saddle, and also some extra length to the legs as they naturally shorten a bit when you start pedalling. But apart from this, they’re just my regular jeans. A few people have asked if I’d release this as a pattern, but it’s pretty niche (even for me!), and you’re probably better off just adapting whatever jeans pattern you like best anyway.
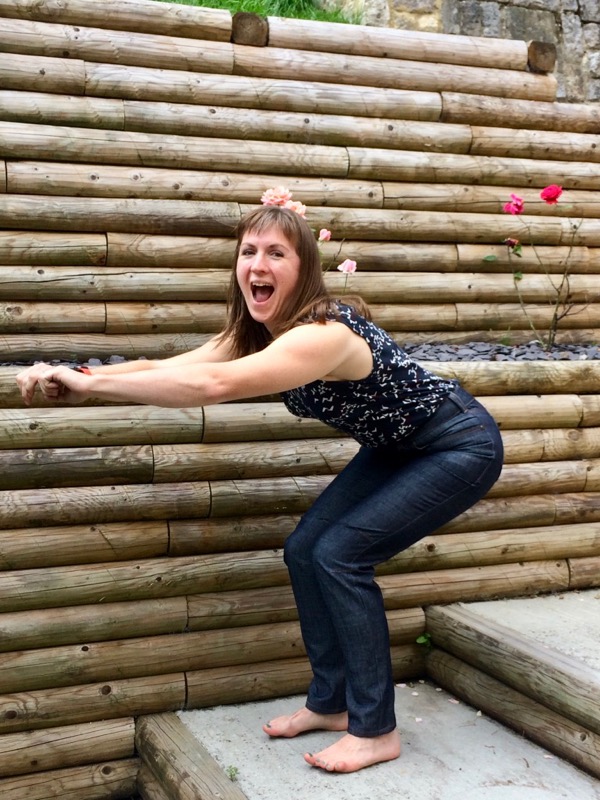
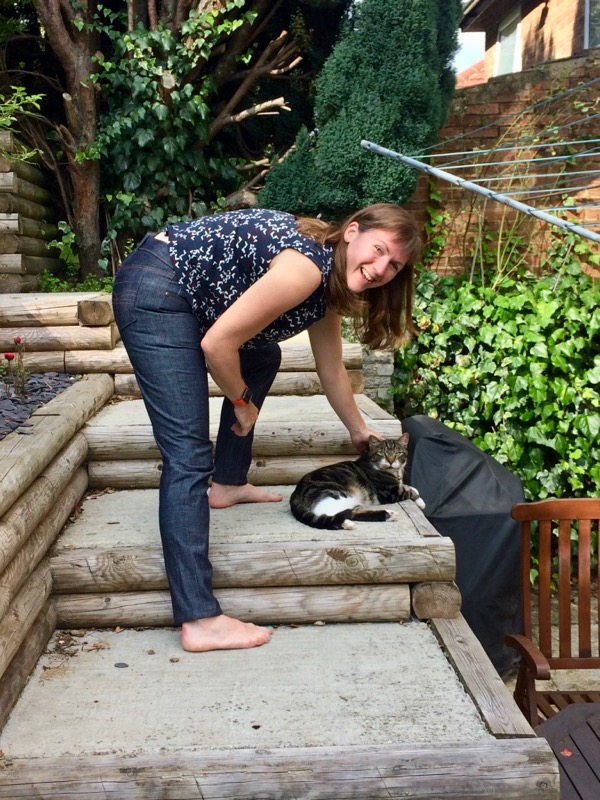
Without a bike at my friend’s house to pose with, I opted to demonstrate with a terrible squat instead!
As per usual, I made the pocket linings, waistband linings, and zipper shield from some contrast cotton – this time using a Draper’s Daughter fat quarter from my Sewing Weekender goodie bag. I love these little contrast touches inside, and they’re just a little treat for me, as no one else will ever see them!

The only problem I usually have when sewing jeans is that I never, ever have any inspiration for back pocket designs! So I was super pleased when Closet Case Patterns released a free pdf comprised entirely of back pocket designs, so I selected one of these and copied that. Sooooo much better than my last few attempts to put something -anything- on the back pockets!
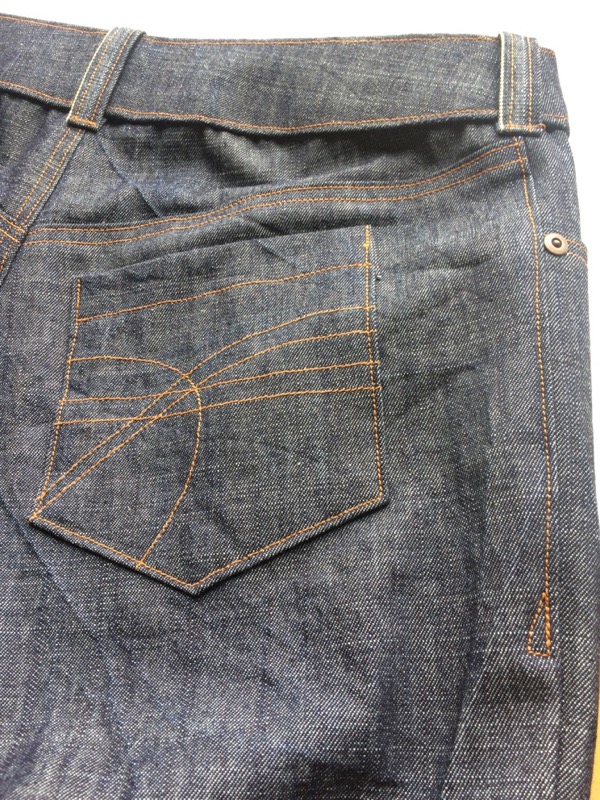
The only other real point to note is that I recently was sent some all-metal jeans buttons from Prym to try out, and one of the designs is for a ring-type hammer-in jeans button rather than flat-top ones which I’ve only ever used before. It’s nice to still be able to find variety in supplies ten years into my jeans-sewing journey!
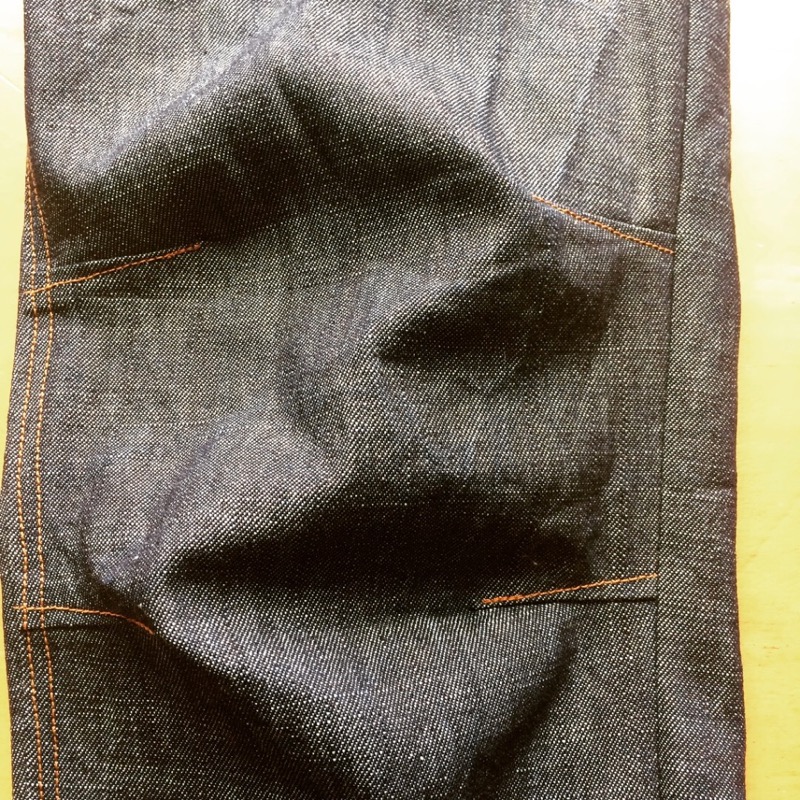
These ended up taking me exactly a week to make, from cutting out the denim last weekend to finally hemming, hammering in the button and rivets, and sewing the keyhole buttonhole using my Singer’s buttonhole attachment on Saturday morning. And no less than ten minutes after finishing these than I was wearing them and out the door to spend a girlie weekend at my bestie’s (the setting for the photoshoot). So forgive the front wrinkling, as I’d been sat on a train for an hour before the photos were taken!
Though Loki doesn’t look quite as impressed as she was!!