Buckle up, because the story of this jacket starts four years when I received a remnant of Dashing Tweeds “Urban Shadow” tartan coating from a friend for Christmas. Now, if you’re not familiar with Dashing Tweeds, they’re a really cool company who’ve revived old tartan and twill patterns and modernised them with great colours and even some reflective threads woven in. The remnant I received was one of these “Lumatwill” designs, and has reflective threads running along all the horizontal yellow lines in the design.
The regular price for their reflective fabric is £92/m(!!) but thankfully they sell off remnants for a lot less. I will say, though, that they make all their own fabric right here in the UK, it is absolutely beautiful quality, and I love the innovation that they’re bringing to the textile world. Having handled and now sewn with it, I absolutely think their fabric is worth the price. And you best believe I’ll be using every single little scrap!
So to get back to the timeline of this jacket:
- Remnant was given to me as a Christmas gift in 2015
- At the GBSB Live show in September 2016 I bought some charcoal wool coating from the Fabworks stall, specifically to partner with this remnant
- In 2017 I bought some pre-quilted lining fabric from Stoff and Stil to line this jacket along with the long separating zipper and two shorter matching zippers for the pockets
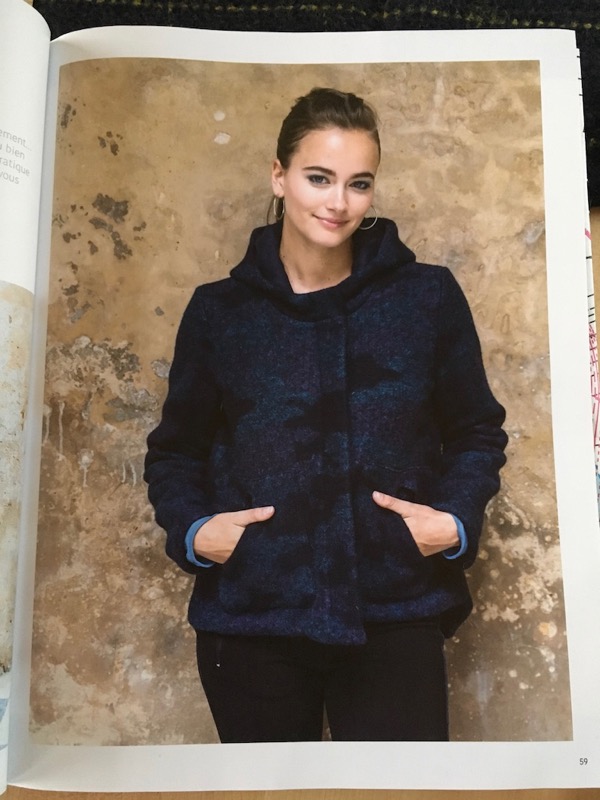
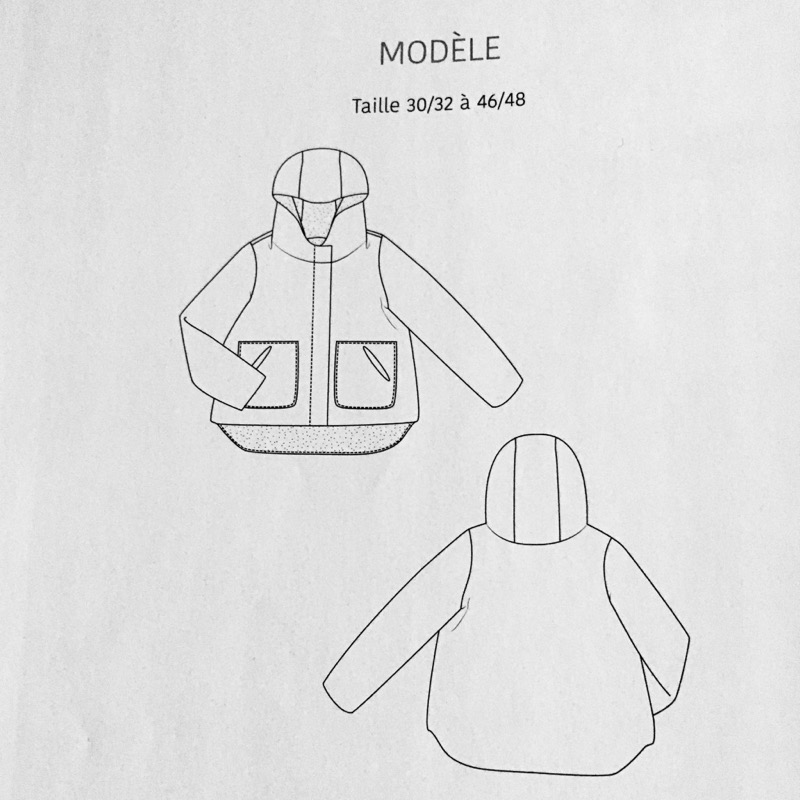
- In 2018 I traced the pattern – La Maison Victor “Carol” coat, from the Sept-Oct 2017 issue. Sadly this pattern is not available to buy as a standalone pdf in any language, nor was it ever translated for the English language magazine as far as I can tell. But you can buy the back issue from their website if you love this design as much as I do!
And in 2019 I finally made the sucker!!
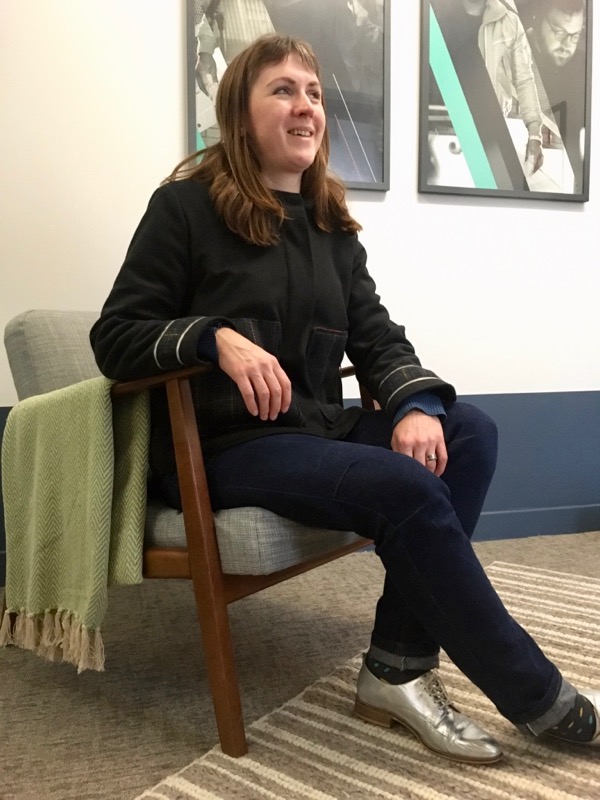
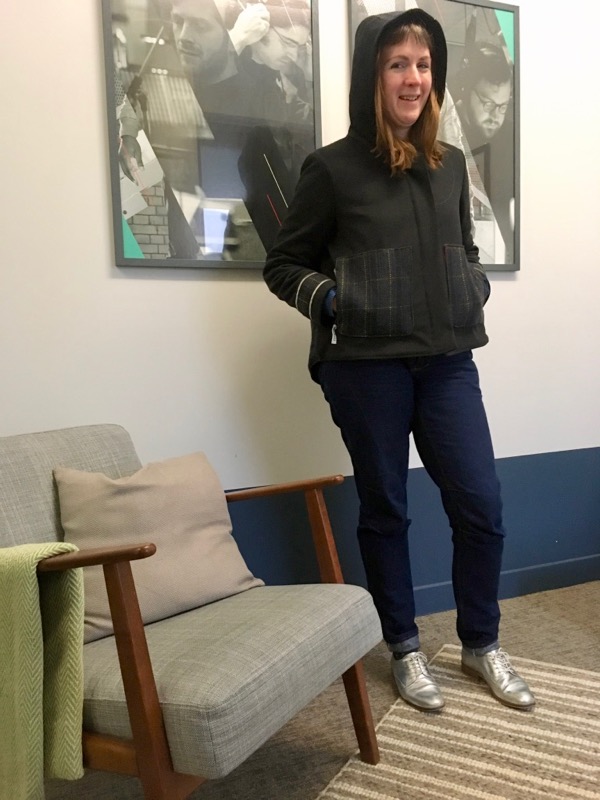
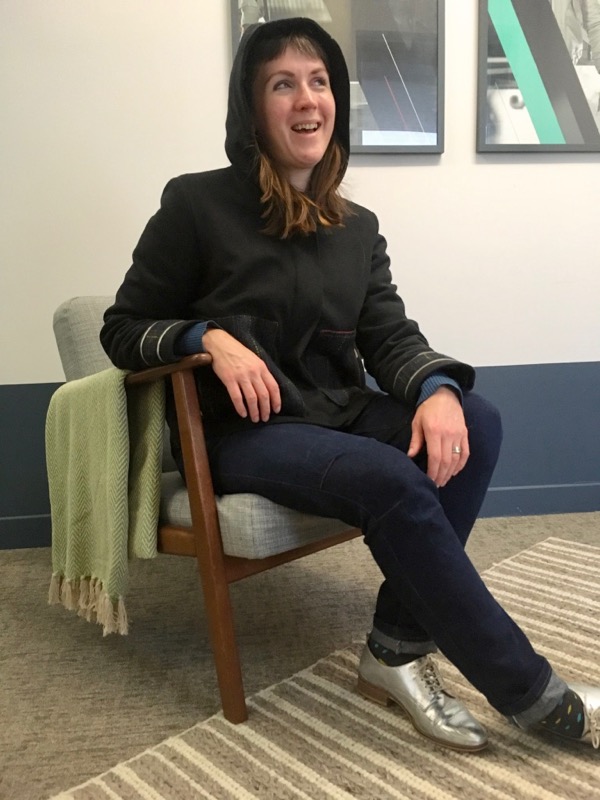
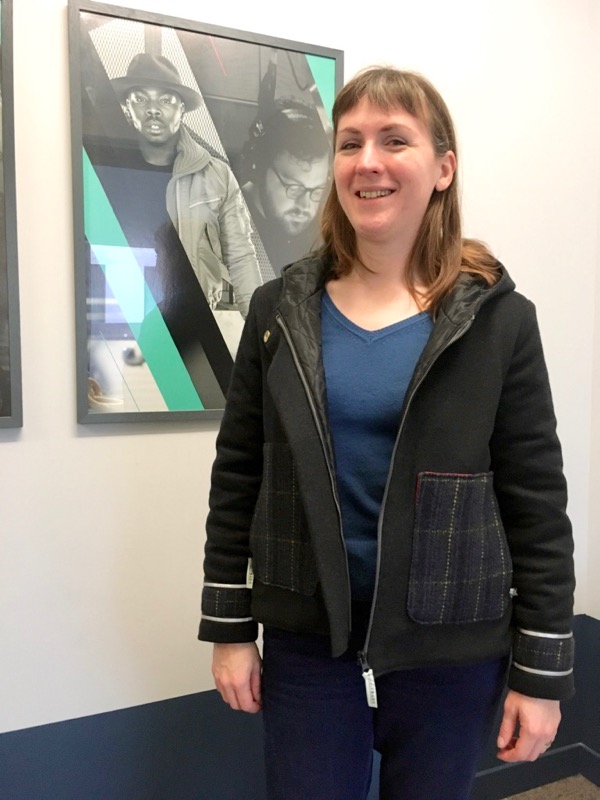
Big up my colleague Kristina for art directing these photos in our office again!!
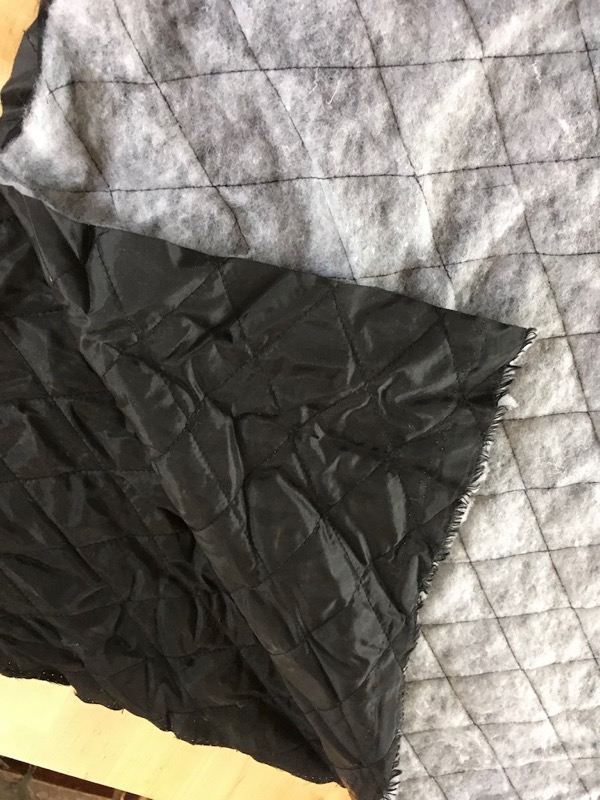
My original plan was to cut the Front and Back of the coat from the reflective wool, and the Sleeves and Hood from the plain wool. But when I got my remnant out to finally sew it, it was a lot smaller than I remembered and pretty much only the Front would fit on it so I had to change my plans!
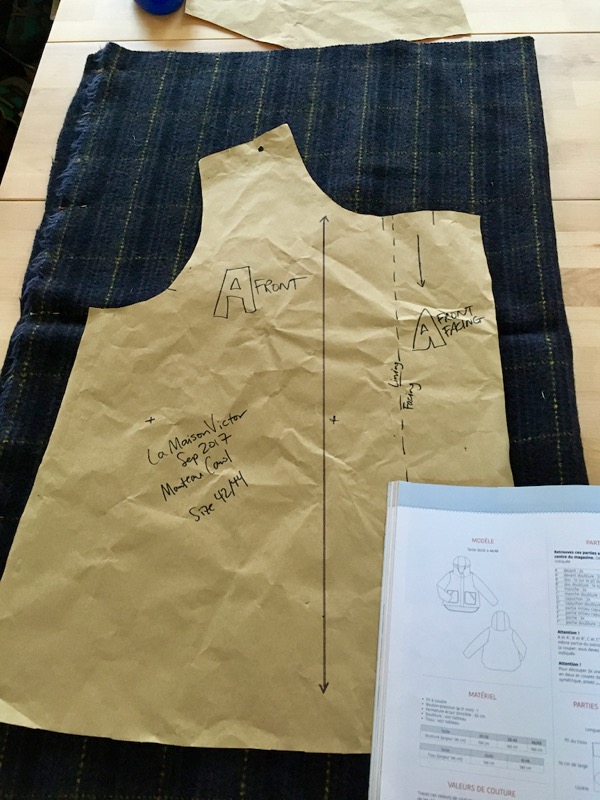
This is the entire (folded) remnant. Yeah, I had to get creative!!
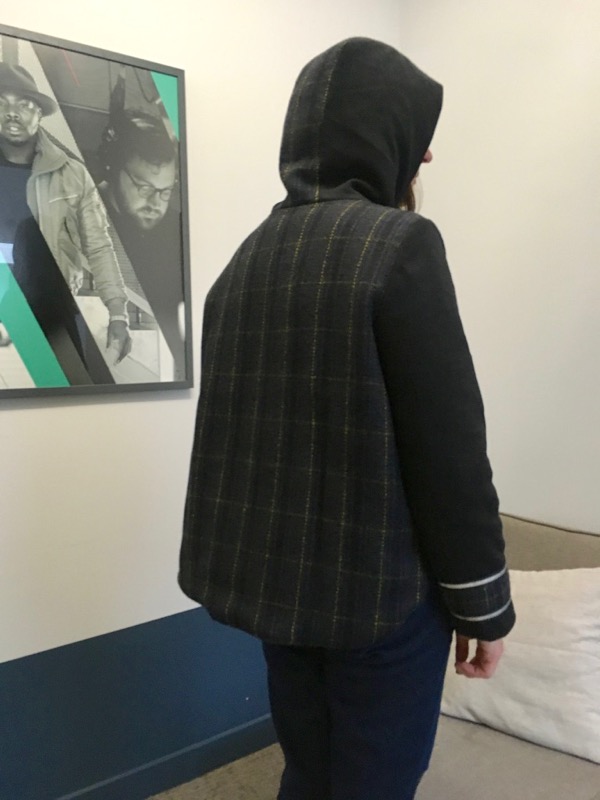
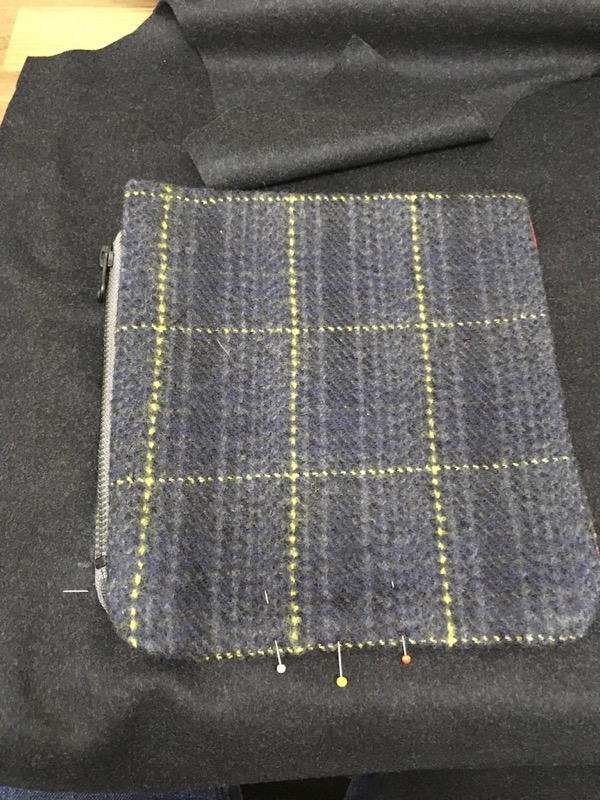
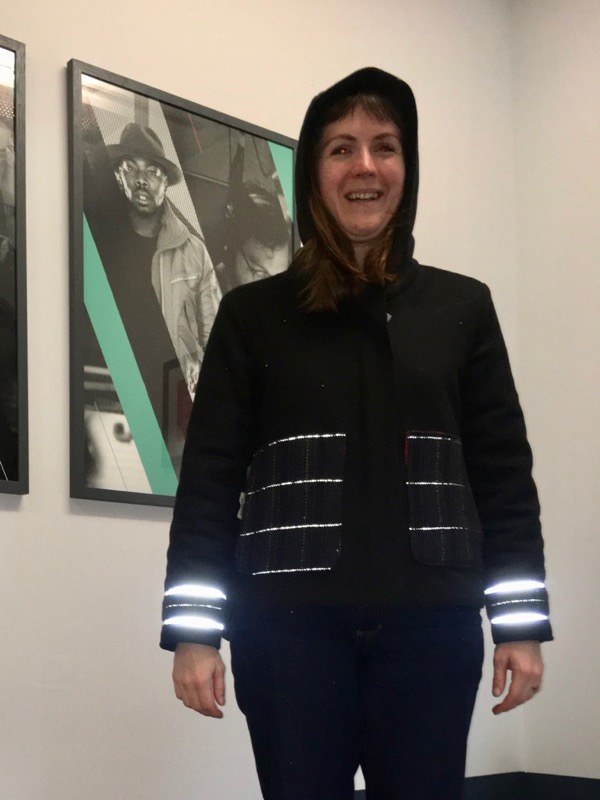
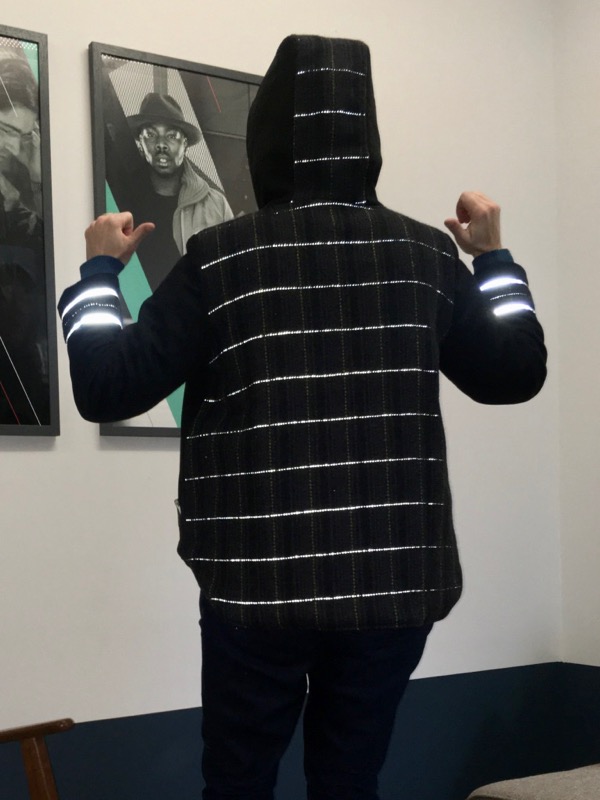
Instead, I opted to cut the entire Back in the reflective wool, along with the front patch pockets, the central part of the Hood, and then I added stripes to the lower Sleeves, too, so that there’d be a bit of reflective no matter what direction you were looking at me from. While this isn’t a cycling jacket per say, I knew I’d want to wear it while I was on the bike so making the most of the reflective qualities of the wool was key in my decision on where to place it.
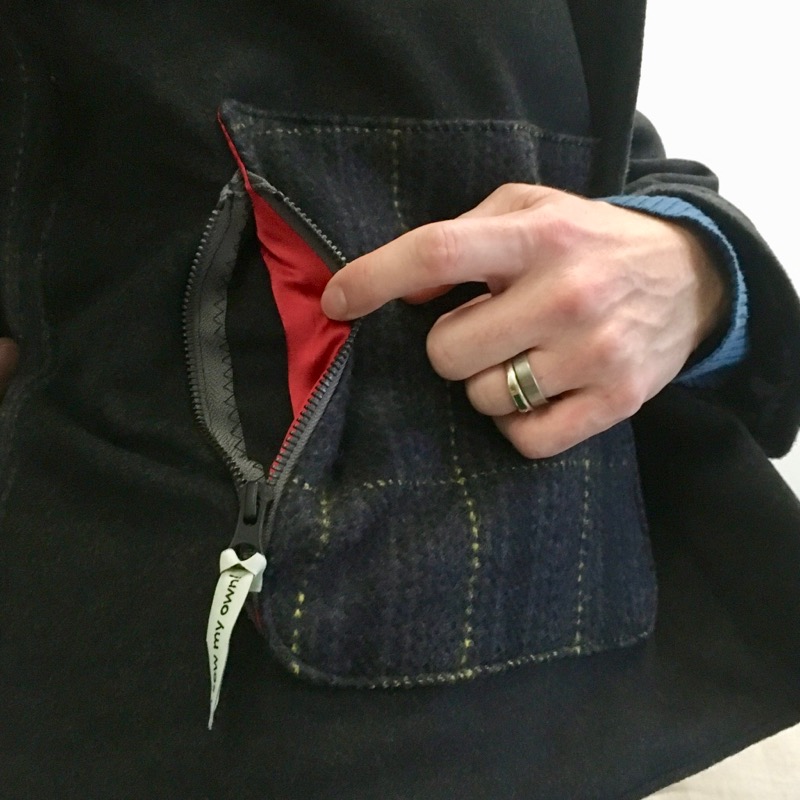
Let’s talk about the pockets! The pockets in the Carol pattern are rounded square patch pockets with a diagonal hole to put your hands into. However, I wanted it to be a side zipper opening so that my contents would be secure (absolutely key if I am wearing it while cycling!) but I could also easily jam my hands inside for warmth. Being able to comfortably jam my hands into pockets is a must for me.
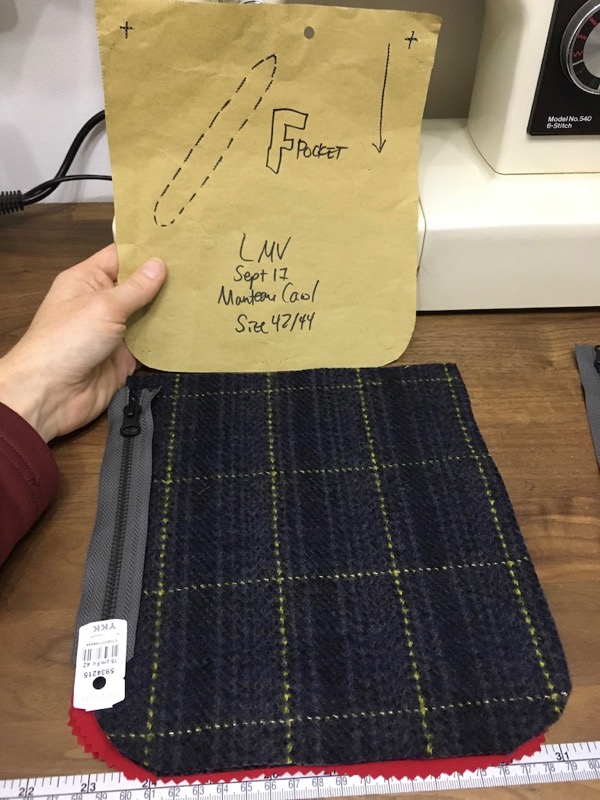
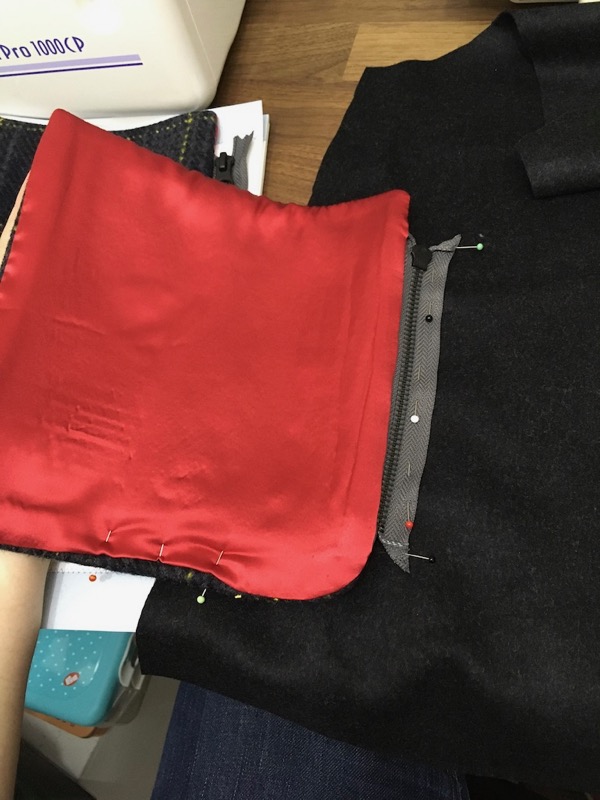
I’ve never seen a pocket construction like the one in my head so I just winged it, and used some red silk charmeuse/satin from my stash and zippers I’d bought from Stoff and Stil for this, also in 2017.
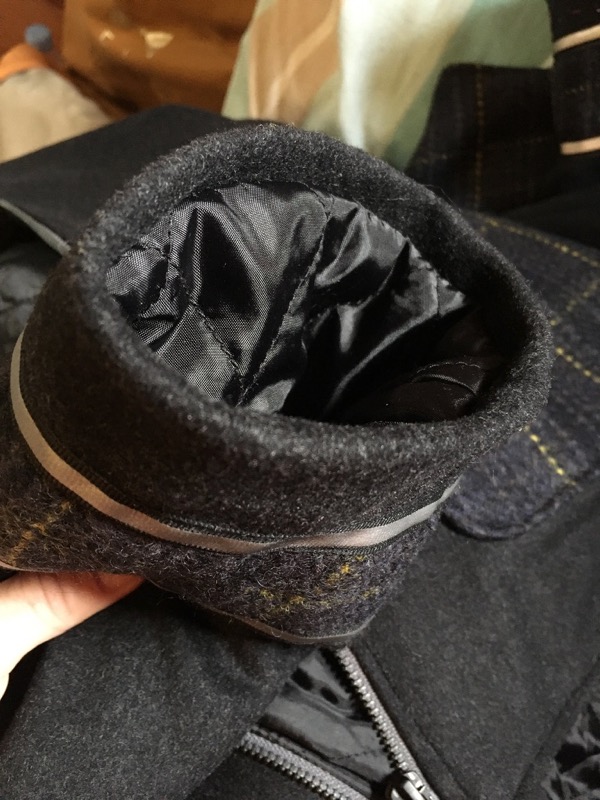
If you’ve been following me for a while you may remember that I swear by underlining my winter coats and jackets with a layer of cotton flannel to cut the wind. This makes for a ridiculously warm coat that is impervious to even the strongest gusts along the river (even moreso than using Thinsulate – seriously!). But for this jacket I *gasp* didn’t underline it in cotton flannel! I figured the quilted lining would be warm enough, and if I was going to be cycling in it, there’s a fine line between warm and being overly sweaty, and I didn’t want to cross it. Having cycled in it a few days this week, I can say that it’s the perfect level of warmth for me, but I can feel the wind through the sleeves in particular when I’m moving fast along the Embankment cycle superhighway.
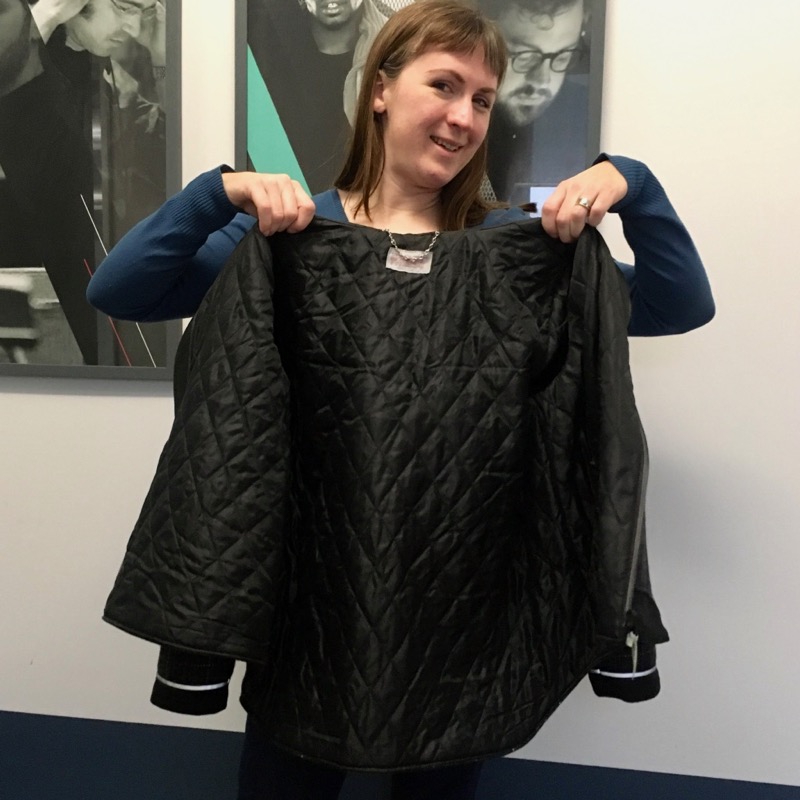
But overall the quilted lining was a total win! It was really easy to sew and my walking foot made quick work of sewing together the lining (which I actually sewed together before cutting the exterior pieces so I could try it on quickly as a muslin). It makes for a really substantial coat, looks super professional, and (I’m hoping!) will be a bit more snag-resistent than a traditional silk lining.
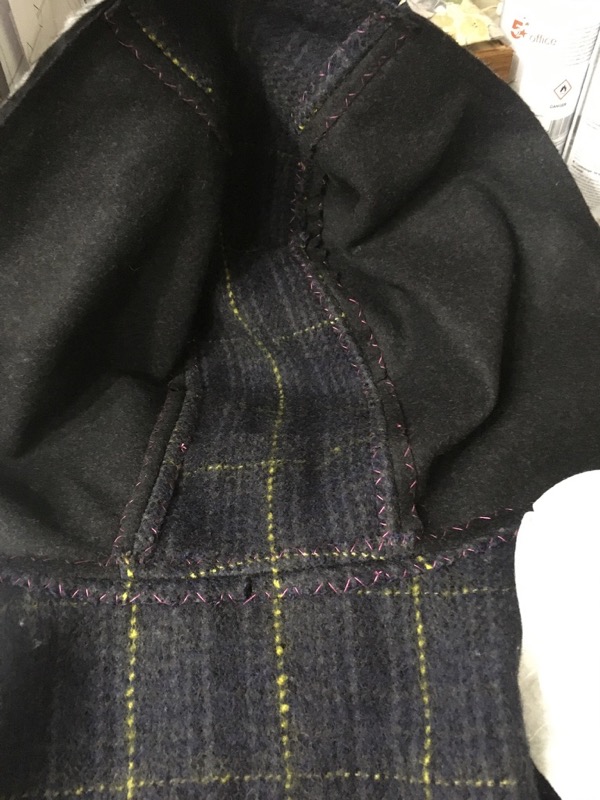
Another tip for sewing with bulky coating fabrics is that I always hand catch-stitch all the seam allowances flat inside. This takes extra time (but not as much as you’d think!) but it means you get really flat and neat seams on the outside, but more importantly the coat doesn’t feel lumpy at the seams when you wear it. If you’ve got limited time or patience for hand sewing then at the very, very least you should do this on the long sleeve seams – it makes SUCH a difference!
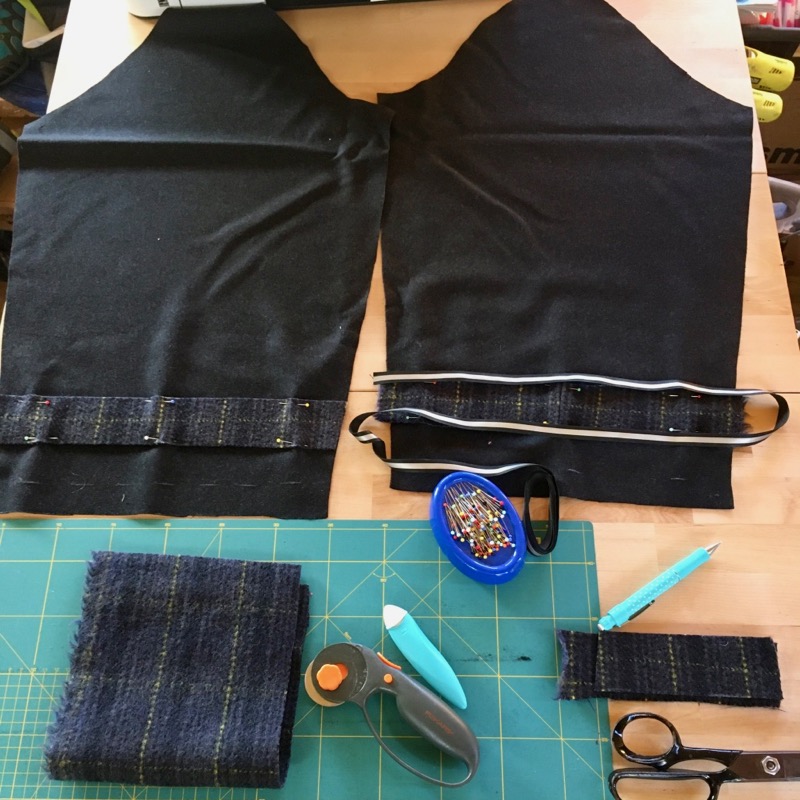
Speaking of the sleeves – I hardly had any horizontal pieces of reflective wool left but I knew I wanted to add something reflective to the sleeves to help be seen when I indicate I’m turning or changing lanes. I kinda wanted the appearance of a Sleeve belt without the actual danger of it getting caught on anything so I topstitched a length of the tweed onto the lower sleeve area (I had to piece it for one sleeve as I didn’t have enough fabric left!), then topstitched down some reflective trim over the edges to make it even more noticeable.
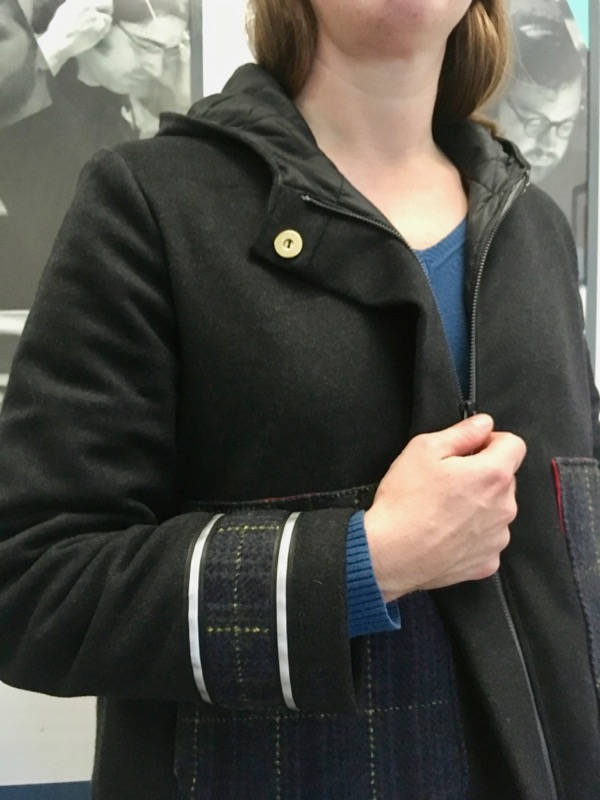
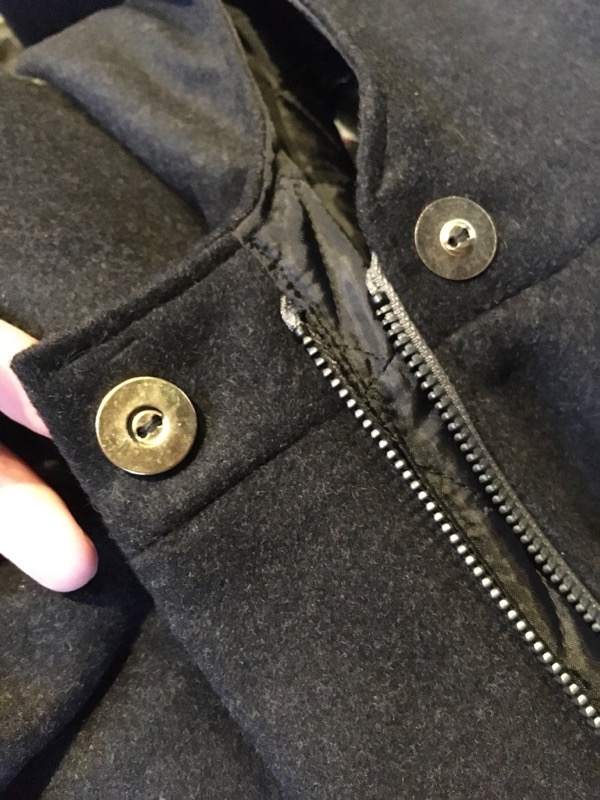
Even though the Carol coat instructions were in French, La Maison Victor have excellent illustrations for each step in the instructions. But even so, their front zipper construction was one that I’d never seen before and I didn’t quite understand at first but it all came together. Basically you had to trim off a bit from one side of the Front and Front Lining (and Hood) making it asymmetric, then you attached the zipper to the edges, but then the longer side got folded over to form an exterior flap for the zipper bringing the zipper to the CF. Topstitching held it all in place and I opted to topstitch around all the edges of the jacket to crisp it up, too. The lining comes right up to the zipper with no facings or interfaced edges, which is a bit odd for a coat/jacket but it seems to work.
Despite buying loads of issues, both in French/Dutch/German and more recently, in English, I haven’t actually sewn with La Maison Victor before this. But one easy way to win me over is to have a sleeve cap without gobs of sleeve cap ease, and this one had literally the perfect amount (ie: hardly any) and went in beautifully without too much pin-easing. I added a lightweight shoulder pad from my stash to make it a bit more substantial, but I didn’t bother with a sleeve head for such a casual design of jacket.

Since I had a few in my stash, I added a Prym metal hanging chain along with my label and the Dashing Tweeds label that came with the remnant for a nice touch! I also added a magnetic button to the top of the zipper flat to keep it closed, but I might add one to the bottom, too.
I bagged the lining of the coat, but I always prefer to finish off my sleeve and sleeve lining hems by hand. I guess I was in a hand-sewing mood after catch-stitching down all the seam allowances, but it’s also a nice winter activity to do while watching tv in the evenings.
I finished this jacket on Sunday evening, and it couldn’t have come a moment sooner because the next day the temperature here in London plummeted and stayed hovering barely about freezing for most of this week. So it was perfect timing to be able to wear it to cycle back and forth to work as well as to Run dem Crew on Tuesday evening and really put it through its paces.
The verdict? It’s bigger than I’d usually prefer in the body, but that just means I can wear my HipLok around my waist underneath the jacket instead of overtop, so hopefully the lock’s velcro won’t damage the exterior of the jacket like it does to all my other cycling jackets. As I said earlier, I could feel a little bit of the wind on my arms as I was travelling along the Embankment (fast speeds + riverside wind), but it was actually quite nice as it meant I didn’t get overly sweaty. There is plenty of room across the back shoulders to reach for the handlebars properly, and to be honest, I didn’t get to work/home/RDC any sweatier than I would’ve in summer wearing my light cycling jacket.
As far as I’m concerned this will be my go-to commuting jacket when it’s really cold out and I love that this works equally well as a regular jacket as it does for cycle commuting as I can wear it at lunchtime without being mistaken for a fire warden (this actually happened in my high-viz cycling jacket!!).