Our DIY wedding – refashioning my grandmother's gown

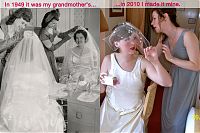
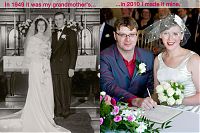
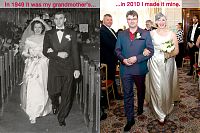
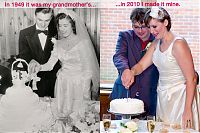
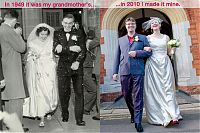
I’ve got many, many more wedding photos to come, but as I was slowly going through all the photos from friends and our professional photographer, I realised that there were a lot of parallel poses between my grandparents’ photos and ours.

Big thanks to my Dad for taking the time to scan in my grandparents’ wedding album in hi-res format, and also to our truly INCREDIBLE and AMAZING wedding photographer, Paul Tanner. I’m pretty sure he was the best money we’ve ever spent.

Confetti toss:

Post ceremony posing:

Walking back down the aisle:

Cutting the cake:

Pre-wedding girly preparations:

If you’re new to this site, let me back up a minute and explain what went on here. First of all, yes, I sewed my own wedding gown. But that would be too easy (ha!), so I decided to sew it from my grandmother’s gown.

Our DIY Wedding – first friends' photos

It’s going to take us quite some time to filter through the 300-odd AMAZING wedding professional photos that we just got through, but in the meantime, here’s some of my favourite shots of the wedding from those that our friends took.

It should give you a great idea of what the dress looks like, and how it held up throughout the day and dancing, anyway!

Signing the official registry:

My bridesmaids and Man of Honour (remember I made their silk jersey dresses?)

Final wedding "in progress" update

This will be the last update you’ll get before the wedding on Saturday, so after this it’ll all be finished photos, which is rather exciting!

I almost winced trying on my gown for the final time on Monday night – I thought for certain there’d be some niggling problem I’d have to fix, but no, phew! Everything’s still good. My sister-in-law marked out a nice curve in the train, trimmed it to within an inch or so of the pins, and then I did the hem last night. As it turns out, I’ve still got a good two feet of train left, and the thumb loop is intact, so I’ll be able to easily lift it up for the dancefloor.

The original hem was just a narrow turned hem that’s stitched by machine, so I did the same thing on the new area to keep it consistent. First I folded the allowance over so the fold was at the marked hem line, and I machine stitched as close to the edge as I could get. I pressed this (with the indispensable silk organza press cloth!), then carefully trimmed away the allowance as close to the stitching as possible. I then folded over the hem again and stitched about 1/8” away from the edge, then gave it another good pressing.

But this wasn’t the only hem I sewed last night, no no! I also hemmed both bridesmaids dresses! My sister-in-law was a huge help here, too, by hand basting the hem of each dress very close to the cut edge of the fabric. So when it came time for me to send them through the coverstitch machine, not only did I have a nice line to follow, but the basting kept the silk jersey from twisting underneath like it loves to do.

DIY Wedding Gown – Fitting

Pip came round last night for dinner, drinks, holiday food exchange (French cheese from me and Greek nougat from her!), and her final fitting on her bridesmaid dress.

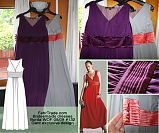
If you cast your mind back to April and May, her gown is the long, purple, silk jersey Gant exclusive design gown from the Sept 2008 Burda magazine.

I’d completed the gowns back in May, but I left off the tiny covered buttons on the cummerbund and finishing the hem until closer to the day so that they wouldn’t have to worry about gaining or losing a few pounds, or deciding on different shoes before now!

Happily, Pip’s gown fits her perfectly, with minimal overlap at the cummerbund, and really her hem was just about perfect with her chosen heels. But then we realised that if she switched to her comfort flip-flops on the dancefloor, the hem would drag, so I’m going to pull up the hem by an inch.

Then Pip wanted to see me in my gown, and since I hadn’t tried it on since the skirt was attached, I felt it was a good idea. But even though I was capable of wrestling into the boned bodice before, it was proving impossible (and more than a little claustrophobic) with the attached skirt. It was apparent that I had to remove the brass bar at the top of the zipper to allow the top to fully open and give me extra room to squeeze into the gown. I’d thought I might have to, but I kept it in until now since it wasn’t a problem. So now I’ll just need to add one or more hook and eyes to the top of the zipper to keep it all in place.

Honeymoon lingerie – two more nightgown muslins

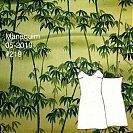
After my first muslin of a potential honeymoon nightgown knocked that pattern out of the running, I turned to the slip dress pattern (#219) from the May 2010 issue of Manequim magazine as my next candidate.

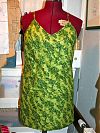
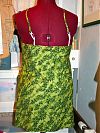
This is a simple bias dress with bust darts and bias edge on the neckline. The pattern calls for you to have two lengths of bias edging – the longer one finishes the neckline from the front bust peak, under the arms, around the back and up to the other bust peak. The shorter length of bias finishes the neckline in the centre front portion and continues up to form the straps. Since I didn’t have any suitable lightweight muslin in my stash, I sacrificed this bamboo-printed Robert Kauffman cotton I’d bought on a binge at equilter.com about 6-7 years ago. I hadn’t decided what to do with it between then and now so I figured it’d be good for a wearable muslin.

Yet another bridal bodice muslin

I’m no big fan of muslins and fitting tweaks, so the title is really reflecting my impatience at still being in the fitting stage. I want to get on with the fun stuff! But I also really want to get the fit and design perfect here as I can’t really go unpicking the vintage satin (the needle holes remain), so here I am, still soldiering on, though hopefully not for much longer…

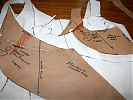
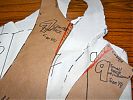
Yesterday was my day off so I devoted pretty much the entire day to this dress. Right after breakfast I made up Muslin #2 (not shown because no one was around to photograph me), which incorporated the neckline changes and better-drafted add-on straps. There’s no photos, but essentially, I just needed to pinch some fabric out in three places, which you can see here shaded in orange on my pattern pieces:

So I made those changes to my paper pattern, unpicked pieces 1 and 3 from the muslin, cut new ones out, and reattached them, bringing us to Muslin #3. And I was pretty happy with the fit, apart from a bulge above my right breast which I immediately knew the cause of and fixed it on the paper pattern.

Bridal Bodice update

When you last heard about my wedding gown, it was two years ago(!!) and I was leaning towards turning my Granny’s gown from 1949 into something with a cowl neck, deep back, and sleek lines, using Vogue 2965 as my starting point.

But recently I’ve been looking more closely at the fabric I’ve got to work with in my grandmother’s gown, and my recent cowl sewing adventure has reminded me that cowl necks need pretty huge amounts of fabric, can’t easily be pieced together, and on top of that, the silk satin in her gown is more of the heavyweight duchesse variety than something very drapey that would cowl nicely. And while I love a low back, it does make things awkward for bras and any sort of shapewear, too.

So I had a bit of a wake up call and told one of my bridesmaids to keep reminding me that “This is just one dress. It is not all dresses.” (thanks, Stacy!). Yes, I like cowls. But I also like other things, too. And I do not need to put everything I like into one dress!

Crafternoon

The moorings’ first Crafternoon was a smashing success! We normally have a monthly craft night amongst the neighbours, rotating around to different boats so no one person always has to host. Since our usual craft night falls on a Bank Holiday Monday in May (and again in August), we decided to move it to the afternoon and outside to the Arts Ark (which is like our little floating, communal village green).

Rather than everyone coming at once, it was more of a drop-in thing, with different waves of crafters coming throughout the afternoon… Clare from Selvedge Magazine and her flatmate helped out with the organza wedding flowers, as did Susannah from Cargo Cult Craft! I was a bit crap with taking photos, though, so I missed the bulk of the crafters, sorry!

James raised the bar for “boy craft” and built a step!

Bits and Pieces

Ok, so to take a brief break from reading material, I thought I should update you with what I’ve been up to in the sewing room…

Bridesmaids dresses

I had the first fitting of P’s muslin, and there are surprisingly little changes to be made – raising the neckline and armscye, pulling up the waistband by a centimetre, and that’s about it.

So I’m doing a second version of the bodice for her to try on this weekend, and then I unpick the skirt off that muslin and attach it to G’s bodice (the skirt is enormous and I didn’t have enough knit muslin for two!) and have her first fitting while I get down and dirty with the waistband pleating. I’m anticipating the pleating to be the most time-consuming part of both the dresses… (Earlier post about the dresses and colours here)

A spring dress

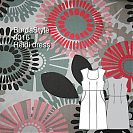
I finished a nice Springy version of BurdaStyle’s Heidi dress yesterday (finally!).

It was just waiting for a hem for nearly a week, which is a long time for me. It’s nice timing as Spring (or maybe even Summer!) arrived this weekend and it was gorgeous outside on deck with the barbecue going and everyone hopping from boat to boat. I’m hoping to do a photoshoot tonight now that we’ve got daylight for longer in the evenings…

A few wedding colours

If you recall, my two bridesmaids, Pip and Gez, had already agreed on the dress pattern they wanted, BWOF 09/2008 #132, the Gant Exclusive Design dress.

But neither were too excited by the silk jersey colour choices I brought home last time I was at Goldhawk Road, so I was expecting Saturday’s fabric-and-shoes excursion to take a while…

…but no! Both found the colours they loved within five feet of walking in the first shop! Classic Textiles had clearly restocked in the last month! Woohoo!

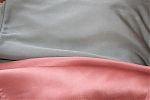
Gez fell in love with this silver silk jersey (which we bought the last of, bwahaha), choosing peach silk charmeuse (satin) for her dress’s “cummerbund”: