Copying a favourite bra

You may have noticed that one of the items on my Spring Sewing Ideas list was a “self-drafted/copied from RTW” bra. I’ve sewn countless bras before, but really only been happy with the fit and look of one (a foam cup muslin, of all things!). I really want to try and get away from moulded foam cups for a number of reasons (which Orange Lingerie discusses here), so my dream bra drawer would be entirely lacey, gorgeous, self-made, frameless, underwired bras, with one nude moulded foam cup bra for when I really need a seamless look.

The problem is, I’d been buying foam cup bras for so long that I didn’t really have any non-padded ones I could clone, and on a whim last year, I bought a few M&S bras and was amazed to find that two (identical, apart from colour) all-lace, single-darted, frameless, underwire bras, fit me perfectly and gave me a great shape.

So in the back of my mind I’ve been wanting to clone these, since my last bra using the Elan pattern ended up fitting well (at first I thought I’d cracked it finally!!), but the cup shape looked B-A-D. Boobs like duck-bills, oh god no!

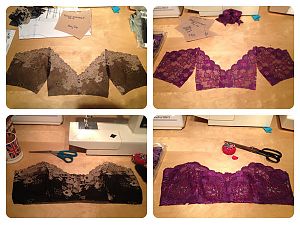
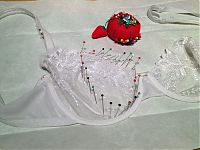
Anyway, so I started the process of cloning the white version of the M&S bra last night, by using my method of tracing patterns – placing the bra down on top of paper and running my serrated tracing wheel around it. This worked well for the band, but I wasn’t convinced I got an accurate trace for the cup, so I looked up an old Threads article, “Clone Your Favorite Bra” (Issue 99, Feb/March 2002 if you’ve got the archive DVDs), which suggested stabbing lots of pins around the bra edge until you got to a point where it would no longer lie flat. Then you unpin the first pins you put down, and re-shift everything using the latter pins (in my case, along the dart) as an anchor so it lies flat and you get all the edges pinned.

Then, in my case, because the dart stayed in place and everything shifted around it, I had to cut through the dart and open it back up. Because the top edge of mine was the lace edge, I knew this had to be straight, so it made it easy to re-adjust.

Birthday dress – just a peek!

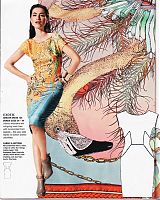
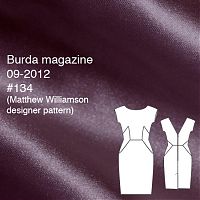
Happy birthday to me! I’m 34 today, and to celebrate, I’ve been making myself a special sheath dress designed by none other than Matthew Williamson from the September 2012 issue of Burda magazine!

If you’ve been following along, then you know I’ve been super busy for the past few weeks and it was a bit touch & go whether I’d finish this dress in time to wear to my special Mystery Birthday Dinner tonight. I’m proud to say that I did finish it in time, thanks in no small part to the snow cancelling our Saturday afternoon plans and giving me time to huddle down and sew! (It did not cancel my run though – we still ran 19 miles in the snow & fierce winds)!

Unfortunately I didn’t finish in enough time to take daylight photos last night (plus it was snowing sideways & not exactly ideal photoshoot weather!), so I can only offer you some dressform photos right now, but hopefully we’ll be able to get a few shots of me dressed up before dinner tonight.

But — while everything’s fresh in my mind, I thought I’d tell you about the construction of the dress, and how I handled some of the trickier aspects of it.

I decided I didn’t want to fiddle about with a muslin for this dress, so I did the next best thing and sewed up the lining first, just to double check that my sole alteration of raising the waist 1”/2cm was right, and everything was okay.

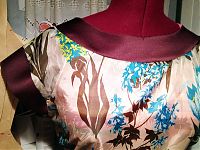
After that I cut out the shell and facings from the purple duchesse satin, and the next hurdle was to attach the curved facings to the curved neckline and sleeves of the lining. The neckline wasn’t too bad, but the sleeves were a total bear! For this reason (and a bit that became apparant later, too), I’d recommend sewing the side seams dead last, after the lining and shell are joined at the neckline and sleeve edges, and then sewing the side seams. This means you can attach the facings flat, for starters…

Purple lingerie set – camisole & lacey thong

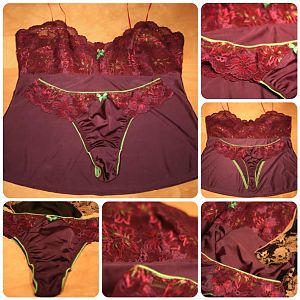
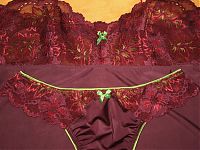
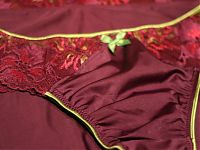
Here’s the second of my recent lingerie sets I sewed while I’ve been ill, which I hope will inspire you! This purple set is again comprised of my (free!) Lacey Thong pattern and the (also free!) Ruby Slip pattern, shortened to camisole length.

I’m so pleased to finally break into the lace and materials I bought at Kantje Boord in Amsterdam when I was there running the marathon in October! I was very restrained in the shop, buying only this lace, the purple lycra remnant, and coordinating lime elastic and motif with this exact camisole in mind!

I’ve definitely got enough materials left (okay, I had to hit up Danglez.nl* for some more coordinating bra supplies!) to make a matching bra in the next week or two, so I might whip up another pair of panties to make this set a foursome like the black lingerie set too.

The only real difference between this set and the black one you saw earlier this week is that the body fabric used here is a lycra rather than a woven. The lace bodices are strikingly similar, even though the laces themselves are so different!

Manequim November 2012

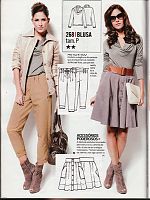
I wasn’t overly impressed with last month’s issue of this Brazilian pattern magazine (Remember there are other Brazilian pattern magazines too!), but this one’s got enough fancy party dresses in it to keep me happy, even if it’s overly summery for my personal use right now!

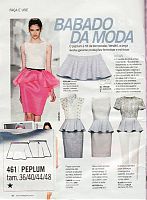
Now here’s some pattern versatility we can all use: a detachable peplum to wear with any skirt, trousers, or dress. This lets you be totally on-trend without any commitment, because when peplums go out of fashion again, your skirt/trousers/dress can still be worn without it!

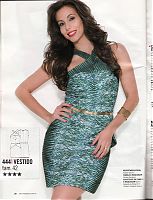
Manequim are so good at the short cocktail dresses, and this little sheath dress has a really intersting crossover neckline and some cool pleats at the hips to add interest.

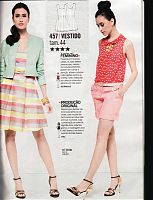
The designer inspiration feature revolves around Kate Spade this month, and I really like this dress in particular, because it doesn’t have a waist seam, which seems to be fairly unusual for this silhouette. The jacket is covering the neckline in this particular shot, but the square neckline is really flattering, too.

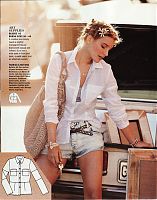
Burda and KnipMode July 2012

I’m never usually a big fan of summer issues or summer clothing, so I’ve again decided to share my picks from the Burda and KnipMode July issues together. I’ve already decided to not renew my KnipMode subscription, after the new editor turned it from the best pattern magazine out there (in 2010, and IMHO) to the worst one out there in little less than a year. It’s also the most expensive, which makes the decision a bit easier! So I think this is probably the last of my subscription to arrive, and as I’m pleasantly surprised by this month’s Burda, I’ll start with it….

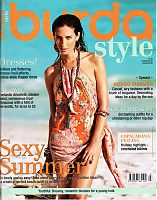
Burda Style (formerly “World of Fashion”) July 2012

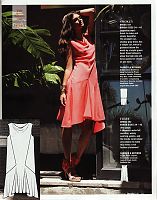
Most of the flapper-style dresses were misguided, ugly, and unflattering, but I think is bias-cut, cowl neck number could actually the the opposite of all those things if made in a flowing, lightweight fabric.

I can’t even remember the last time I sewed (or wore!) a button-down shirt, but something about this pattern really grabs me. It could be that waist-seam, which mimics a peplum without being too trendy, or maybe it’s just that I’m happy to see long sleeves in a July issue (hello English summer!).

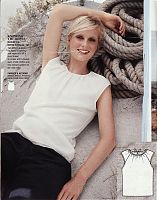
There’s another variation of this gathered, raglan shell in the magazine which adds short sleeves and is worn with the slit in front instead of the back, but for some reason, in their lightweight cotton, all I could see was “hospital gown”. But here, in a soft, solid silk, I can suddenly see a lot of layering possibilities – both for multiple layers of silk (how about a blue charmeuse with a purple voile or chiffon on top??), and for wearing under jackets or cardigans for officewear.

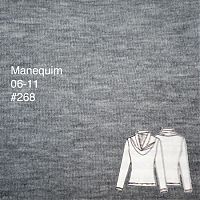
Manequim draped collar sweater

There came a point about midway through the construction of this where it suddenly dawned on me that I was creating my second draped collar sweater with pieced sleeves of the month. Clearly the sweater knits in my stash were calling out to me, and I’m naturally drawn to drapey styles. Though I really must remember when I’m in fabric stores that 2m really isn’t enough for long sleeves and a big collar!

This the Michael Kors-inspired, collared sweater from the June 2011 Manequim magazine. Last week I showed you details on the construction of the various pieces and altering the size “Small” pattern to my basic knit tee pattern.

The only problem was, when I was laying out the pattern pieces onto my awesome, ex-Versace sweater knit from Ditto in Brighton I realised that yet again, I didn’t have enough fabric to lay out the sleeves without piecing them, argh! I didn’t want to back down since I’d tried to use this fabric for something else last winter, but 2m of a really narrow fabric really limits your possibilities. So I carried on, introducing two seams in the lower arms. Frankly, sleeves tend to bunch up so much around the sleeves that I find the seams kinda get lost visually around that area anyway.

In the end, I was forced to cut the collar on the bias simply because the fabric was too narrow to place it on the cross grain!

The Draped jacket & skirt suit

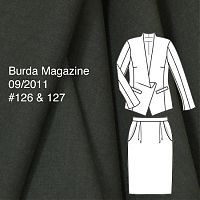
I’m very happy to report that my draped suit (Burda September 2011 #126 and 127) is finally finished! It feels like I’ve been sewing this for f-o-r-e-v-e-r and I am thoroughly sick of it now!

If you recall, it’s a two-part suit, with a draped, collar-less jacket and a pleated pencil skirt:

I’ve been sewing both of the pieces in parallel, so I’ve finished them at the same time. I like a lot of aspects of this suit, but to be perfectly honest, I’m not totally in love with the overall resulting look.

The jacket and skirt together!

Things I really like:

  • The lapel-less shawl collar construction
  • The asymmetric drape
  • The three part, bell shaped sleeve
  • The two-tone, piped lining
  • The folded and seamed facing on the draped side
  • Pretty much everything about the skirt
    • The drape makes for a rather elegant side view, too:

      Things I don’t like:

Save Goldhawk Road – UPDATE!

As a Londoner, I feel proud of the great things this city has to offer, but I feel ashamed when corporate greed threatens to ruin those landmarks I’ve come to love and enjoy. I’ve often expressed my enthusiasm for the fabric shops on Goldhawk Road in West London, but last year I heard the stomach-sickening news that half the Goldhawk Road shops are under threat from developers.

I hadn’t heard much since then, until a few days ago, when Dilly brought to my attention the good news that the Goldhawk Road shop owners have been granted a Judicial Review of the earlier decision in favour of the developers!

Now, this doesn’t mean it’s being overturned, but it means the case will be looked at again. There’s a good rundown of exactly why this Judicial Review was granted here if you’re interested (there are rumours of corruption…), but what this means is that there’s still a chance that half of Goldhawk Road won’t be demolished in order to build (yawn) more flats.

Some of the shop owners are organising a big celebrity media event next Tuesday, launching an exhibition about the history and cultural importance of the parade of shops, as well as the launch of an online petition. I’m unable to attend the event itself, but if you’re in the area and would like to help drum up support (or if you know any journalists happy to cover a David vs Goliath story!), then please contact Kimikawa, whose details are on their Facebook page (Scroll down to the 22 August comment from Aniza Meghani).

Totally discouraged…

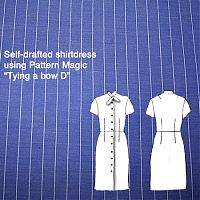
I’ve been hard at work on my slow-moving self-drafted shirtdress, creating bound buttonholes for the spaces the collar passes through before tying, making french seams everywhere, double checking all the darts so they all line up, and finally I tried it on last night to check the hem and button placement.

And it’s horrible. Dumpy, unflattering, and just bad.

All I could think of was Trena’s “prison matron” dress, and like hers, mine’s got pockets, but that’s about it. I don’t even know if I can bring myself to finish it, but it’s sitting on my dressform for a while so I can mull over whether any of it is even salvageable. I just know there’s no way in hell I’m ripping out a million french seams! It’s got nothing to do with the Pattern Magic directions, as the collar is okay, it’s all down to the fit of the rest of the dress…

And the shirting is Prada, too! *whinge* And I made three muslins! *whinge* I did everything right, and the dress is just so very wrong. Which mostly discourages me from pattern drafting altogether. I mean, what’s the point in pattern drafting if the fit is worse than what I get straight off a pattern sheet? Because, really, Burda, Knip, and even Manequim fit me straight off the sheet, no alterations needed. Do I really need the extra hassle in my life to end up with a sub-par result even with all my designer finishing techniques? Am I happy to never be a pattern designer? These are the sort of questions I’m asking myself right now anyway.

A black and brown lacey lingerie set (and exclusive freebie!)

I think it was inevitable that I’d need a quick and fun distraction from all my pattern drafting and muslins, and nothing spells “quick” and “fun” like lingerie! Seriously, if you’ve never sewn lingerie, you won’t really understand the appeal, but playing with tiny bits of lace and trim is just so creative and rewarding, especially for ladies like me who really aren’t into embellishment elsewhere in their wardrobes.

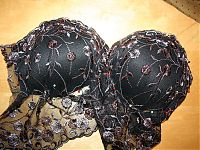
Since it fit so well before, I used the same modified bra pattern from my purple hearts bra, though this time I used black, pushup foam cups and the black/brown Alice lingerie kit from The Sewing Chest.

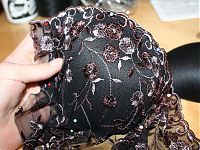
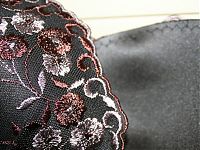
The first step was to cover the cups with the rigid lace. The lace in the kit was 50cm long, with two scalloped edges, so I aligned a scalloped edge along the top of the cup, then pinned and smoothed and made a few needed pleats in order to get it looking nice. If the lace or covering material is stretchy, then you don’t need any pleats in it, but as mine was rigid, a few small pleats were necessary towards the bottom.

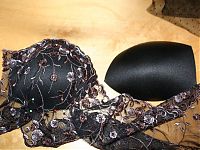
Here’s the covered and uncovered cups:

Then I did the same with the other cup, though I had to use the opposite scalloped edge so both cups were symmetrical. In bra making, symmetry is king!!

With a wide zigzag stitch, I basted the lace around all the edges and trimmed the excess. I actually went back later and added some stretched, narrow elastic on the inside of the top of the cups, but I’d recommend actually doing this, or applying FOE (foldover elastic) to the upper cup edge before stretching the lace over your cups to avoid a second line of zigzagging over the lace. Even if you think your cups are sturdy enough to not need the elastic, it really makes a difference in keeping the top of the cup close to your body and not getting any gaping.