Blog

A wool maternity coat – nearly there…

As you recall, last week I underlined Holly’s maternity coat and created all five bound buttonholes, but I had the day off work on Friday so I was able to make loads of progress over my long weekend! In fact, her coat is now 95% finished and ready to hand over, so I thought I’d give you a rundown of what I got up to…

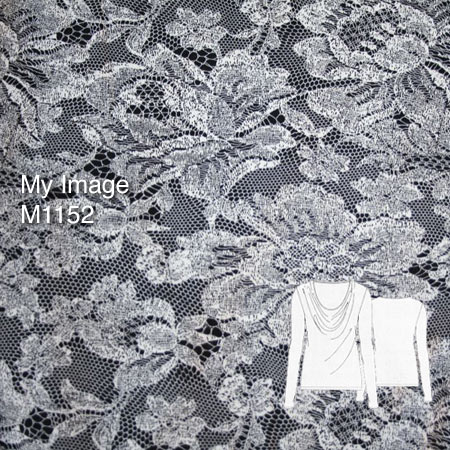
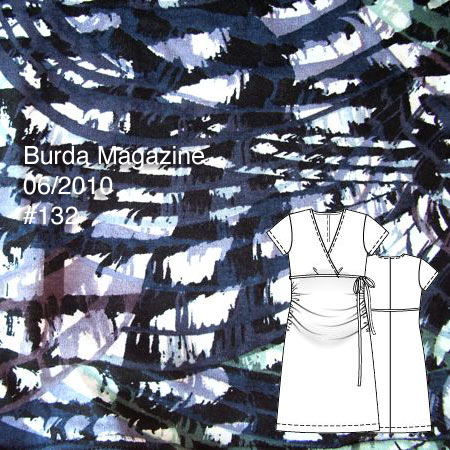
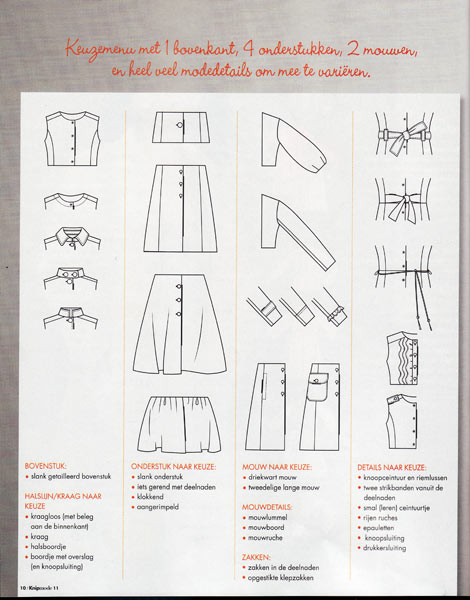
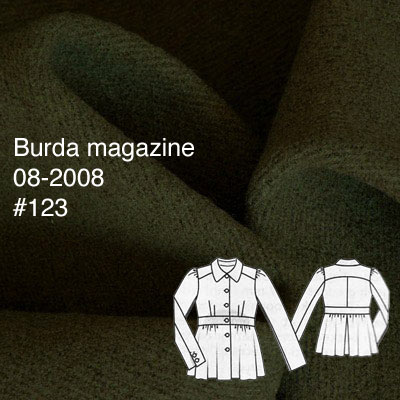
I’m making this maternity coat from the August 2008 issue of Burda, but after the first muslin we made some design changes (namely, eliminating the band and gathered sleeve caps) so it won’t look exactly like this tech drawing:

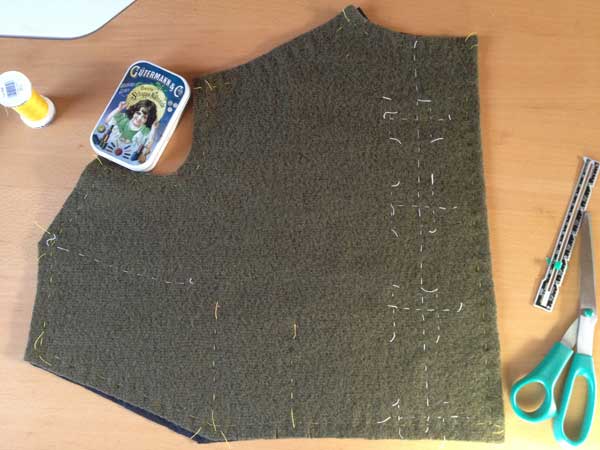
As I constructed the shell of the coat, I took the extra step here to catch-stitch all the thick wool seam allowances to the flannel underlining. I started off just doing this on the sleeve seams as I feel the bumps are most noticeable during wear there (and therefore most likely to get annoying quickly!), but I carried on and just catchstitched everywhere.

I wanted this coat to be as nice for her as one I would make myself, so why not? I also noted that Gertie was asking last week how to make the seam allowances lie flat on her coat – well, the answer is catch stitching!


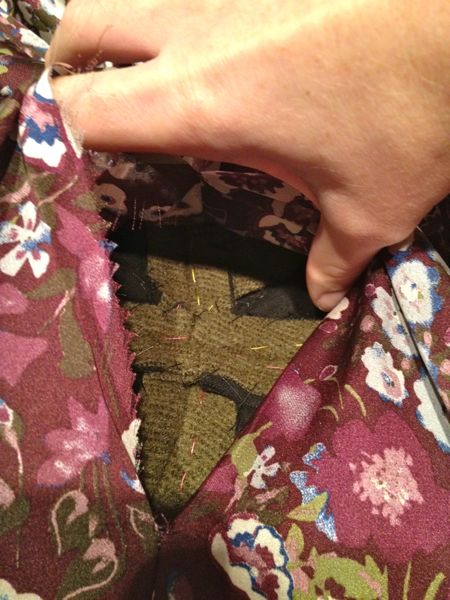
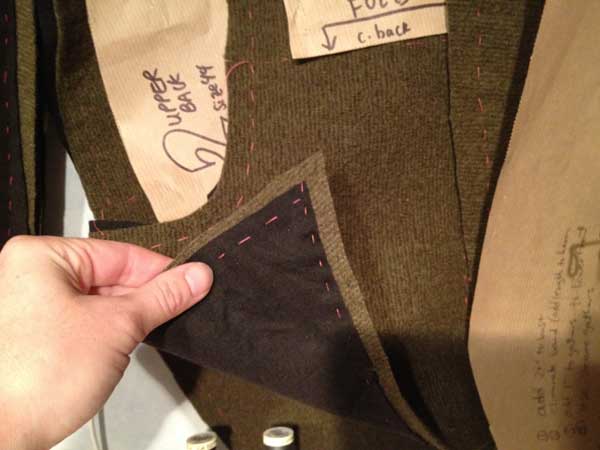
(I forgot to take a photo of all my stitching before lining it, though, so you’ll have to make do with a shot through the “window”!)

Patrones 306 & 307 (and Plus-sized giveaway!)

Patroneses are just like buses – you wait ages for one and then they all come at once!

I was very lucky to win a copy of issue 307 from Jacquie, who bought it while she was visiting in Spain, and then right after that, my friend Pip (aka the bridesmaid in purple) went away to Madrid on business. Even though she was on Spanish soil a good month after Jacquie, she managed to find 306 and no.8 on a newsstand there!

So let’s take a look inside…

Patrones 306

This edition was the last of the summer clothes, which isn’t too practical for me in London. I don’t go out of my way to buy the summer issues, but there is some good stuff to be had amongst the shorts and sundresses…

Skipping past the beach wear, this unstructured, reversible jacket and slim trousers is very nice.

I think my favourite in this issue is this strappy dress with an added drape portion. I can just imagine it moving in the wind (I’m going to ignore how cold that wind would be right now!).

I also totally love the seaming on the strapless cocktail dress on the right (the dress on the left? ick.). It’s difficult to see in the navy fabric with the belt on top, but the tech drawing is luscious!

A wool maternity coat – basting and buttonholes

If you recall from last week, my next project is this maternity coat from the August 2008 issue of Burda, which I promised a very good friend:


(The issue date is still wrong above – it is indeed in the 2008 issue…)

After we sorted out the fitting and design alterations (including a second, quick muslin fitting of just the upper bodice in the pub toilets on Saturday night!), my first step was to cut out all the pieces in the green wool and then again in the black cotton flannel I’d bought to underline the spongey wool coating and give it a bit more structure. The coating is wonderful, but I’m a bit concerned about it bagging out in places, and I wanted to give it some added stability as well as a bit of extra warmth (though if warmth were my primary concern, I’d call it “interlining” and attach it a bit differently!).

Here’s all the pieces hanging on the line in my tiny sewing room:

I then hand basted all the layers together around the edges of the pieces, plus through the darts, and then also marked out the placement lines for the five bound buttonholes:

Dark green sateen Clover trousers

As I mentioned earlier this week, I bought the new Colette Patterns Clover trouser pattern and I just had to try it right away!

There’s only four pattern pieces (five if you count the pockets) so this is about as simple as trousers get, and Colette have rated this as for Beginners, too. My first step was to make up a quick muslin in some super cheap stretch viscose I had on hand, but I hadn’t realised that the stretch was lengthwise until midway throgh cutting it, meaning there’d be no stretch around the body.

And you know what? These trousers still fit like a dream, with zero fitting wrinkles! I kid you not! It’s like Sarai came and measured me in my sleep or something (really, that’s bordering on creepy right there!). The only alteration I made with this final version was to add 2” to the leg length at the indicated line. Otherwise View A (the longer length) were still above my ankle bone when unhemmed. I’m not sure what height Colette drafts for, but I usually have to lengthen Burda trousers, too (but not Knip!) so I’d guess it’s around the 5’6” range.

I’m happy to say that this version in a nicer (but not terribly much more expensive) fabric fit just as well around the waist and hips, and are now the perfect length, too!

Even Bosco couldn’t resist coming along to rub up against them!

Independent pattern purchases

I went on a wee pattern spree last week! With my monthly supply of pattern magazines, I don’t tend to buy one-off patterns very often, but I’ve been very tempted by some new offerings from independent companies, so I decided to splurge and buy a few.

First, I bought two recent designs from Colette Patterns (though I bought from SewBox in the UK for faster, local shipping!):

Cinnamon is a bias-cut camisole or dress, and it’s from their previous lingerie collection. Reading through the instructions, there are a few changes I’m going to make to the cups to improve the finish, but I’m really keen to give this a go, and I don’t have anything similar in a bias-cut already in my magazine archive.

Clover is their first trouser pattern from the newest collection, and I was so excited to try this that I’ve already made up a muslin and my first pair! I knew it was Meant To Be when I tried on the muslin and had zero fitting wrinkles, but even crazier is that I’d accidentally made my muslin in fabric with zero width-wise stretch, which means the pattern is that awesome on me with no stretch to help it along!!

How to finish a cowl neckline

As promised yesterday, here’s a really cool technique I used to sew the shoulder seams and get a clean finish at the neckline of my MyImage cowl tee (M1152 from the Fall/Winter 2011 issue) all in one go.

It’s a variation of “the burrito method”, and you can use it on any top where you’ve got a facing on one side, and a folded edge on the other. So it doesn’t have to be cowl necks, it’ll also work for surplice or wrap necklines with a self-facing, too!

This comes fairly early in the construction of your garment, but by this point you should have already sewn your facing (in this case, my back neck facing) to the body of the garment (the back here), right sides together. You should also stabilise your shoulder seams, either by using Vilene bias tape like I have, or with strips of knit interfacing or clear elastic – whatever your preferred method is!

In my example, I’ve got a back neck facing which is a separate piece, and a folded (ie: integrated) facing on the front.


Step 1. Pin the shoulder seams together from the shoulder edge to the back facing stitching line, right sides together. Keep the front facing and the back facing out flat (ie: don’t pin them!)

The One Hour Cowl tee

First of all, thank you so much for all your comments and suggestions regarding my draped jacket! The consensus seems to be a) try it with skinny trousers, and b) shorten the sleeves at the very least, but I definitely need to take some time away from it before I can contemplate working on it again.

I think you can also predict what came next – a quick knit top! This top was particularly medicinal because last Saturday I’d already sewn up Holly’s maternity coat muslin, then done a bunch of overtime work from home, cut more insulation on the boat, and I found myself about 4pm with a totally frazzled brain and not quite sure what to do with myself.

So I went with my gut instinct, and started tracing the MyImage cowl tee (M1152 from the Fall/Winter 2011 issue)!

This fabric was a gift from Marie-Christine when we visited her in Toulouse at Easter. It’s a viscose(?) jersey printed (or actually, bleached, since the reverse is black!) to look like lace! I’m not a big “prints” person in general, but I’m such a sucker for a trompe l’oeil print, and you already know my love of lace!

There was only 1 metre of this, though, so it’s a good thing it has 2-way stretch since I had to fit the sleeves on the cross grain! If this was just a crosswise-stretch fabric I don’t think I would’ve been able to fit it in…

This pattern really is the essence of simplicity – there’s only three pattern pieces (four if you count the back facing, but I just used a rectangle of fabric instead), and the title of this post is no exaggeration – from tracing to cutting to sewing to wearing it took me only an hour! This really was just the pick-me-up I needed after the long-running draped suit project…

A beginner's knit maternity dress

Just to make things absolutely clear – no, I am not pregnant!

But my very good friend (and beginning sewer!) Holly is, so I’m doing some maternity sewing for her over the next few months, and helping her to sew a few things for herself, too. We’ve already had an afternoon session converting regular trousers to maternity versions (and I’m thrilled to report that she’s since gone home and done a few of these herself, too!), but it’s down to me to start the “from scratch” garments.

The first project was to make a “wearable muslin” of this Burda knit dress from June 2010. She picked this pattern out of a lineup, and it’s actually great for a beginner. The seamlines and construction are pretty straightforward, and you get a lot of bang for your buck with this, as there are two sleeve variations and two length variations!

I traced off all the different versions, and used the double tracing wheel I picked up in Budapest to even add the seam allowances on for her, too (something I never bother to do for myself, as I prefer my patterns without).

For this muslin I used some viscose jersey donated by Claire (Seemane) specifically for muslining purposes. The print is definitely too wild for me, but it might come in handy for Holly while she’s got a limited wardrobe. I don’t think it’s an ugly print by any means, and I could see her toning it down with a black or navy jacket or cardigan.

The Draped jacket & skirt suit

I’m very happy to report that my draped suit (Burda September 2011 #126 and 127) is finally finished! It feels like I’ve been sewing this for f-o-r-e-v-e-r and I am thoroughly sick of it now!

If you recall, it’s a two-part suit, with a draped, collar-less jacket and a pleated pencil skirt:

I’ve been sewing both of the pieces in parallel, so I’ve finished them at the same time. I like a lot of aspects of this suit, but to be perfectly honest, I’m not totally in love with the overall resulting look.

The jacket and skirt together!

Things I really like:

  • The lapel-less shawl collar construction
  • The asymmetric drape
  • The three part, bell shaped sleeve
  • The two-tone, piped lining
  • The folded and seamed facing on the draped side
  • Pretty much everything about the skirt
    • The drape makes for a rather elegant side view, too:

      Things I don’t like:

KnipMode November 2011

I currently subscribe to three different sewing pattern magazines: Burda, Manequim, and KnipMode. I don’t post reviews of Burda because so many other blogs do already, and also because Burda are great about publishing all the line drawings in advance, so you probably already know whether you like an issue or not without me harping on at you. All three have reliable delivery schedules, with Manequim appearing in the first week of the month, then KnipMode around the middle, and Burda bringing up the rear at the end of the month, or the beginning of the next. This month I ended up getting KnipMode only a few days before Burda, but I think it was just a combination of Knip being a bit late and Burda being a bit early. What it’s meant for me is that I’ve been a bit overwhelmed with breakfast reading so I’ve only just now been able to properly digest each issue along with my porridge, let alone get out the scanner!

As a total aside, I find it interesting that Manequim is the cheapest year subscription at about £65, then Burda at £70, followed by KnipMode at about £90. All I’m saying is, KnipMode has been alright since their new editor took over, but they better step up to awesome territory again soon if they want to stay in the sewing budget…

The first ten or so pages of this issue are taken up by the wide array of styles you can create with their mix & match coat patterns. They’ve done this in the past with dresses and cocktail dresses but essentially you choose the various sleeves, bodice, collar, etc, and build your custom coat pattern that way.