Blog

Minimum Viable Dress (and speed sewing tips!)

In the tech industry, there’s a term “Minimum Viable Product”, which means the absolute minimum you can do to get code out the door. It’s not your best work, but it works.

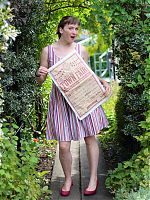
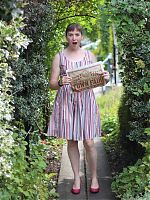
Like half of London, we had tickets to see Secret Cinema’s performance and screening of the first Back to the Future film, where they recreated the entire 1955 town of Hill Valley, California, complete with about 20 business, the clock tower, full fun fair, a cast of hundreds of actors, you name it. We were also all asked to assume an identity (I was “Tiffany Hyslop, developer!”) and dress in 1955 styles. Now, I’ve only got one 1950s dress pattern (which I made into that Porsche dress a few years back) but it’s too big in the bodice now and would require too much work.

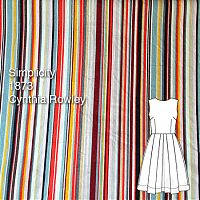
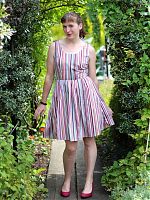
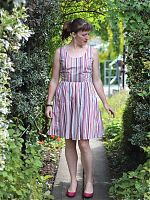
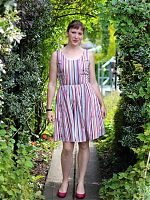
So instead, I picked a modern dress with a 1950s feel – the Simplicity Cynthia Rowley pattern (1873) which I had already made in fuchsia and really liked the fit of.

The pink version was the wrong colour for the 1950s and definitely too short, so I bought some striped cotton poplin from Minerva that had the right vibe, and figured it’d be close enough.

My "Brazilliant" red Brasilia Dress

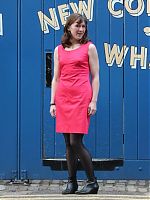
I’ve been wanting to make Rachel’s free Brasilia Dress pattern since she released it on Christmas Day, and I finally got the kick I needed, in the form of a big opportunity – ten days ago I was asked to speak at the House of Commons about a new stem cell bill! So of course I needed a new dress, and I figured the red stretch cotton sateen in my stash would be perfect, both for confidence and the connotation with blood.

The pattern is only available in one size (Rachel‘s), but through an extreme act of coincidence, I match her bust, waist, and hips almost exactly, only differing by a centimeter or two. Our lengths, however, are another matter entirely, so I jotted down mine for comparison on the size chart provided:
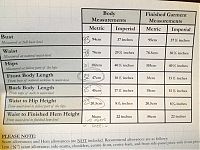
I was a bit confused as to whether I should adapt the pattern based on the given body measurements or the finished measurements (as there’s a big difference in the lengths between them), so I ended up measuring the pattern myself (which was somewhere between the two given sets) and made this match my lengths.

In the end, I removed 5cm above the waist, added 1cm between the waist and hips, and lowered the front neckline by 7cm (this latter change was just a personal style choice). My bust point was exactly the same placement as on the pattern, though in future I’d shorten the darts so they end an inch or two below the bust rather than right at the apex.
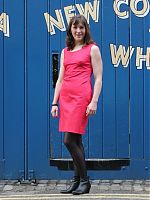
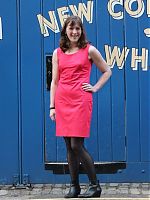
Can you believe this red stretch cotton sateen has been in my stash since 2010? What was I thinking not using it until now?! It really is cherry red and not fuchsia like in these photos, also! The only problem with stretch cotton sateen is that it shows way more wrinkles in photos than it ever does in real like! In reality, this might possibly be the best fitting sheath dress I own.
Peach flip-turned top and slim brown trousers

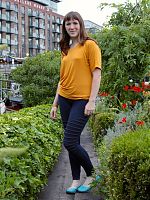
In addition to my exercise gear you saw yesterday, I actually made another top and trousers the weekend I got back from Montreal! Since I wasn’t in a fit state for a photoshoot until now, I kinda feel like I’m clearing out the cobwebs here…

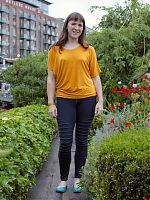
This top is another “Flip turned for a draped effect” top from Pattern Magic 2 (drafted on my Morley College course!), this time using the tulip sleeves from Jalie 2806 for a more Spring/Summer look. This is the third time I’ve used these tulip sleeves and I really love the look and love wearing them – they really make a top much more special than just your average short sleeve! I used a lovely orange marl viscose jersey from Tia Knight here that’s just sooooo soft and lovely to wear! Hurrah for an impulse purchase!
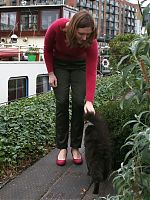
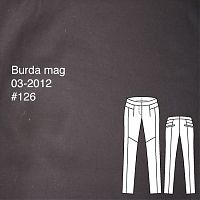
The trousers are from the March Burda magazine (#126), using some stretch cotton sateen I bought at Tissues Dreyfus in Paris last month. It looked black in the dark lighting of the shop, but I got it home to realise it’s actually dark brown, which was fairly annoying, as I wouldn’t have bought 3m of brown had I known!

Christmas Present – Dr Who waistcoat

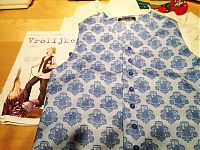
I didn’t get much of a chance to sew many Christmas presents this year, but James and I have been plotting and planning to sew a Dr Who waistcoat (“vest” in America) for his nephew for about three months now. It was all triggered by seeing this Tardamask fabric on Spoonflower, which is the exact same print as a Threadless tee James owns that little Rory went mental for when he saw James wearing it!

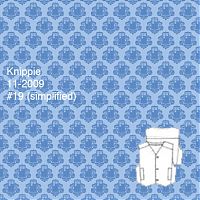
So we ordered the fabric months ago, then got his mum to take some measurements for us, and with that, I sifted through my patterns archive and found I’ve only got one waistcoat pattern for boys, from an old Knippie (KnipMode’s kids pattern magazine):

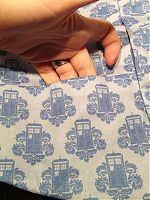
As you can tell by the line drawing, though, I did quite a bit of manipulation before I started sewing. I wanted to minimise the seamlines and thus, disruption to the print, so I taped the pieces together and eliminated the front pockets so the only seams are at the shoulders and sides. I wanted to make the entire thing from the Tardamask print, but I ran out of length inside, necessitating a horizontal seam in the lower front.

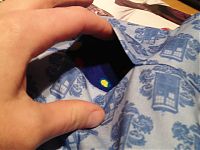
But ah-ha! I turned that seam into a feature by putting in some inseam pockets, just perfect for storing action figures or treasures or whatever it is little boys put in their pockets these day.

In any case, Rory loved his waistcoat! He’s 7, and the biggest Dr Who fan ever, so we were excited to see his reaction on Christmas. Little did we know that he’d turn up in a full suit and hat (it was under the tree for him earlier that day), which complimented the waistcoat perfectly!

Dark green sateen Clover trousers

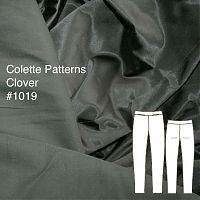
As I mentioned earlier this week, I bought the new Colette Patterns Clover trouser pattern and I just had to try it right away!

There’s only four pattern pieces (five if you count the pockets) so this is about as simple as trousers get, and Colette have rated this as for Beginners, too. My first step was to make up a quick muslin in some super cheap stretch viscose I had on hand, but I hadn’t realised that the stretch was lengthwise until midway throgh cutting it, meaning there’d be no stretch around the body.

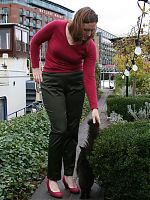
And you know what? These trousers still fit like a dream, with zero fitting wrinkles! I kid you not! It’s like Sarai came and measured me in my sleep or something (really, that’s bordering on creepy right there!). The only alteration I made with this final version was to add 2” to the leg length at the indicated line. Otherwise View A (the longer length) were still above my ankle bone when unhemmed. I’m not sure what height Colette drafts for, but I usually have to lengthen Burda trousers, too (but not Knip!) so I’d guess it’s around the 5’6” range.

I’m happy to say that this version in a nicer (but not terribly much more expensive) fabric fit just as well around the waist and hips, and are now the perfect length, too!

Even Bosco couldn’t resist coming along to rub up against them!

The Burda trench jacket

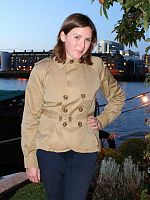
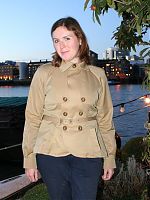
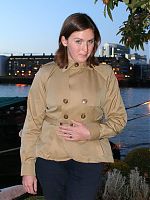
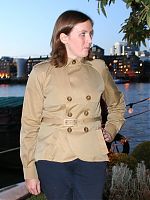
I’m so pleased to finally show you the first piece from my Fall 2011 sewing aspirations – the trench jacket!

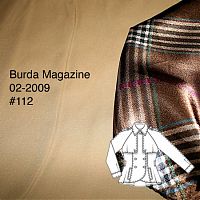
As you recall, I was restricted in my pattern choice since I bought the last 2.5 yards of this waterproof gabardine from Mood when we were in NYC last Fall, but in the end I settled on Burda 02-2009-112. The gabardine feels great – it’s not coated with anything and it doesn’t feel plasticky – it’s just that the weave is so tight that water beads on it! Perfect for London!

This is a Burda Petite pattern, but the only change I needed to make to the muslin was to lengthen the sleeves! I’ve been busy sewing this in tiny increments over the past few weeks because I’ve been so busy, and you can see that we had to squeeze in this photoshoot after work, too!

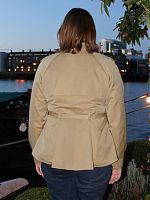
I really love the overall shape of this totally curvy jacket, but I especially love the pleated back vent, which was surprisingly very easy to sew! I cut the same pieces in the lining, and I cleverly waited to sew the diagonal topstitching to keep the folds in place until after the lining was in so the two layers stay together nicely.

The John Deere shirt

So following on from my high class, designer escapades last week, I’ve now got something a little more, err, salt of the earth to show you. I’ve taken to calling this the “Appalachian Wedding Shirt” (and being from Perry County, PA, I’m allowed to say that!), but it’s also a gift of a gift, and I love when I can do that.

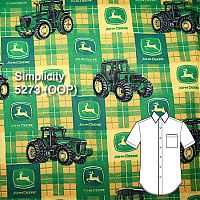
The (officially licensed!) John Deere quilting cotton was a gift from my friend Sharon, who bought it at her local Amish fabric store and presented it as a gag gift in my stack of fabrics that made up our wedding gift. John Deere is a completely unknown brand amongst my circle of friends in central London, but we knew our friend Simon would love this, and he travels all around the world on business so we knew it’d get seen a lot, too.

I paired this with Simplicity 5273 (now Out Of Print), which I’ve made many, many times for James in various guises and it’s my go-to pattern for a quick and easy button-down casual shirt for him.

You may remember Simon from the quickest pirate coat ever (and yes, he still wears it!). But this shirt has been a mental project for almost a year now, since Simon was overheard at our wedding complaining to other friends how “it’s not fair that James just picks out any fabric he wants and Melissa makes it into a shirt for him!”. ha! So we thought this would be perfect for him…

James’s first reaction when he saw the finished shirt was “It’s horrible! Simon will love it!”.


(Apologies for the mobile phone photos!)

A functional KitchenAid mixer cover

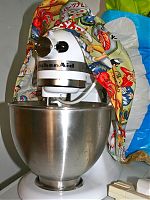
Back in March, I joined the ranks of the middle class aspirational home cooks when James bought me a KitchenAid mixer for my birthday. I asked for (and received!) yes, a white one, because, while I like the red ones, they’re totally not worth £100 more just for the colour! Anyway, we were finally able to rearrange our tiny galley space to accommodate it so I finally broke it out of the box to make macarons last weekend.

The macarons were a resounding success (I also discovered the sole thing on earth that’s tastier than macarons – macaron batter!), but the only storage space for the mixer is out in the open, so I needed to sew a cover for it, lest I have to wash the dust off it every time I want to use it!

I was feeling supremely lazy, so rather than measure it myself, I just used the
tutorial and pattern here to sew up a really quick cover.

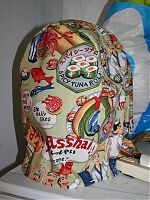
I made a few changes from the above site, though, the main being that mine is not quilted (it’s not like the mixer needs to stay warm!), and mine has a seam at the top since my print is directional and I didn’t want upside-down people on one side.

A plum tulip top and seamed silver trousers

I’m finally over my post-wardrobe exhaustion and able to sew again, so I carried on with my March mini-wardrobe plans and made the seamed trousers from KnipMode Oct 2010 (#8):

(hmm, why are they covering the waistband in their only magazine photo?)

I also thought I was due a “quick knit top” so I pulled out Jalie 2806 (a gift from LynnRowe on PR!) so I could try out those fantastic tulip sleeves, with the thought of maybe using them on the spring/summer version of my Burda September cover dress

I had just enough of Ditto‘s wonderfully soft and supple plum bamboo/lycra jersey leftover from my plum and green lace top for this, so it was clearly meant to be! For the trousers I used the same Fabric.com stretch twill as in my navy riding trousers, though in different lights this goes from looking pale grey (nice!) to baby blue (not so nice!). But the combo of pale trousers and dark top feels very Spring-like to me.

Rose and lace teeshirt

It’s absolutely freezing in London and I really need more long-sleeved knits, so I thought it was the perfect opportunity to use this pattern from KnipMode Dec 2005 with a yard of rose jersey from Fabric.com and some of my gorgeous cream stretch lace that I bought in Paris. Et voila! A raglan-look lacey long sleeved teeshirt (Lace but without the Brrrrrr!).

This is a really basic long-sleeved teeshirt pattern, but with lines drawn in from the neckline to the side seams on the front and back. I left off the weird cuffs (in fact, I just reused the sleeve from my drape-front dress because I’m lazy like that and don’t see the point in tracing an identical sleeve again!), and decided to create my own neck binding which I serged on and then coverstitched down.