Blog

Hokey Croquis & Fashionary tech drawing help

Last year I was sent a complimentary Hokey Croquis fashion sketching notebook as a thank you for being a contributor to the BurdaStyle book, and I never quite got around to telling you about it. Not because the product isn’t nice, but mostly because I haven’t done much drafting or designing until now where Ive needed to make my own tech drawings!

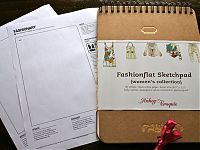
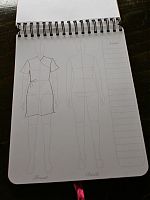
Hokey Croquis is a very sturdy, nicely designed, spiral bound notepad with pre-printed female croquis (those are the little drawings of female silhouettes), which you just draw your designs on top of. Then, you can scan in the page, fiddle with the contrast on your computer, and their lines disappear.

HC have really paid attention to the little details here – the book closes with a nice, pink ribbon, and included with the book are some classy stickers to customise the cover. I’ve noticed that Fashionary.org have a similar croquis notebook for sale, but they also have some free pdf downloads, too. I’ve not had a chance to try their book, but the croquis included in the pdf are a bit small for my liking. I think they’re great for getting a bunch of ideas down without wasting precious, thick pages in a book, but for making the final tech drawings, I think the larger, HC forms are better.

Muslins, muslins everywhere…

…but not the time to sew!

I’ve had an incredibly busy week and weekend, between my whirlwind social life, an influx of new work at the office, hardcore boat DIY, moorings duties, and keeping up with my running, so I’ve hardly had any time to step foot in my sewing room, let alone sew! It doesn’t help that pattern drafting moves at a glacial pace as compared to just tracing off a pattern and sewing it up!

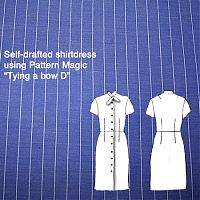
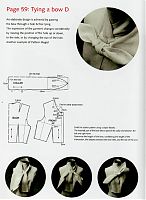
If you remember, I’m using Pattern Magic and the Bunka draft to revisit pattern drafting. So far I’ve made my bodice sloper and drafted up this variation from the first Pattern Magic book, “Tying a Bow D”.

This is one of about five designs across the books that I’d really like to make, but it’s also by far the simplest draft so I thought it’d be a good place to start. The only difference is that I want to a dress from this instead of a blouse, so I’ve also drafted up a skirt sloper and am just now starting to match up the darts to the bodice and insert some flare to make it usable for a nice shirtdress.

Revisiting pattern drafting and the vintage tab dress muslin

Remember the vintage dress pattern I graded down to my size a few weeks ago?

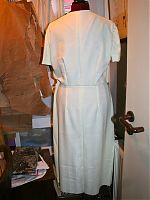
Well, I made up a muslin with my grading changes in place, and though I didn’t get any photos of it on me, I did get some on Susan. I realise that diagnosing fit issues on a dressmaker’s dummy is particularly futile, though, so you’ll just need to take my word for it!

On first glance, the worst issue is that there is way too much fabric in the upper back, but also I think I may need to raise the waist seam by an inch, and narrow the shoulders by an inch or so, too.

The skirt length is d-o-w-d-y so I’ll need to shorten all those panels, too (happily I’ve got a “lengthen or shorten here” line on both the bodice and skirt pieces).

While the sleeves themselves fit nicely, there is an unholy amount of excess ease in those sleeve caps, omg. So I’ll need to shave down those caps to take a good few inches out of there.

It wasn’t necessarily the list above that made me lose enthusiasm for this dress, but I can’t really put my finger on what it was. But it turned out that doing all the boring grading reawakened in me a desire to conquer pattern drafting, which I dabbled in when I received “Metric Pattern Cutting” by Winifred Aldrich last year, but didn’t get far.

Lekala cowl top instructions and giveaway

You’ve seen my version of this fantastic cowl top, now’s your chance to make your own and show me yours!

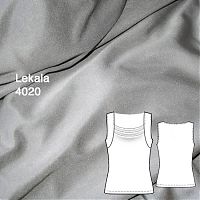
As you’ll recall, the above is made using Lekala 4020, but I’ve created sleeve bands on the back to echo the ones on the front, so our first step is to alter the pattern for this.

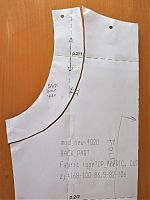
Here’s the (unaltered) tech drawing:

Lekala give full pattern pieces rather than placing some patterns on the fold, so the first thing I like to do is fold the front and the back in half. If you’re altering the back like me, then cut the back piece in half along this foldline (at the CB).

To echo the sleeve bands/yokes on the back, first lay the front sleeve band/yoke piece onto the back, and mark the corresponding widths at the back shoulder and the back side seam, so the two bands will align nicely when sewn together. Then, using the front yoke piece as a guide, draw a nice curve to join the two points, trying to keep the width of the yoke even. Lastly, draw a double notch somewhere in the lower half across the line, so you’ve got the notches on both the back piece and your new back band piece. Then cut along the line and treat as two pieces.

You’ll end up with something like this:

A different kind of lingerie success

I’ve made three bras so far, and despite winning the PR Lingerie contest last year, I’ve never been that happy with the fit of any of those bras. I mean, they were okay, but the style is different to the kind of bras I buy, and the underwires dug in, and well, the girls just didn’t look their best. So they’ve kinda worked their way to the bottom of my lingerie drawer, which makes me sad. I sew to wear, not to shove in a drawer!

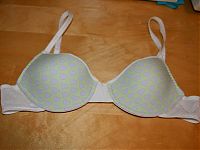
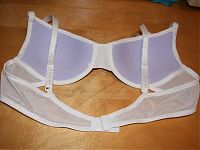
As I mentioned last week, I got very excited about the notion of sewing a bra made with foam cups, which are the sort I always buy, and speaking to Kellie at The Sewing Chest, she got me all set up with the right bits to have my first go. I made a toile using her purple hearts foam cups over the weekend and the fit is so good I wore it all day Sunday and now again Monday!

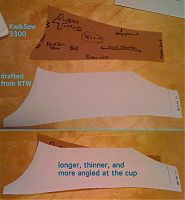
I started the process by making a rigorous comparison of the Kwik Sew 3300 pattern vs two RTW bra backs and ended up drafting a back similar to a Ted Baker one that fits me well.

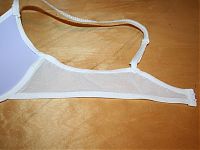
Here you can see the difference between the KwikSew back (in brown) and my newly drafted-from-RTW back (in white) –

Grading down the vintage tab dress pattern

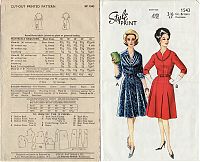
One of my big tasks this weekend was to finally get cracking on my upcoming vintage tab dress, Style Print 1543. It doesn’t have a copyright date, but was estimated to be from the late 1950s/early 1960s by the vintage gurus on Pattern Review. I’ll be making the button-tab view in blue, but since this pattern is for a 42” bust, I’ve got to grade down the pattern to be closer to my 38-39” (depending on the bra!) bust.

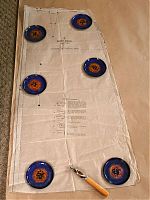
My first step was to trace the pattern pieces (read more about my pattern tracing method here) so I wouldn’t have to cut or damage the vintage tissue. Those blue enamel coasters from my mom are the most perfect pattern weights! They’ve even got a nice felt bottom to them.

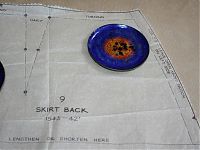
This pattern has seam allowances (called “turning” here!) included, but they also mark all the seam lines! Heaven! Since I’m going to be altering the pattern anyway, I just traced on the seam lines to make life simpler.

Surely this is the best of both worlds, right? You can choose to use the seam allowances or not (though I understand how this would be impractical on multi-size patterns!)

As I was unfolding all the pattern pieces, I found it really interesting to see the fit alterations the previous seamstress had made. She:

I'm currently excited about…

My turquoise and silver motif dress is nearly done (check out the fantastic lace hem tape I found in my stash to pretty-fy my hem, too!), but it doesn’t stop me thinking ahead…

  • Lekala 4020 – My brain needs a quick knit top, and I looooove the cowl neck and shoulder yokes on this. I’ve created echoing sleeve bands on the back to decrease the “coffin back” look (the only reason I haven’t made their “S dress” yet is that I’m contemplating how to jazz up the back on it. Any ideas?). I’ve got some small lengths of silver silk jersey left in my stash that I think will find a good home in this top.

    Even better is that they’ve got every pattern available in a free size 44 pdf this month if you want to try them free before you do the custom-size thing!

  • A foam cup braOMG I am amazingly excited to learn there’s a pattern out now for making the type of bras I buy in RTW with the moulded, foam cups! It’s the Pin Up Girls “Amanda” bra pattern. I’ve made bras before, but I’ve never been happy with the fit, and I think that half my problem is that I’m trying to sew the kind of bras I never actually buy…

    I had an email chat with the lovely Kellie, owner of The Sewing Chest shop (the best UK source of elastic and boning and lingerie fabrics, hands down!), and I’m now totally excited about sewing bras again. She’s advised me to put some of her foam cups onto the non-cup parts of the KwikSew 3300 bra I’ve made before, and see how that goes. She’s also advised me to use a different underwire size, too. Fingers crossed for bra success!

Recent gifts

My first gift is a very special one, because it’s from all of you!

I recently received a Google Adsense payment, and I always try to spend these exclusively on sewing supplies to feed back into this site. The last payment bought me four Patrones issues and some Spoonflower knits, for example! But I’m trying to pare down my fabric to fit in my tiny sewing room, and I already have more patterns than I can sew, so I thought I’d spend the windfall on some really nice interfacings from Fashion Sewing Supply!

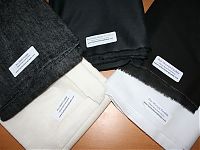
You bought me:

  • 2 yards Pro-Weft fusible interfacing, Natural
  • 2 yards Pro-Weft fusible interfacing, Black
  • 2 yards Pro-Tailor Deluxe fusible Interfacing, Dark Grey
  • 2 yards Pro-Woven Fusible Interfacing, White
  • 2 yards Pro-Woven Fusible Interfacing, Black

This should be enough to keep me in interfacing for a year years, and this stuff just feels incredible – the Pro-Tailor stuff especially feels so silky soft! I can’t wait to try this stuff out…

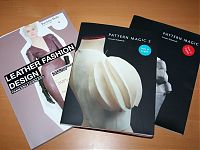
For my birthday, I received some sewing books that I requested!

Free kitty kicker pattern and tutorial

Do you have a cat? Does he sometimes scratch where he’s not supposed to?

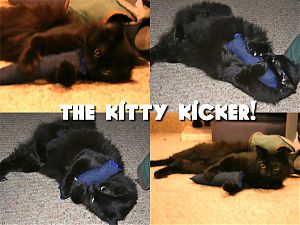
Ours may look angelic, but Bosco’s certainly got a naughty streak!

Cats need to scratch with their hind legs or bad things happen. But we don’t really want them “bunny kicking” our arms to shreds, either! That’s where the Kitty Kicker comes in – your cat will nuzzle the felty, catnippy wonder to his face and kick at the body with his hind legs! And the offset end seams means it rolls really easily, giving kitty something to chase as you throw it around the room.

Download the pdf here!

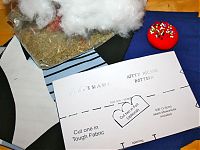
Like with all downloadable patterns, make sure to print it at 100%! Unless your cat is very small, or utterly enormaincoon, in which case feel free to scale up or down. Also feel free to change around the felt piece – make it long and fringed, or spiked, or even replace it entirely with ribbons or yarn if you’d rather.

You will need:

1. Small piece of tough fabric like denim, twill, canvas, or home dec fabric (IKEA do great heavyweight fabrics for cheap!)
2. Small scraps of felt (optional)
3. Fiberfill, or scrap fabric for stuffing
4. Catnip!
5. Hand needle and thread

Instructions:

Un-petiting the Burda September cover dress

While I wait for the weekend to photoshoot the Lekala ribbed top (either you all are too smart or I’m too predictable!), I’ve started work on creating the cover dress from the September Burda magazine. It’s a really cool, curved seam design with no side seams and designed for knits, but it’s one of Burda’s Petite patterns.

I am in NO way petite – at 5’8” (172cm), I am closer to Burda’s Tall height (180cm) than I am to the petite height( (160cm). I have a sneaking suspicion that my torso is quite compact and my height is mostly in my legs, but in any case… I’ve made a few of Burda’s petite patterns before with good results, namely, my 30th birthday dress and the blue silk cocktail dress, so I wasn’t totally scared off because it’s for petites.

I made up a muslin of the top half of the dress (the half I’m most concerned with) on Wednesday night and I’m happy with my alterations so I thought I should share what I did.

First of all, lay out pieces 1 and 2 so that their folded edges are aligned, taping the pieces together loosely. Then lay out pieces 8 and 9 so that their folded edges are aligned, and that these meet the front pieces at intersections 7 and 8. Don’t worry that the shoulders are far apart or that some of the curved seams don’t meet up whilst flat.

My alterations are the white pieces shown below: