One of my favourite things about the block-based approach to the designs in my “Sew Your Own Activewear” book is that you can use just about any block patterns as your starting point – not just the ones I’ve included in the book.
As I say on page 16, “The included blocks are designed for women in the sizes shown in these size charts, but if you’re not a woman or your body doesn’t match any of the measurements in the size charts, using your own block means that these designs could work for children, men, disabled people, trans people and non-binary folks, those who prefer modest clothing and those whose measurements are beyond the size range here. There really is no limit: if you’ve got a body, you can exercise, and if you can sew, you can make activewear.”
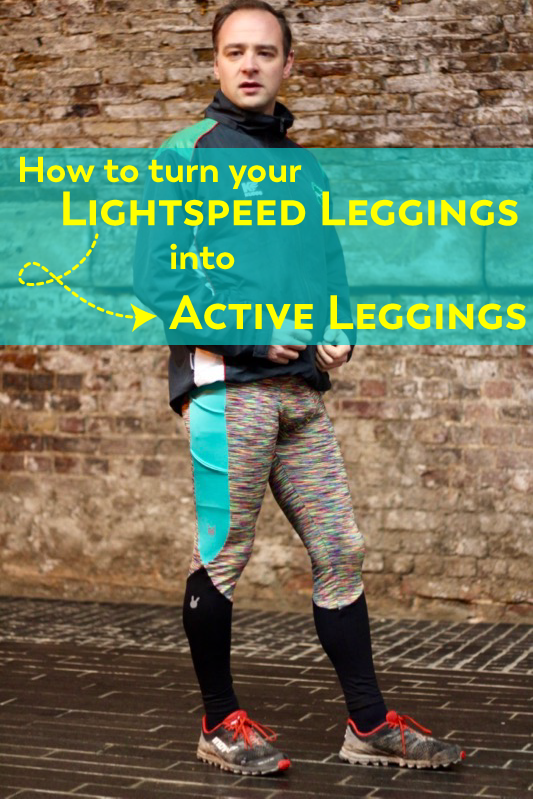
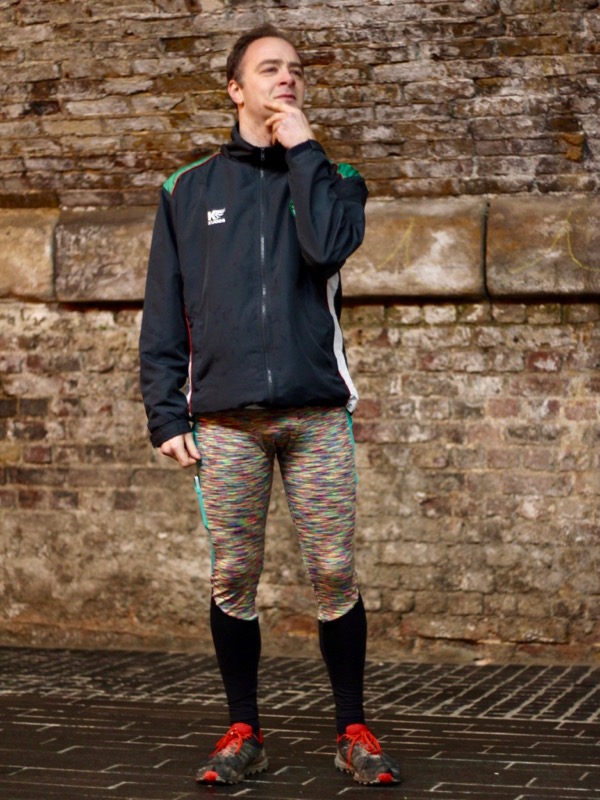
It’s one thing for me to say all of this, but it’s another entirely for me to show you. So today I’m going to show you how to take my men’s leggings pattern, the Lightspeed Leggings, and use them as the starting point for the Active Leggings in my book. (Scroll down for a discount code for the Lightspeed Leggings, too!!)
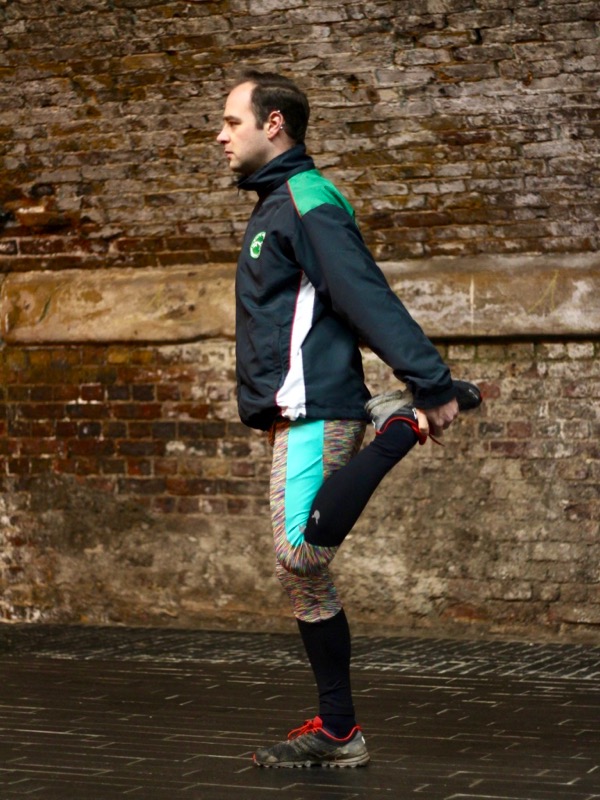
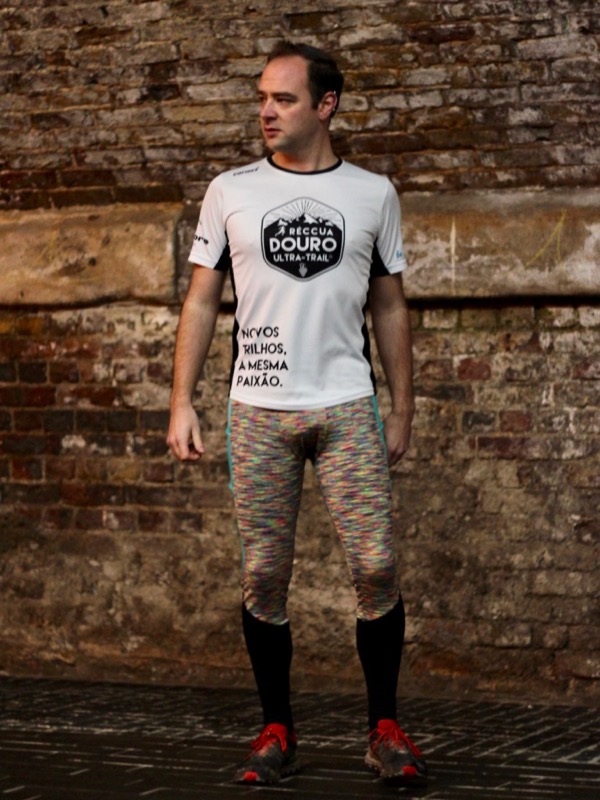
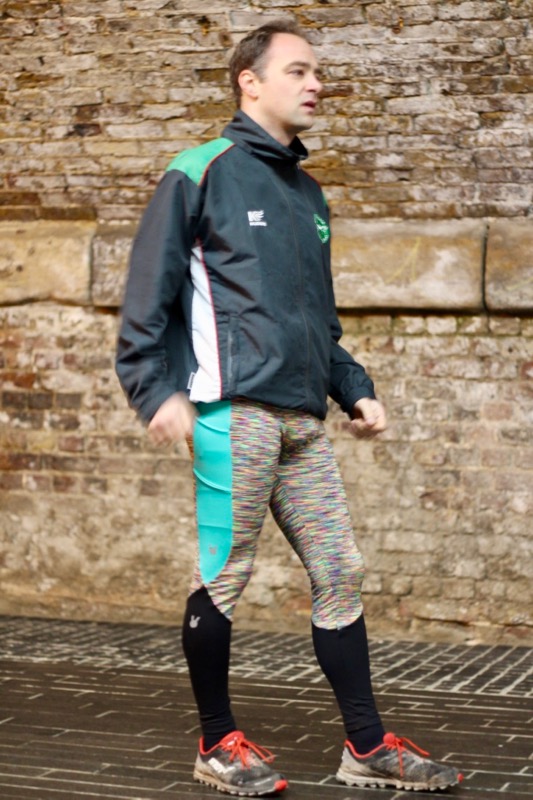
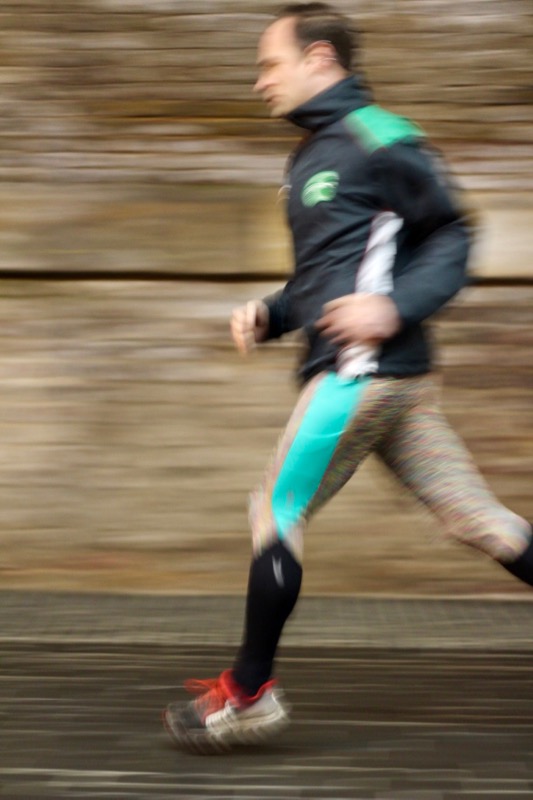
Thankfully I have a willing model in my friend Alex, who so happy to have some great running gear that isn’t black or blue (the 2018 men’s equivalent to my complaints about black and pink a few years ago!) that he’s willing to pose for a few photos. And those of you who visited our stall at the Great British Sewing Bee Live last year may have met him then, too!

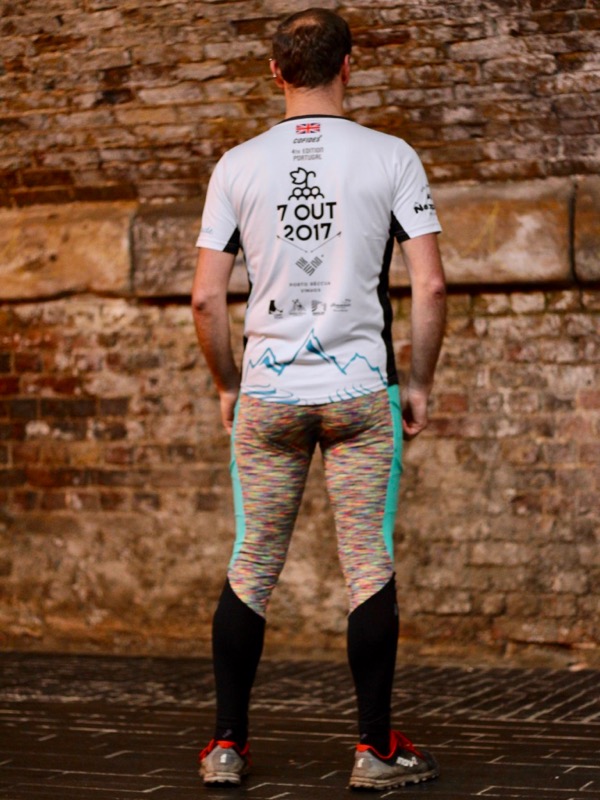
For this pair of leggings I’ve used Neon Blur and Vibrant Green activewear fabrics from Guthrie Ghani along with some black supplex (originally from Tia Knight but long since sold out – Funkifabrics stock similar black supplex though) on the lower leg. Using black on the lower leg was a conscious choice here because Alex does a lot of muddy trail running in rural Oxfordshire and this will conceal any mud stains that might be difficult to shift!
TUTORIAL TIME!!
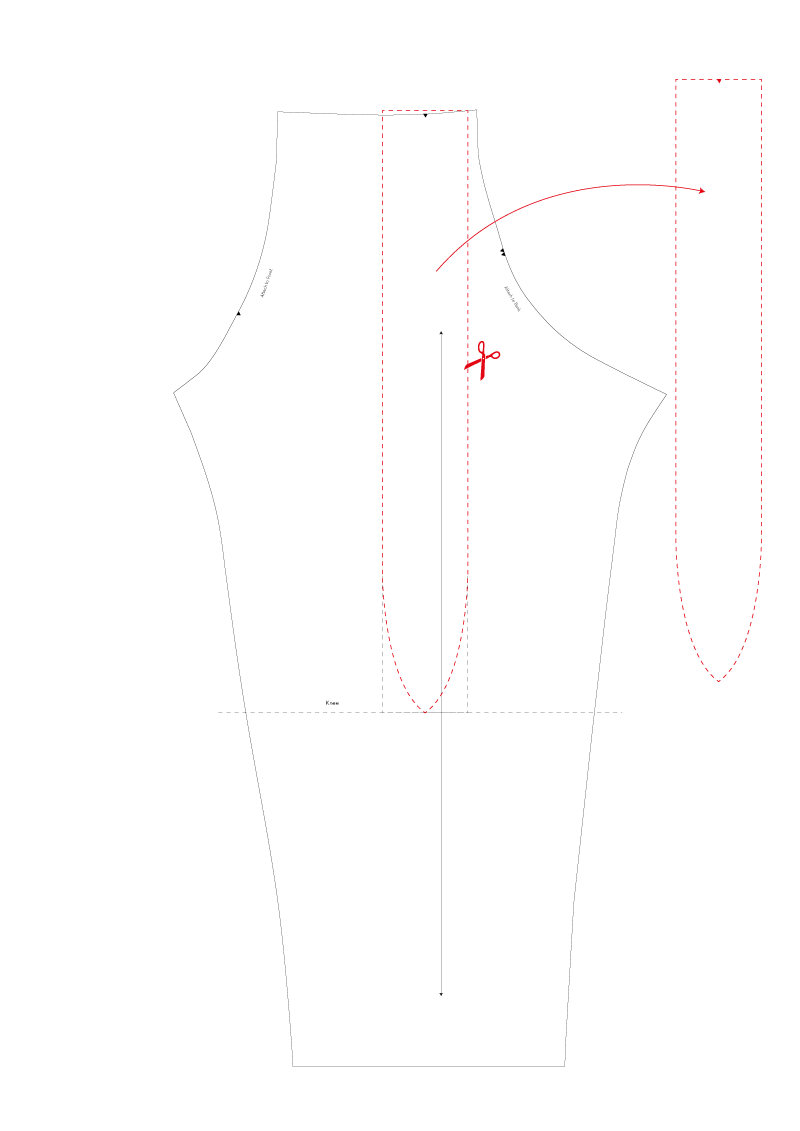
1. PATTERN: Take the Side, Front and Back pieces from your Lightspeed Leggings, and since we’ll only be modifying the Side, trace off a new copy of just that piece, being sure to mark the knee line. Tip: Remember that this pattern includes seam allowances already, so either remove these now, or mark your changes in a different coloured pen/pencil so you know which lines to add these on to at the end (I’ve done mine as dashed lines throughout this tutorial)!
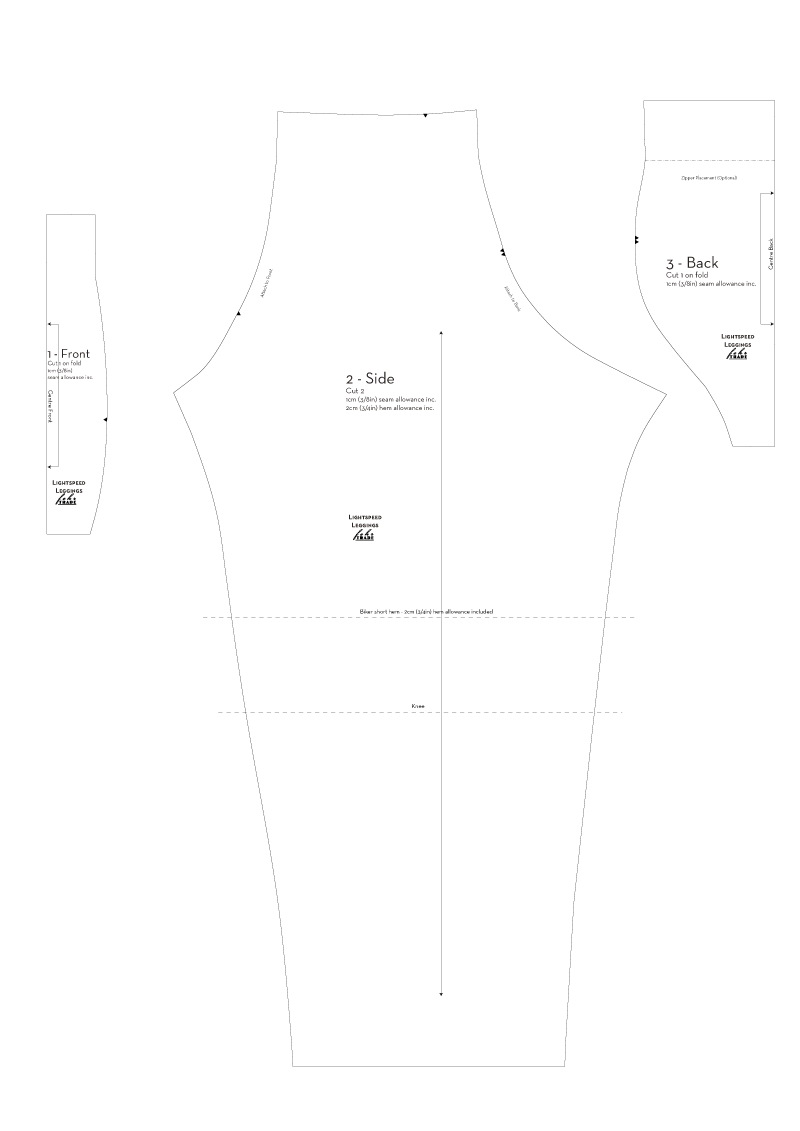
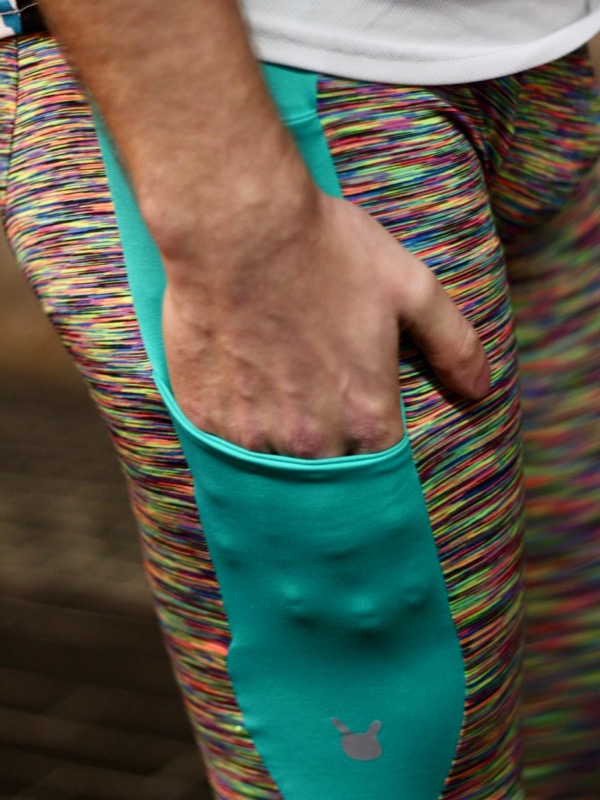
2. SIDE LINES: Determine your finished side panel (and therefore, pocket) width based on the widest object you wish to store (such as your phone) and subtract 10% from the amount so the fabric’s stretch will prevent it from falling out as you move. Draw a rectangle of that finished width centred on the waist notch running from the waist down to the knee. For example, for an object that’s 10cm (4in) wide you’ll want a pocket that’s 90% of this – 9cm (31/2in).
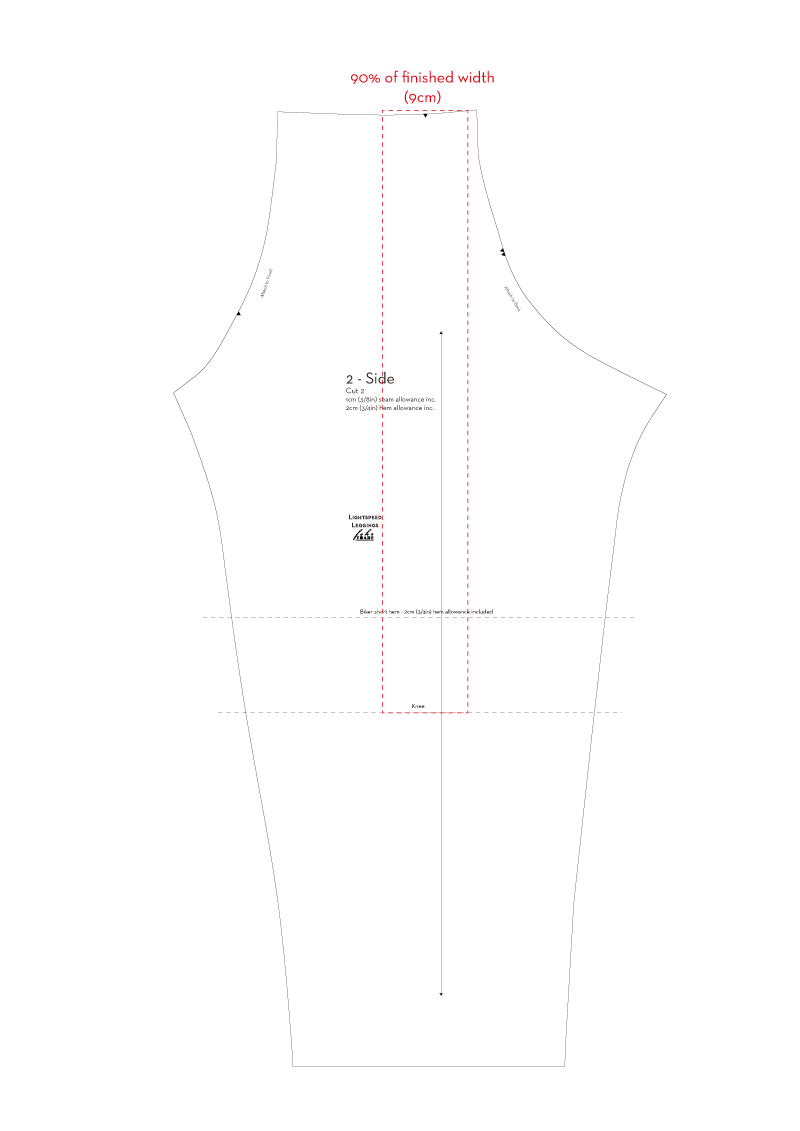
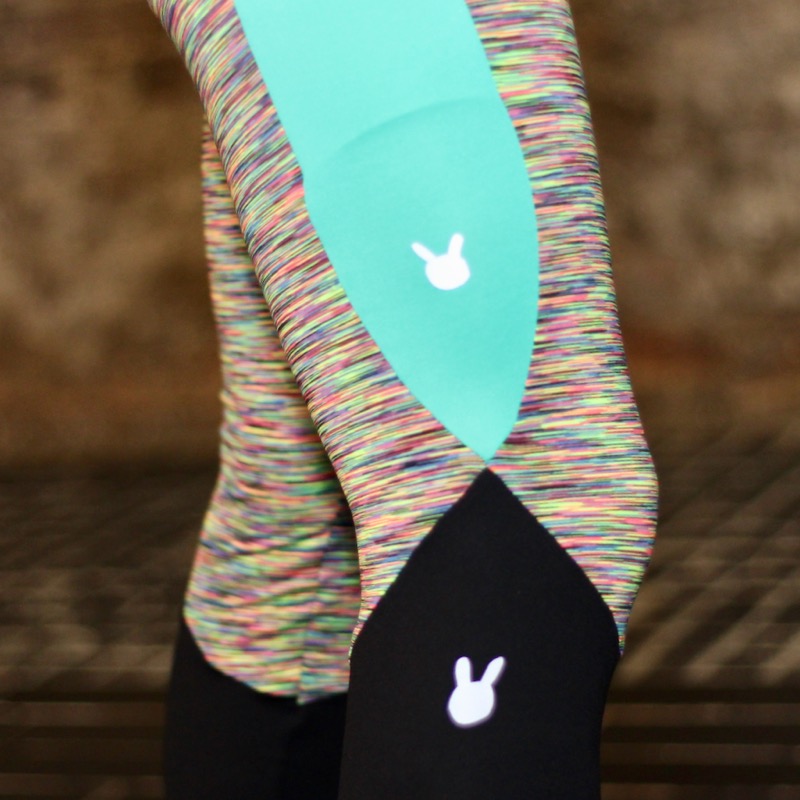
3. DIAGONAL KNEE LINES: Mark a point 15cm (6in) up from the marked knee line along the outside of the rectangle. Draw a line connecting this point to the center of the rectangle at the knee, curving the line to join the side panel line.
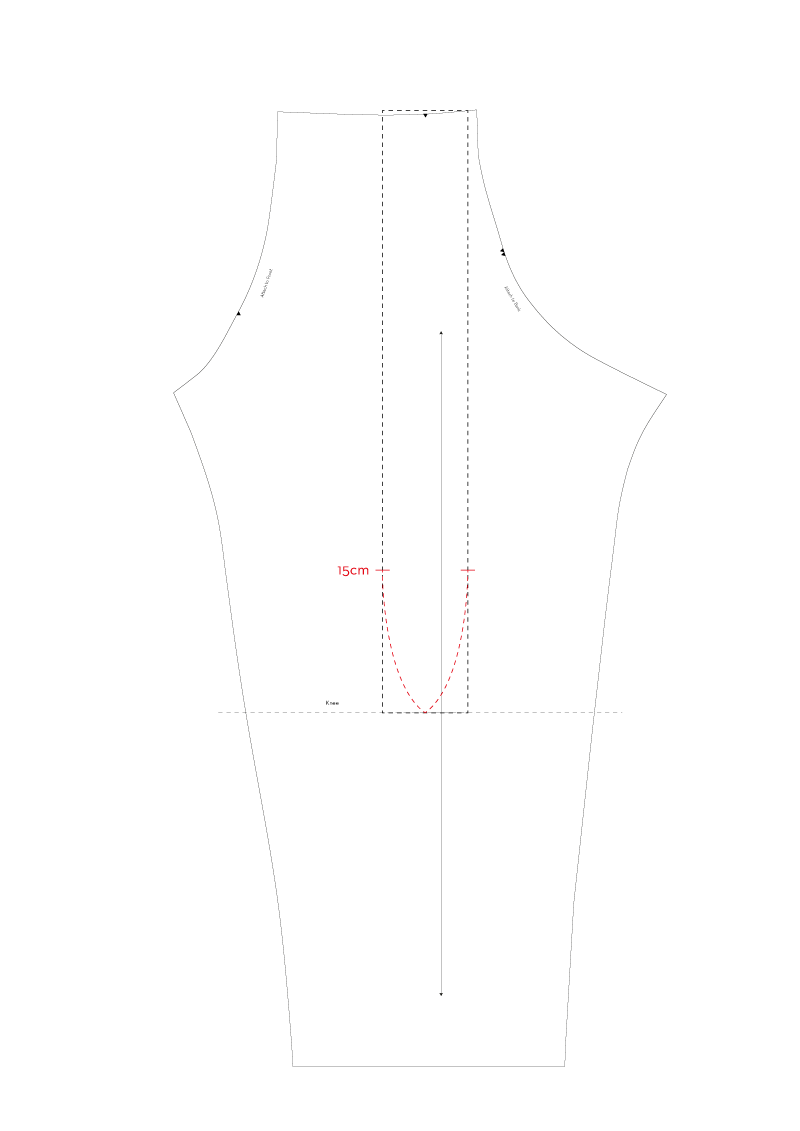
4. SIDE PANEL: Carefully cut around your side rectangle using the curved point instead of the bottom edge and remove it from the Side piece.
Follow Steps 5-7 as in the Active Leggings “Pattern Changes” instructions on page 97.
8. LOWER LEG LINES: On the Side piece, mark a point about one third of the way down the inseam from the marked knee line on both sides. Draw a line connecting each point to the centre of the knee line, curving up as it joins the point from the side panel. Add a single notch along the line on the Front, and a double notch along the Back.
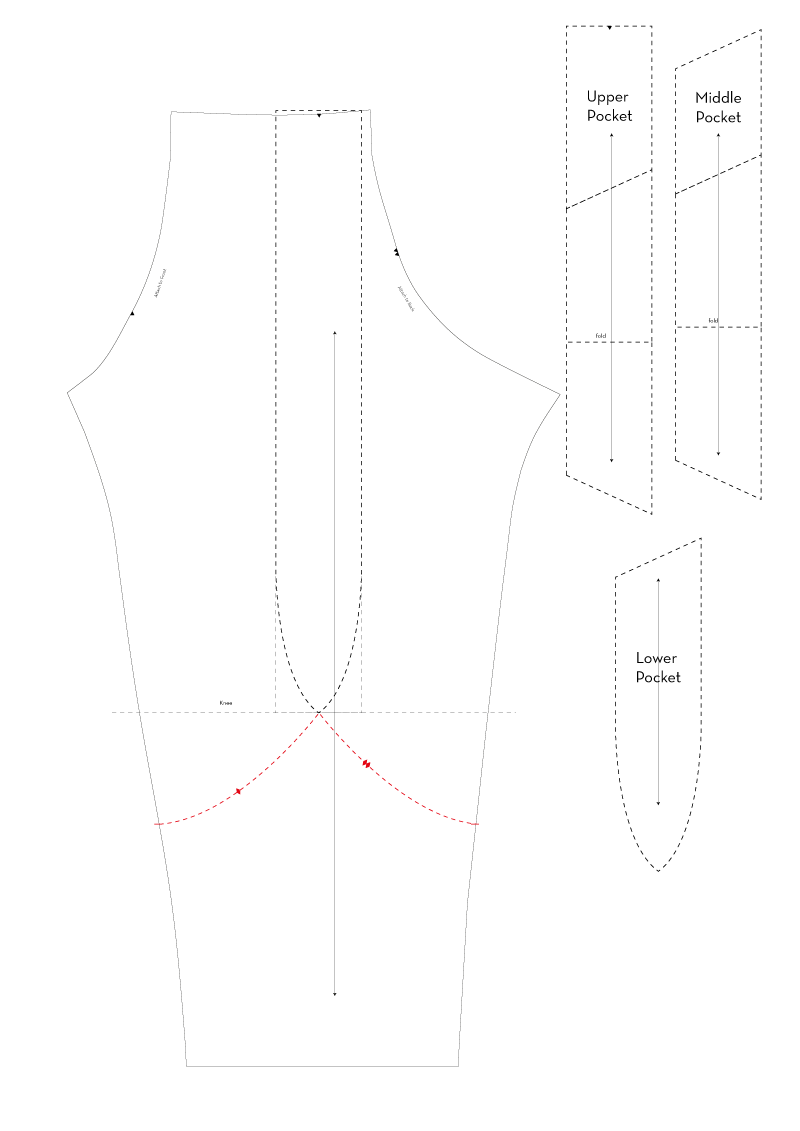
9. LOWER LEG PANEL: Transfer the grainline from the original Side piece to the Lower Leg and cut along the lines.
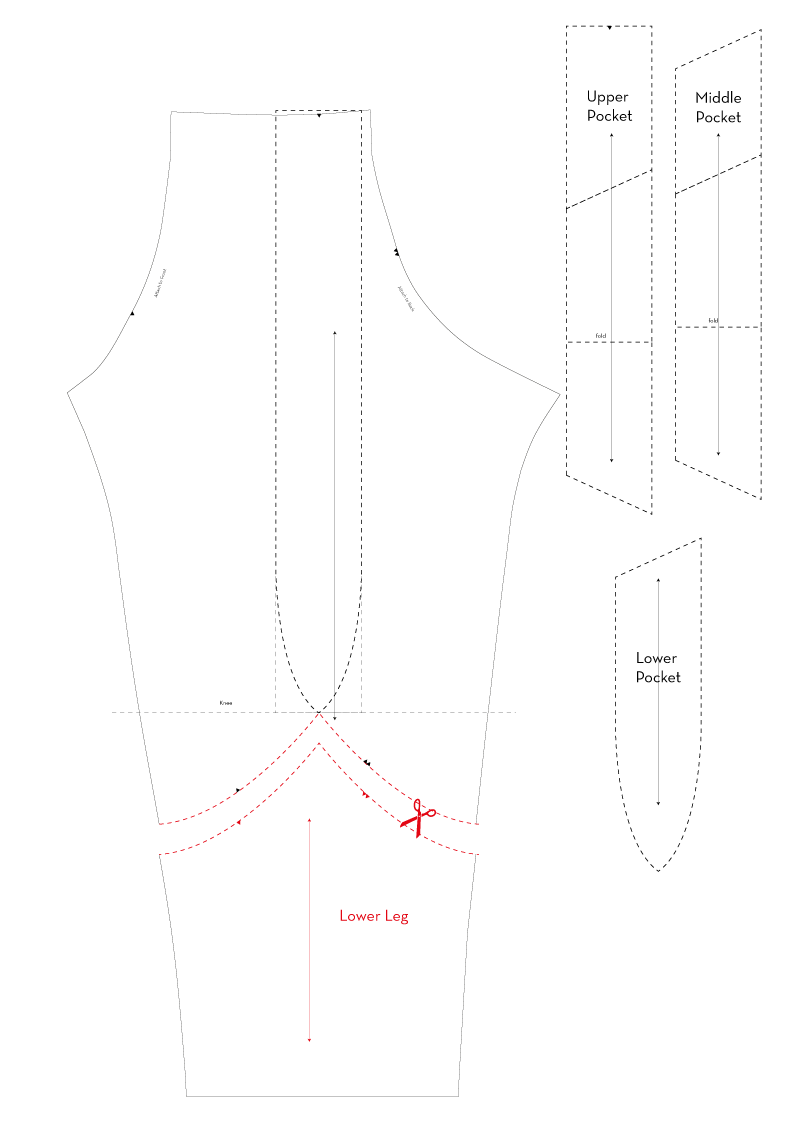
10. ADD SEAM ALLOWANCES: We’ve already removed the side panel in Step 4, but now is the time to re-label your old Side pieces as Side Front and Side Back, transferring grainlines from the Old Side piece, and adding seam allowances onto any coloured (or in my case, dashed) lines so that all your edges are consistent.
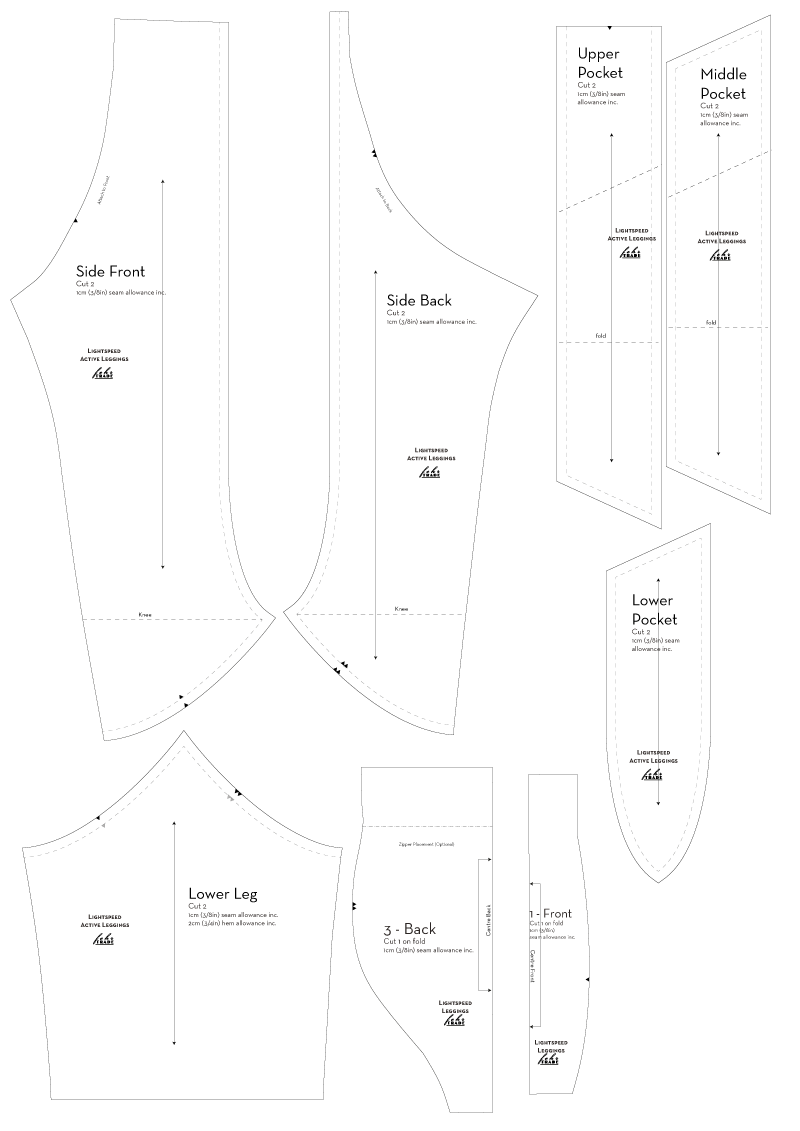
PATTERN PIECES
1 Side Front – Cut 2
2 Side Back – Cut 2
3 Upper Pocket – Cut 2
4 Middle Pocket – Cut 2
5 Lower Pocket – Cut 2
6 Lower Leg – Cut 2
…plus the original Front and Back pieces from the Lightspeed Leggings:
Front – Cut 1 on fold
Back – Cut 1 on fold
Construction:
Follow Steps 1-5 of the Active Leggings instructions starting on page 99, replacing all instances of “Front” with “Side Front” and “Back” with “Side Back”.
6. Attach the Front to the Side Front pieces as in Step 11 of the Lightspeed Leggings instructions.
7. Attach the Back to the Side Back pieces as in Step 12 of the Lightspeed Leggings instructions.
Follow Steps 13-16 of the Lightspeed Leggings instructions.
You can also use a similar method if you’ve got a no-outseam leggings pattern for women or children that you want to use as a starting point, too (they just will probably have a traditional crotch seam rather than the male-anatomy-friendly panels like the Lightspeed!).
To help support all our fit men out there, we’re running a special flash sale on the Lightspeed Leggings pattern!
Use code ACTIVELIGHTSPEED at shop.fehrtrade.com for a whopping 50% off Lightspeed Leggings until March 3 (the day I run my next half marathon, The Big Half!)
And be sure to share your Active Leggings (Lightspeed-based or otherwise!) with the hashtag #SewYourOwnActivewear – I’ve got some great versions of these to share later this week, including an amazing version a reader has sewn up already for a very fit little girl!