Blog

New Year's Progress Report

Back on the 17th I set some bold goals to finish by New Year’s:

I thought it was time for a little progress report, seeing as how I only have a few days to go…

  1. Paco’s Drape Collar Tunic – I sewed this up in an evening before Christmas. Though I had to get very creative in order to get long sleeves out of the 2m of sweater knit I bought… Note to self: Buy more yardage, or shorten the body length next time!
  2. Clover jeans – I just finished these! I’m totally loving the fit and the (IMHO) improved pockets, too.
  3. Holly’s maternity maxi-dress, Burda 08/2008 #125 – Having no place to cut the fabric of the enormous skirt pieces, I actually took it along to work yesterday and cut it out on the big (and empty) lunch table at lunchtime! The few guys left in the office already think I’m weird anyway. Shrug. In any case, this is now ready to sew!
  4. Ruby Slip – I wanted to cut the skirt pieces at the same time I cut out the maxi dress, but the low table height was killing my back by the time I finished with the maxi dress. I don’t think this will take long to sew together if I can ever find somewhere to cut the single-layer, bias layout… A good cutting area is my new productivity choke point.

Piling up…

The number of posts I want to write is piling up at an alarming rate, and I have no time to do anything about it, what with work being crazy busy (I hate all of you who get tons of time off at Christmas – I only get 3 days off in total! And my days have mostly been solving one problem, and having five new problems pour in while I was fixing the one, then moving on to the next in a To-Do list which never, ever gets cleared.) and us spending all our weekends working on the boat (last weekend we spent 15 hours building the subfloor down there. No, don’t feel jealous – the boat blog is being neglected, too).

So rather than stress about the amount of things piling up, I’m going to present my pile to you in pictorial form.


This is what James’s desk looked like this morning. It’s supposed to be my temporary cutting table while we’re building in the hold. How can I possibly cut the bias Ruby Slip or Holly’s maxi-dress fabric on this?? I’m pretty sure Bosco isn’t responsible, though he does look a bit shifty there…


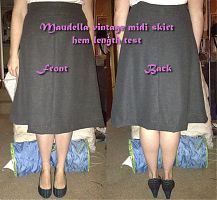
I finished my vintage midi skirt ages ago, but have had zero time to document, or photoshoot or anything. So here’s two photos to test the hem length (which is why it’s just basted here)


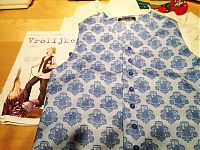
I sewed a little waistcoat for James’s nephew out of this Tardamask fabric on Spoonflower. It’s got hidden pockets inside! He’s 7, and the biggest Dr Who fan ever, so we’re excited to see his reaction on Christmas.

Grey flannel outlook ahead

My next two sewing projects to share with you both use the fantastic, charcoal grey, ex-designer poly/viscose/lycra flannel that Neighbour Helen gifted to me just before they set sail for the continent. If I didn’t have the fibre content tag still attached to the fabric, I’d assume it was a cashmere or wool flannel, it’s that lovely!

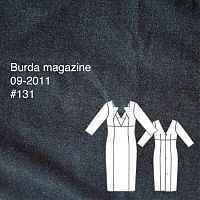
The first use of the flannel is actually already finished and could’ve been spotted in the swankier parts of Spitalfields on Saturday night – an amaaaaaaazing sheath dress from Burda magazine:

I’ll avoid a long story to explain the Why, but you’ll have to wait til next week to see the photos. But trust me when I say it is a truly stunning va-va-voom dress!

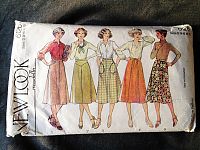
Then this weekend I decided to jump right in and use up the remaining ~2m or so of the flannel and make the vintage Maudella midi skirt pattern I bought in Sheffield a few weeks ago:

A wool maternity coat – nearly there…

As you recall, last week I underlined Holly’s maternity coat and created all five bound buttonholes, but I had the day off work on Friday so I was able to make loads of progress over my long weekend! In fact, her coat is now 95% finished and ready to hand over, so I thought I’d give you a rundown of what I got up to…

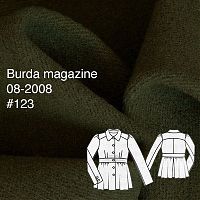
I’m making this maternity coat from the August 2008 issue of Burda, but after the first muslin we made some design changes (namely, eliminating the band and gathered sleeve caps) so it won’t look exactly like this tech drawing:

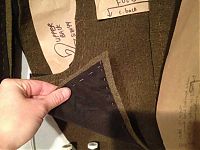
As I constructed the shell of the coat, I took the extra step here to catch-stitch all the thick wool seam allowances to the flannel underlining. I started off just doing this on the sleeve seams as I feel the bumps are most noticeable during wear there (and therefore most likely to get annoying quickly!), but I carried on and just catchstitched everywhere.

I wanted this coat to be as nice for her as one I would make myself, so why not? I also noted that Gertie was asking last week how to make the seam allowances lie flat on her coat – well, the answer is catch stitching!


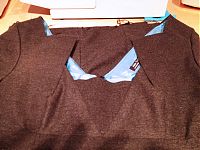
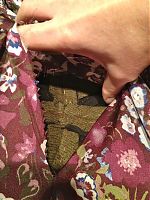
(I forgot to take a photo of all my stitching before lining it, though, so you’ll have to make do with a shot through the “window”!)

A wool maternity coat – basting and buttonholes

If you recall from last week, my next project is this maternity coat from the August 2008 issue of Burda, which I promised a very good friend:


(The issue date is still wrong above – it is indeed in the 2008 issue…)

After we sorted out the fitting and design alterations (including a second, quick muslin fitting of just the upper bodice in the pub toilets on Saturday night!), my first step was to cut out all the pieces in the green wool and then again in the black cotton flannel I’d bought to underline the spongey wool coating and give it a bit more structure. The coating is wonderful, but I’m a bit concerned about it bagging out in places, and I wanted to give it some added stability as well as a bit of extra warmth (though if warmth were my primary concern, I’d call it “interlining” and attach it a bit differently!).

Here’s all the pieces hanging on the line in my tiny sewing room:

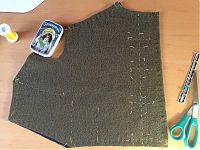
I then hand basted all the layers together around the edges of the pieces, plus through the darts, and then also marked out the placement lines for the five bound buttonholes:

A beginner's knit maternity dress

Just to make things absolutely clear – no, I am not pregnant!

But my very good friend (and beginning sewer!) Holly is, so I’m doing some maternity sewing for her over the next few months, and helping her to sew a few things for herself, too. We’ve already had an afternoon session converting regular trousers to maternity versions (and I’m thrilled to report that she’s since gone home and done a few of these herself, too!), but it’s down to me to start the “from scratch” garments.

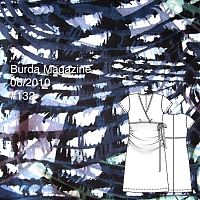
The first project was to make a “wearable muslin” of this Burda knit dress from June 2010. She picked this pattern out of a lineup, and it’s actually great for a beginner. The seamlines and construction are pretty straightforward, and you get a lot of bang for your buck with this, as there are two sleeve variations and two length variations!

I traced off all the different versions, and used the double tracing wheel I picked up in Budapest to even add the seam allowances on for her, too (something I never bother to do for myself, as I prefer my patterns without).

For this muslin I used some viscose jersey donated by Claire (Seemane) specifically for muslining purposes. The print is definitely too wild for me, but it might come in handy for Holly while she’s got a limited wardrobe. I don’t think it’s an ugly print by any means, and I could see her toning it down with a black or navy jacket or cardigan.

Mobile sewing weekend report

I’m beginning to feel like my draped suit (Burda September 2011 #126 and 127) is dragging on forever, so it’s good that I am making progress in the few snatched snippets of time available to me over the past few weeks. I hope you’re not getting too bored yet!

We were out of town this past weekend, up in Sheffield visiting two very good friends of ours in their new place (a house with his’n‘hers sewing machines! We slept in a room with a vintage Bernina!). It’s about a 3.5 hour drive from London, so there was ample time in the car for handstitching, but it did require some planning ahead to get the suit in a state ready for it.

Going back to my earlier To-Do list from last week, I was able to finish the following on Friday night before we left:

  • Construct and attach the sleeve linings to the rest of the lining
  • Interface the jacket hem
  • Attach the lining to the jacket around the front facings and neck edge
  • Construct the skirt lining and baste to the skirt at the top edge
  • Attach the waistband
  • Machine-hem the skirt lining
  • Machine-stitch some grey lace tape to the bottom skirt edge

I also prepped about 5 lengths of grey and pink thread with beeswax before leaving so that I wouldn’t get horrible tangles while doing all the handstitching. I never used to bother with beeswax, but it seriously does help cut down on the excess tangling, so the time spent waxing and pressing the thread in advance really does save you time and frustration in the long run.

Then, in the in the car ride up to Sheffield and back (and, err, also in the KwikFit waiting room while we had new tires put on) I was able to:

  • Anchor the lining to the seam allowances at the underarm
  • Baste and hand stitch the jacket hem
  • Hand stitch the lining hem to the jacket hem
  • Hand stitch the sleeve lining hem to the sleeve facing
  • Baste and hand stitch the skirt hem

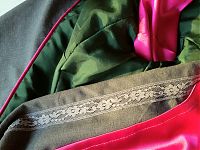
I just love how that hot pink satin piping turned out! You can also see my lace hem tape on the skirt here. This was a pack of lace tape I’d bought at the Amish dry-goods store in Perry County last year, paying 50 cents for it, and with a 1986 copyright on the package!

Draped jacket – no ordinary lining

There’s been only slow and steady progress on my draped suit (Burda September 2011 #126 and 127) this week as there’s been little time to sew, but I did get a few hours of “me time” in on Sunday evening after my insulation work was done for the day.

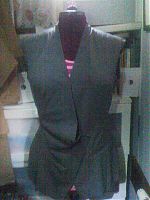
Those few hours were enough for me to finish the entire shell of the jacket and skirt, but I needed a clear surface to cut out the lining fabric, so that was delayed until last evening (since my running group was cancelled). Since the wool suiting has stretch, I didn’t want to negate the benefits of that with a non-stretch lining, so I pulled out one of the few stretch wovens in my stash – a blisteringly hot pink stretch satin I’d bought from Fabric.com last year (and came across in my mom’s suitcase before the wedding). Despite it being polyester, it actually feels wonderful and it was worth the price to be such a high quality lining.

Draped jacket – in progress

Last weekend I cut out all the pieces for my upcoming draped suit, Burda September 2011 #126 and 127, in the beautiful grey stretch wool suiting I’d bought specifically for it.

Since then, though, progress has been slow. I’ve got an evening class for work every Monday night, I’ve found a wonderful, brilliant amazing running club I go to on Tuesdays, and our weekends are still chock full of boat DIY work as we scramble to get the last outside work done AND the insulation up before the weather turns. Which leaves exactly three evenings left for all of our social activities, and any sewing left to squeeze in. This week I’ve got something on all three of those evenings, too.

So this really leaves progress to be made in very small segments. I’m very good at finding spare ten minute pieces of time here and there, but lately even these have been thin on the ground. Over the past week, I only managed to work on this jacket twice – on Wednesday night I fused all the necessary pieces with Pam’s weft-insertion interfacing and vilene bias tape, and then Sunday afternoon I actually managed to get a few hours of sewing done once I’d done 3 hours of insulation work and the dust settled enough in the hold for me to get out my ironing board.

Beyond that, while we were working on the construction part of the boat, something happened to the 24v cabling and so the lights in the bedroom, sewing room, and one other area no longer work. So my sewing room is very dark now, even when it’s light outside! Please accept my double apologies for the quality of these photos – I had to light the area with a headtorch while taking these on my (soon to be upgraded, yayyy!) old iPhone 3G camera.

When you need thread fast…

I’ve literally been sewing my trench jacket in tiny sessions – 10 minutes before work here, 5 minutes while dinner cooks there – you get the idea. It doesn’t seem like much, but when you add up all the short bursts, it really does mean I’ve made progress in a week where I’ve had social plans every single night, and huge amounts of exhausting boat work every weekend.

But on Saturday night I realised that I’ve come to a bottleneck that couldn’t be fixed with time management – I was nearly out of beige Gutermann thread, and I still had quite a bit of topstitching and a bunch of buttonholes yet to sew. Ordering online would take several crucial days, so I tried to rack my brain for any London shops that stock Gutermann thread and are open Sundays… Hrmmm…

Yes! Of course!

So Sunday morning I got up early and combined my weekend run with a trip to Beyond Fabrics on Columbia Road to restock on No.464 All Purpose thread!

I ended up arriving there a little too early for their 9:00 opening so I ran a few laps around the little triangular park on Quilter Street (yes, Quilter Street!) to fill time before they opened up. Then I just peered in the windows until they laughed and let me in. ha!

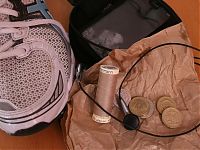
I thought for sure the spool would fit in the little elastic space on my arm band where my chapstick usually fits, but it was slightly too big (how dare they not design these things with thread in mind, eh??) so I had to ask for a paper bag to protect the thread from my sweaty fist on the run home.