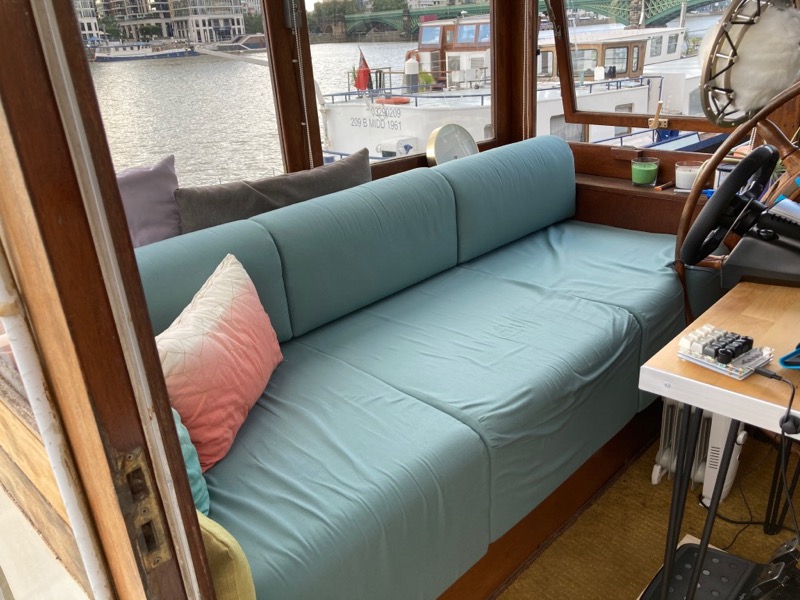
Since lockdown began in March, James has been using the wheelhouse of our boat as his office, but we’ve also spent a few nights up there Zooming with friends or watching films for something different. But the cushion on the built-in sofa up there was just a thin foam pad that we’d cover in a single bed sheet and then pile pillows behind for some back support, and it wasn’t really that comfortable for long periods of time.
So James took matters into his own hands and ordered some custom foam cushions for the bottom and back support from Foam Factory (who we’d heartily recommend and will definitely use again, btw). And I found myself saying the words “I guess I’ll sew up some covers for them then…” even though I hate sewing upholstery and home dec! Turns out I hate spending exorbitant amounts for someone else to do it even more!!
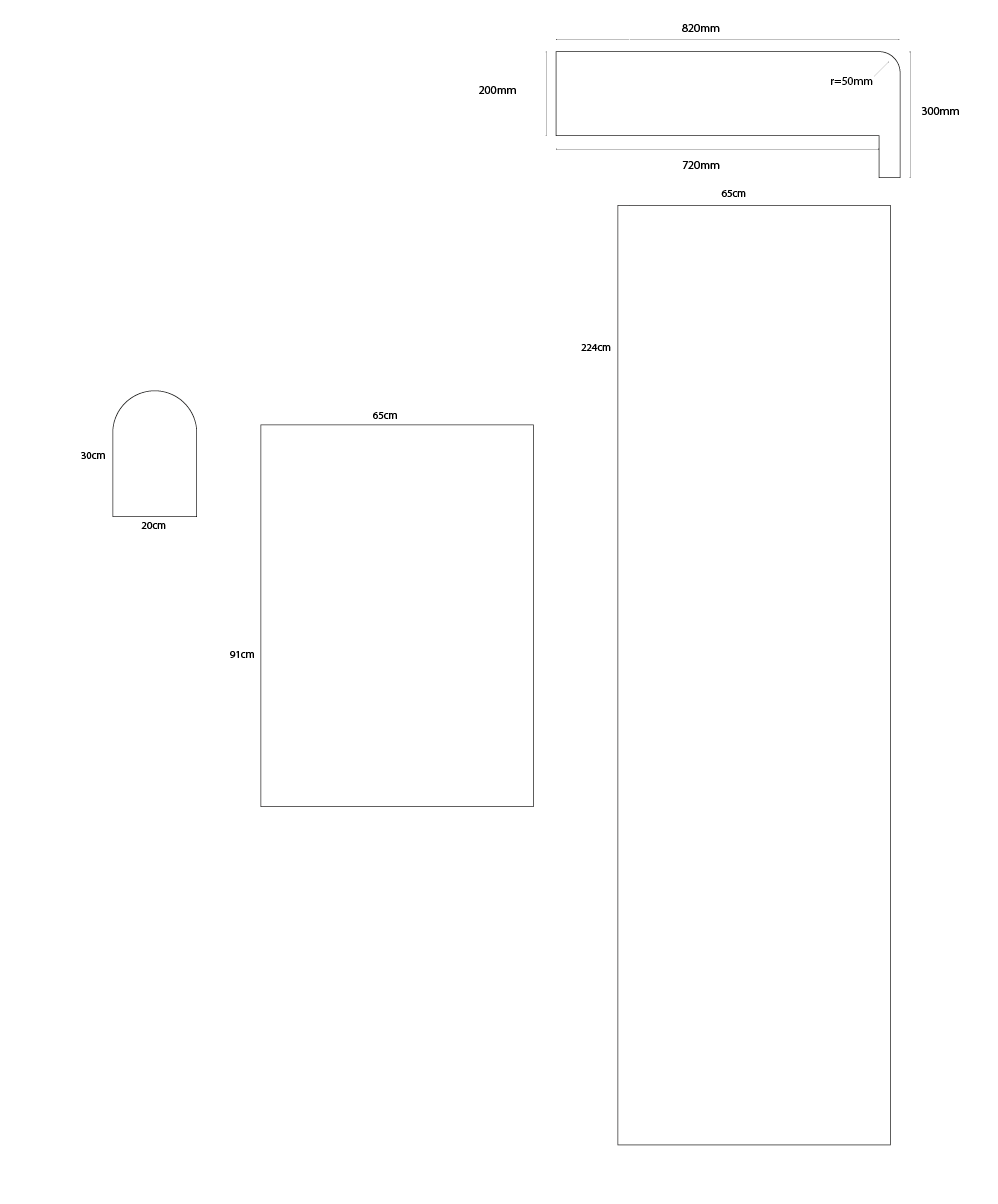
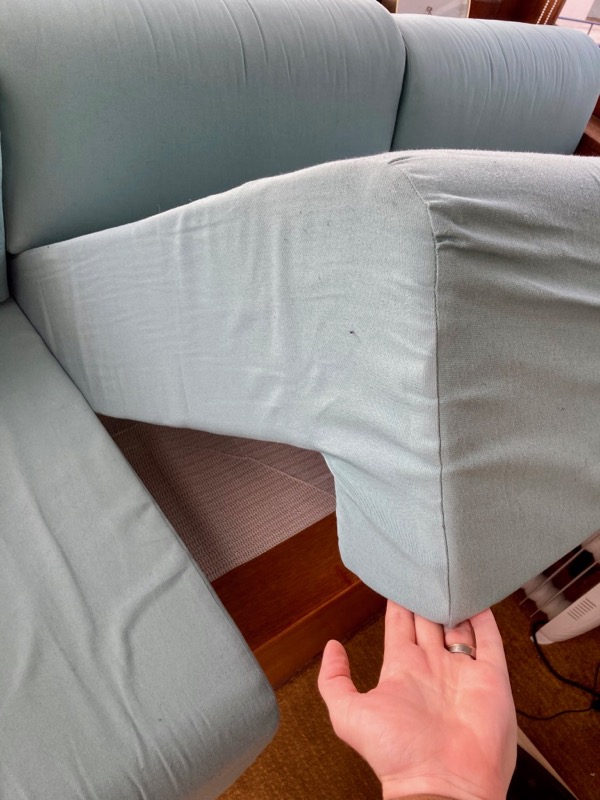
Our first step was to model the cushions and the cuts we’d need, in 1:1 in Adobe Illustrator. The flat cushions actually have an overhang so the backs of your legs are cushioned, too, which complicates the shape to be covered somewhat.
Thankfully the back supports were relatively straightforward, with a flat base and curved top, and just a rectangle to wrap around. Since these shapes were all modelled in actual size, I could just open up a template in Illustrator for measuring yardage (which I use in pattern development!), and figure out how much we needed to order, plus extra for mistakes/wastage.
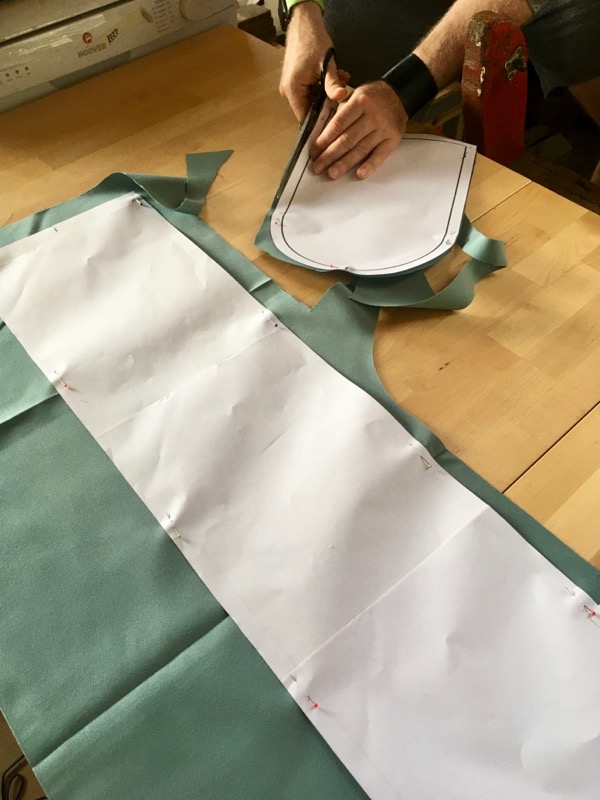
I created pattern pieces for the sides in Illustrator and printed these out, but the long rectangles we just measured and chalked straight onto the fabric. Cutting it was definitely a two-man job, so I’m glad I roped James into helping me do the cutting!
James decided he liked this muted aqua Dralon from Stoff & Stil, which was absolutely fine to sew, unlike the horror that was the sticky-backed velvet we used for the sofa cover two years ago (I still have nightmares). Each cushion would be 60cm wide, so I ordered 6x 60cm closed end zips from Stoff & Stil, too.
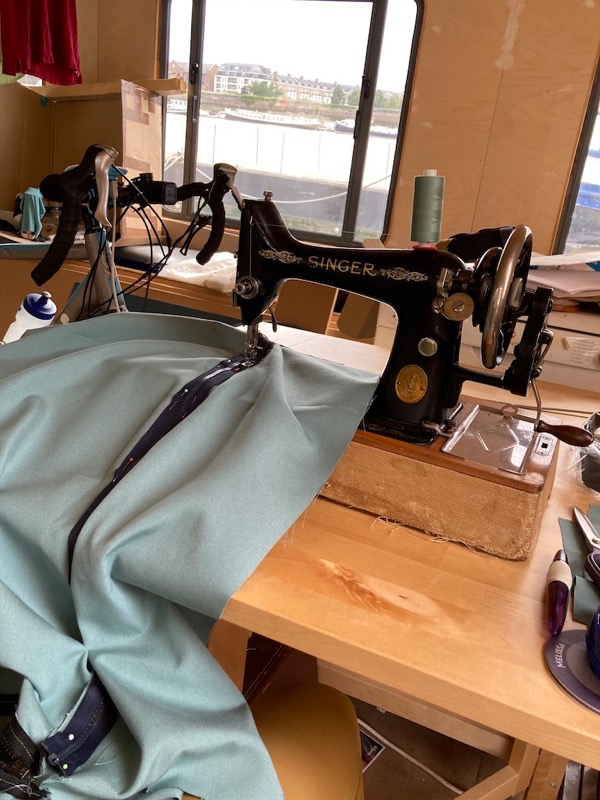
The sewing of them wasn’t too bad – I got REALLY good at sewing inset corners quickly, and to make things more fun I decided to bring out my vintage hand crank Singer machine since it creates a really strong and robust straight stitch. I usually only use it for jeans topstitching so it was nice to bring it into the (still under construction, sigh) Saloon and use it for something different.
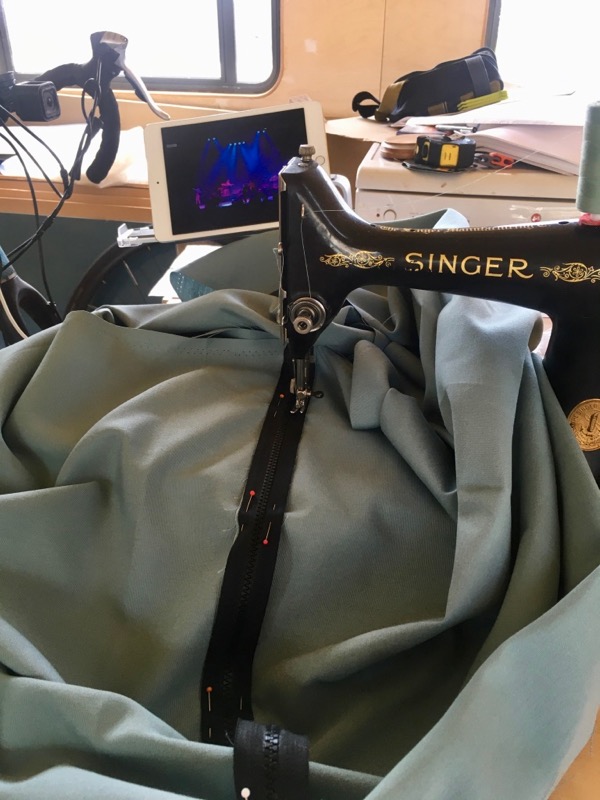
I’d start each pillow cover by joining the short ends of the long rectangle with a basting stitch, sewing a zipper face down, then unpicking the basting so it could be opened up. I’d then attach the side pieces and flip the whole thing right-side out. There are a few tucks at the rounded edges as there’s no give in the fabric, but I really couldn’t care less!
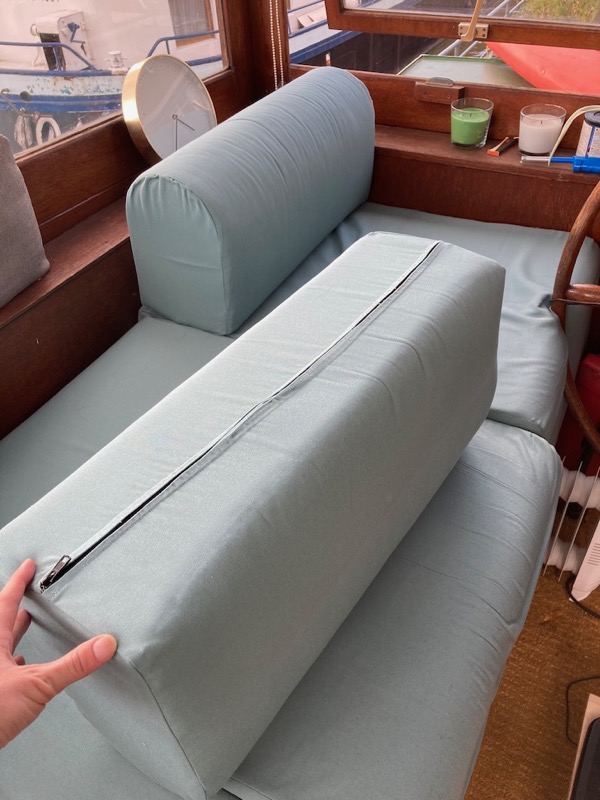
The only real struggle with the whole project was stuffing those flat cushions into the covers! This was a two-man job with lots of swearing and a lot of popped stitches. If I were doing this again, I’d use opening zippers and have two – one at the back end and one along one of the side seams, too, because these were an absolute beast to squeeze in with just one zipper at the end!
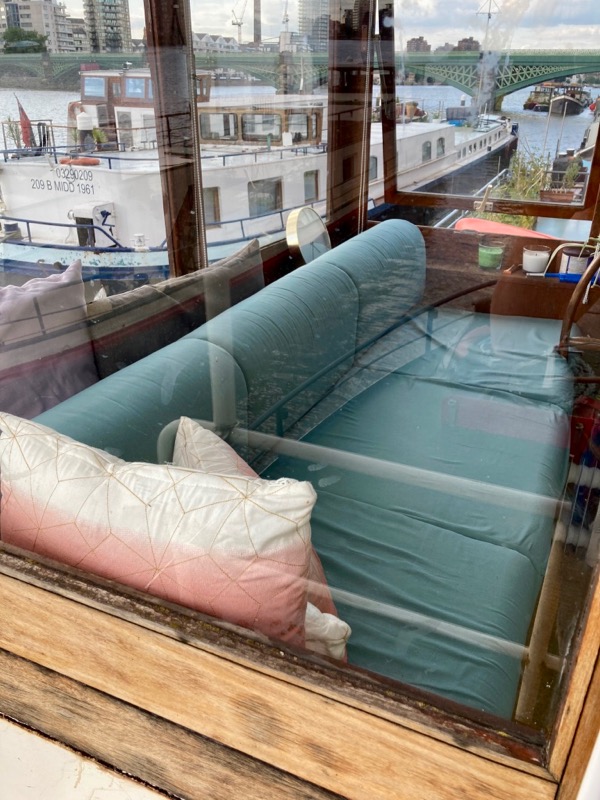
James is super happy with the finished sofa – it’s way more comfortable to sit on, though in his excitement to have lots of padding, he hadn’t realised that it’s now quite a bit taller so he needs a footrest to rest his feet on as they now don’t touch the floor!! Also, we’ll probably have to remove the cushion closest to the wheel when we move the boat as it’ll likely impede the steering.
It also turns out that we have several metres leftover, so I may find myself sewing a few more covers with the excess at some point in the future…