Burda magazine December 2016

I know it’s a cliché, but my god, where did the year go? I mean, I know I basically lost the first three months of the year but still. Overall, it’s been a fantastic year of Burda magazines, in my opinion, and I’m pleased to report that there’s no letup for the final issue of 2016. I’ve ended up picking a lot out of this one so grab a mug of something hot and settle on in…

A Jean Paul Gaultier flannel shirt

You may recall that back in September, I traveled down to Brighton to meet James at a conference, and we both hit up the fabulous Ditto Fabrics store over his lunch break. I’ve been surprisingly good at sewing up most of the fabrics from that trip in the past four months (only the coating & lining remain, and that’s earmarked & muslined already), having made a cowl neck top from the digitally printed lycra and of course, a shirt for James from the lime linen.

During that same visit, James spotted a wonderful 50/50 poly/cotton flannel which was black on one side, and a soft, brushed charcoal grey on the reverse. It also still bore the tags from its original, designer previous life!


Jean Paul Gaultier Paris!

After the success of the lime linen shirt, James requested that I make the same pattern again using this two-sided flannel – most of the shirt should be in black, but with the cuffs, collar, and placket using the grey side.

I wanted to sew this as a Christmas gift for him, so once the Surf to Summit Top pattern release was out of the way, I got to work, finishing most of it before my evil holiday cold hit, but finishing the sleeve cuffs on the 24th when I could barely sit up!

Brick orange Marita draped dress

I fell in love with the design of the Style Arc “Marita” dress as soon as it was released, and I bought it right away. But that was back in our summer, and I thought the long sleeves would be better suited towards cooler weather, so I let it hibernate a bit in my pattern stash before adding it into my Fall/Winter 2012 Sewing Shortlist.

I bought some wonderful some brick orange (or “rust”) viscose-lycra jersey from Tissu and knew it’d have the perfect drapiness and recovery for this design. Coincidentally, it’s also the same fabric I made the Donna Karan skirt set in – I just love this stuff and you cannot beat the price (£3.50/m)!

The pattern front claims you can make it in one hour, and it really is ridiculously fast to sew! I don’t feel right showing the pattern pieces as I feel that’s giving away their design, and I really think this is ingenious. The finished dress looks really complicated, but in reality it’s just a basic knit dress with one dart and one tuck. That’s it.

The Donna Karan red vixen dress (Vogue 1280)

I don’t often sew Vogue patterns, but I am a massive fan of the Donna Karan patterns’ design and execution, so it’s no surprise that I added Vogue 1280 to my Wish List the second it was announced recently!

Happily, my mom saw there was a pattern sale where she lives in the USA and offered to buy a few patterns for me at US sale prices – she paid less than half the price for the pattern + shipping to the UK than I’m charged just in postage to the UK for the same pattern! I wasn’t planning on sewing a dress right now, but I got so excited when I saw Vogue’s numbered pattern marks for the first time (possibly in response to my complaints regarding Vogue 1259’s instructions), that this dress moved quickly up my Must Sew list.

Like all DKNY & Donna Karan Vogue patterns, this one’s a great mind puzzle to put together! It also has the joy and wonder of looking like a total mess until the very end, when it all comes together into a dress shape. I found it to be true to size, so go with your measurements, not some vague idea that all Big Four patterns have tons of ease. Most of the pieces are cut on the bias (not that it means much in a jersey!), and it hugs the body very closely. If you’ve got any lumps and bumps, though, this is not the pattern to hide them, and so you’ll probably be wearing Spanx underneath in addition to the strapless bra the bodice requires (Full disclosure: I’m not wearing Spanx in these photos!).

Sequin running vest and purple leggings

I’m going to break from tradition here and actually post my next two outfits out of sequence from when I made them, mostly because I just shared my elastic waistband tutorial with you, but also because I’m really freaking excited about sewing exercise gear right now. Honestly, it’s starting to become nearly lingerie-levels of hysteria with me – super quick to make, easy to fit, and lots of wild colours and patterns in small doses! But you’ll get to see my “civilian” top and trousers later this week, so no worries if you’re starting to glaze over at all the lycra…

For this set of running gear, I’ve paired up the Papercut “Ooh La Leggings” pattern (UK stockist here) with my self drafted knit block (from Metric Pattern Cutting). And in the case of the top, I altered the seam lines and armhole shape to suit!

You may remember the ex-Prada sequin trompe l’oeil fabric from a few years ago when I used it to make a cowl top. I wear that all the time, but I only had a small piece leftover in my stash, and it was far too lovely to throw away. But with a bit of creative thinking, it was enough for this! Though I think I’ll lower the curve a bit for my next running vest so the peak is just at my underbust…

As you can see with the leggings (or maybe not, the purple fabric is quite dark!), there are no side seams here! The shaped front and back yokes give some really cool, curved seams, and they merge nicely into front- and back-leg seams instead.

Asymmetric Plum Lace Top

The latest installment in my post-coat winter sewing plans is the asymmetric pleated turtleneck, Patrones 296 #14.

In this design, you’re given the pattern pieces for a turtleneck top, where the front has been cut diagonally across the front. So if you’ve not got this issue of Patrones, just go and draw a curvy line across your favourite turtleneck pattern!

In the magazine photo, the sleeves and upper front piece are pleated and underlined, but I chose to overlay lace on mine instead. Patrones provide the pattern pieces for the post-pleated fabric (allowing you the fun of working out exactly how much fabric you’d need for whatever size pleats you choose!), so it was super simple to just use those finished pieces to cut out the lace overlays instead.

The plum fabric here is a gorgeous bamboo/lycra jersey that I bought from Ditto in Brighton last month, and it’s so unbelievably soft, and with a nice, beefy weight and good stretch. I loved Wazoodle’s bamboo years ago, but this stuff is even better as it’s thicker and doesn’t wrinkle anywhere near as readily. I am utterly in love with this fabric! I’ve got another of their bamboo/lycras in red and I’m itching to make something from that now, too. The green stretch lace I bought at Tissues Dreyfus in Paris last summer, and I love how the two together give a bit of an antique look….

Bridal Bodice update

When you last heard about my wedding gown, it was two years ago(!!) and I was leaning towards turning my Granny’s gown from 1949 into something with a cowl neck, deep back, and sleek lines, using Vogue 2965 as my starting point.

But recently I’ve been looking more closely at the fabric I’ve got to work with in my grandmother’s gown, and my recent cowl sewing adventure has reminded me that cowl necks need pretty huge amounts of fabric, can’t easily be pieced together, and on top of that, the silk satin in her gown is more of the heavyweight duchesse variety than something very drapey that would cowl nicely. And while I love a low back, it does make things awkward for bras and any sort of shapewear, too.

So I had a bit of a wake up call and told one of my bridesmaids to keep reminding me that “This is just one dress. It is not all dresses.” (thanks, Stacy!). Yes, I like cowls. But I also like other things, too. And I do not need to put everything I like into one dress!

How to sew a narrow bias edge

I had a busy yet productive weekend – not only did I finish my Colette Patterns Beignet skirt, but I also made the Patrones 292 sleeveless bias cowl top, too! I didn’t have enough time for a photoshoot over the weekend, but I did remember to finally document my favourite way of finishing the edges of thin blouses like the cowl top so I can finally share this with you.

This technique is great for necklines and armscyes on sleeveless tops, and is my preferred way to finish any kind of blousey, lightweight fabrics like silk satins and the viscose (rayon) you see here. You get a thin, finished edge that looks good inside and out with a minimum of fuss, and you don’t have that awkward problem of facings flipping out or anything, either. As long as you’re okay with a small amount of topstitching on the right side, this is the technique for you…

So before we begin, sew one of your seams so you’ve got a C-shape. If you’re finishing a neckline, this means you sew one of the shoulder seams. I’m finishing the armscye of a sleeveless blouse here, so in this case I’m sewing both shoulder seams, leaving the side seams free.

Step 1


Cut out a bias strip that’s the length of your opening edge, plus a few centimetres just to be sure. For the width, I prefer a finished facing of just 1cm, so my width here is 1cm + (2× 1.5cm seam allowances) = 4cm.

Springtime Heidi dress

I’ve been doing so many bits and pieces over the last fortnight, between making and fitting the bridesmaids’ dresses, doing some experimental pattern drafting, and a huge amount of gardening that it feels like I started sewing BurdaStyle’s Heidi dress months ago! It really didn’t take very long to sew at all, it was more that I was doing in in small chunks around everything else that made it last so long from start to finish!

I bought this brushed cotton fabric in Brighton last June for (a rather expensive for me) £10/m, but I liked the print too much to care. I also lined this with a silk/cotton voile from Goldhawk Road which makes it really airy and lightweight for spring and summer.

Mentally sewing the LMB draped dress

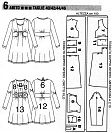
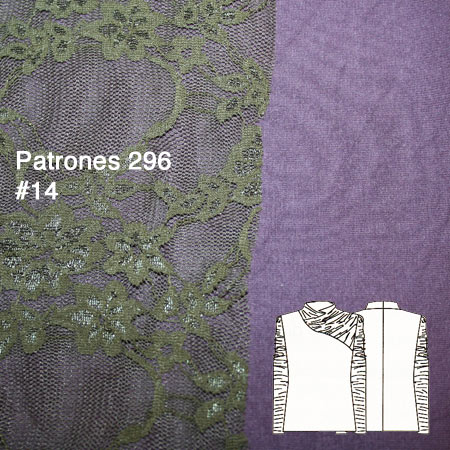
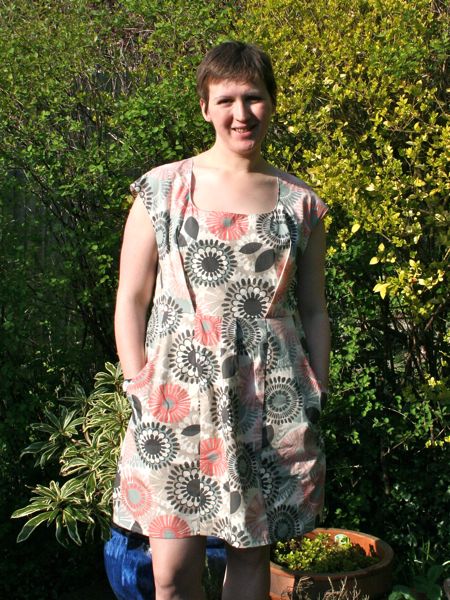
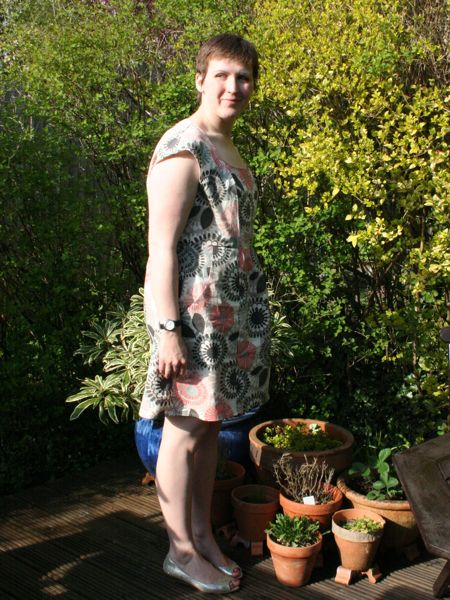
I’ve gotten as far as I can on my secret other project while I wait for supplies (mostly new labels – can you believe I’ve sewn through the last lot of 120-odd Fehr Trade labels in the past two years??), so I cut out my muslin pieces for my birthday dress. If you’ve got a good memory, it’s this luuuurrrrrvely draped number from the Feb 2010 La Mia Boutique magazine, #6:

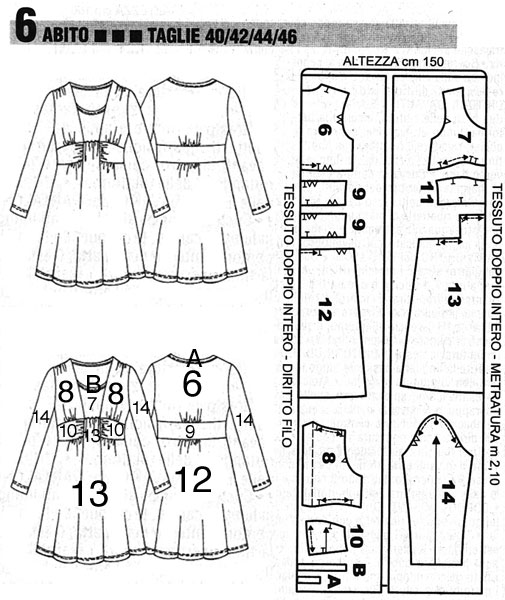
What I normally do for foreign language patterns (La Mia Boutique is in Italian) is look at the pieces and get a brief order of construction in my head. Usually I work from the top down, starting with assembling the front bodice pieces then join to the back at the shoulders, then finish the neckline, then if it’s a knit, attach the sleeves at the armscye and sew up the side seams, or if it’s a woven, do the side seams first them attach the sleeve in the round. After sewing for a while, you begin to see that most pattern instructions have you sew things in roughly the same order, so you can just do those here to suit this particular pattern.

But for more complicated patterns like this one, I like to sit down with a pen and paper and mentally go through the whole process, visualising how the different pieces interact and the pros and cons of doing which seams in which order (like “if I do this first, is it going to make it awkward to serge that?”). It’s a great mental exercise in spatial thinking, and one of the most pleasurable aspects of sewing for me.

And it means I don’t have to type in every single word of the foreign instructions and figure out what the translator’s trying to tell me (sewing terms are not the best translated! )!

So since I was writing these out anyway, I thought my order of construction might help others who were eyeing up this pattern.