Friday snippets

Happy Friday everyone! Congratulations for making it to the end of a week, and in celebration, I’ve got a bunch of little updates and goodies to share. Regular readers by now will know that I do this sort of “potpourri” post full of stuff that is too good to miss, but not really big enough to warrant it’s own post…

A matching silk hardshell clutch

When I make a nice dress for a formal occasion, I often like to create a small handbag to match the dress (or jacket!) as it just creates a more “pulled together” look, and it’s something I can do that RTW often can’t!

So when I was cutting out the silk noile for the Pamela dress you saw earlier this week, I realised I had a small rectangle leftover – perfect for covering one of the U-Handbag hardshell clutch cases I’d bought!

All the clutch bags I’d made previously had been sewn (a favourite being the Cake patterns wristlet), so a hardshell case involving lots of glue was totally new territory for me! Luckily, Lisa provides really great, printable instructions for these, and honestly, it was SO easy to make!

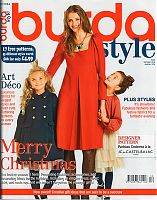
Burda magazine December 2014

It’s the last issue of the year, boo hoo! Oftentimes Burda have some easier projects (including menswear) you can make for gifts in their December issues, but this one’s just for ladies and girls. I initially wasn’t that impressed with this collection, but the more I looked through it, the more I found myself drawn to a few…

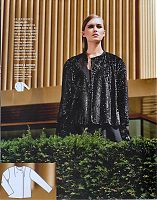
I’ve often admired the sequin tops other sewists have made, but I’ve never quite gone as far as to buy some sequin fabric for myself. This boxy jacket might change that, however!

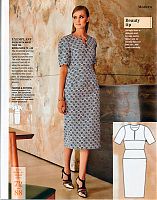
This dress is the Tall offering this month, and even though the shorter, peplum top versions works fairly well, I pulled this out because the simple act of adding a straight skirt onto the curved seam means the model looks absolutely pregnant. Not really a look anyone wants, and it seems like a good idea drafting-wise. But in practice? No!

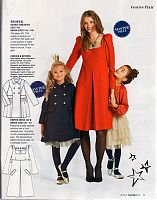
I’m really not a fan of the dress (square neckline, yes, but the puffy sleeves and awkward pleat at empire waist? Urgh.), but I love the little girl’s coat! Like the trench cape a few issues ago, I’d totally make this if it were in adult sizes!

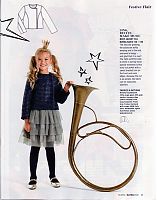
This little boxy jacket for girls feels like the sister to the ladies’ sequin jacket above. They’re both for special fabrics and have a similar fit and seam lines, without feeling too “mini me”.

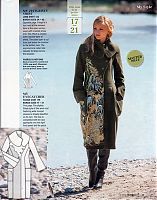
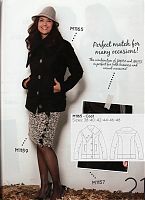
I utterly love the asymmetric collar on this coat, plus the off-centre closure, and (though it’s hard to tell in the garment photos) the hidden pleating just above the pockets would really give this some wonderful shaping. They’ve gone one step further and appliqued fancy lace over a portion of the wool coating, which I just love. Two thumbs up for this one, Burda!

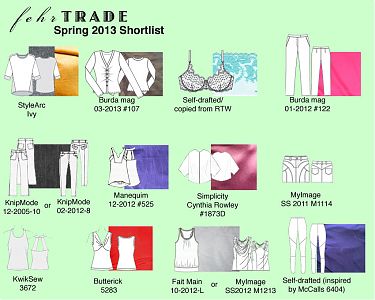
Spring 2013 Sewing Ideas

Thank you all so much for your lovely comments on my asymmetric Drape Drape teeshirt! A girl could get used to that level of flattery…

It also marks the start of my sewing short sleeves, which means it must finally be Spring, and hence, time to start thinking about marrying up the patterns and fabrics I’d like to sew for the next few months. I really do these only for my own benefit, and so they’re not a “SWAP” in the sense that everything must coordinate against each other (lord knows I have enough clothes that I don’t have problems putting combinations together!).

This is more just a set of ideas towards which I’d like to work, so when I get to the end of a project, I can quickly refer to this image and go “oh yeah, I want to sew that next!”

For the first time I’m also including running/exercise gear in my plans, since I’m wearing lycra as a significant portion of my weekly wardrobe, and I want to contain all of my sewing ideas together. So you’ll find all the running stuff on the bottom row, and the rest of life’s wear on the upper two rows!

Top row:

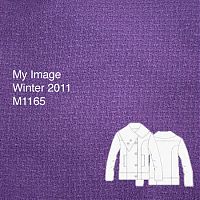
MyImage Purple coat – in progress

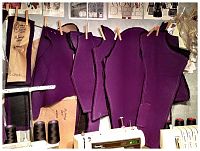
Yesterday I mentioned that I’ve started sewing the asymmetric, collared coat from the Winter 2011 MyImage magazine, and after a prep period that felt like forever (probably exasperated by the fact that my ironing station is hovering around 0C/30F), I’ve now got some progress to show you!

I’m sewing this up in a wonderful purple basketweave/boucle coating, which was another gift from Claire (she’s so good to me!) at the end of last winter. I always like to underline my coats when I can to just add that little bit of extra warmth, but it made even more sense here as it will help to stabilise the coating fabric and prevent any bagging out that might otherwise occur with looser-weave fabrics. The alternative is to block-fuse the coating with a lightweight interfacing, like I did with my Patrones duffle coat.

For this coat, all the facings were interfaced (the usual front and back facings, plus the front and back hip band facings), and pretty much everything else was underlined in black cotton flannel. This meant there was a lot of prep – everything but like 3 pieces needed underlining or interfacing! I love sewing, but prepping is dull dull dull work!

I machine-basted the flannel underlining to the coat pieces here, because frankly, the prep work was tedious enough as it was. I normally hand baste my underlinings, but in this case, the coating and the flannel “grabbed” each other quite nicely, so this, plus the walking foot, plus a long basting stitch meant it felt okay to do it by machine. I still made sure to never turn any corners though (when basting underlinings, you always stitch to the edge, cut the threads, reposition, and stitch the adjacent side so that you don’t create puckers at the corner)!

Draped jacket – no ordinary lining

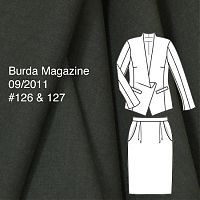
There’s been only slow and steady progress on my draped suit (Burda September 2011 #126 and 127) this week as there’s been little time to sew, but I did get a few hours of “me time” in on Sunday evening after my insulation work was done for the day.

Those few hours were enough for me to finish the entire shell of the jacket and skirt, but I needed a clear surface to cut out the lining fabric, so that was delayed until last evening (since my running group was cancelled). Since the wool suiting has stretch, I didn’t want to negate the benefits of that with a non-stretch lining, so I pulled out one of the few stretch wovens in my stash – a blisteringly hot pink stretch satin I’d bought from Fabric.com last year (and came across in my mom’s suitcase before the wedding). Despite it being polyester, it actually feels wonderful and it was worth the price to be such a high quality lining.

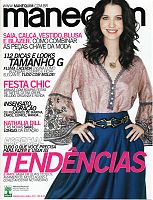
Manequim April 2011

For the past two years (and perhaps further back), the April issue of Manequim magazine has always included patterns which knocked off that year’s big Oscar dresses. I’ve been looking forward to the Oscar issue for months now, and April finally arrived and… there’s no Oscar dresses in it. Waaaahhmp-wahhhh.

But if you’re a plus-sized lady, you’re probably going to like this issue better anyway.

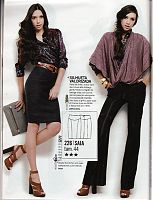
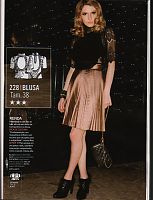
We’re looking at Missoni this month in the designer-inspired section, and I think this seamed skirt would be a really flattering basic. It’s just a bonus it’s in my size!

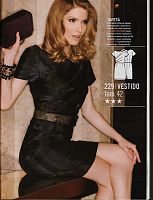
I really like the look of this taffeta dress, though I think I’d prefer to flex my puny drafting muscles and try my hand at it myself. I really need to stop being so lazy with readymade patterns and just rotate some darts like they did here…

While it’s not meant to be, this lace top really reminded me of Cate Blanchett’s Givenchy Oscar dress this year, with that same circular front.

A beginner skirt sewing lesson

Sunday afternoon was Lesson Two for my beginning sewing ladies, following along from the first lesson a few weeks ago when they learned how to operate a sewing machine and make a shopping bag.

At the end of the last lesson, Holly, Ness, and Veda were all begging to learn how to make a skirt, so how could I refuse? I decided they should follow in my footsteps and learn with New Look 6843, which was one of the VERY first patterns I ever made (then remade over and over again with a few variations!).

They picked out their own fabric and zippers, with Ness choosing a navy corduroy (so we got to talk about nap!), Holly choosing a beautiful navy wool suiting fabric, and Veda going for a bright and cheerful Liberty print.

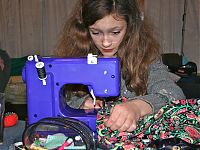
Here’s Veda sewing on her own purple JL Mini machine (like my red one!)

We talked through measurements, pattern layouts, what the symbols on patterns mean, and also how you don’t have to follow the directions if you don’t want to (since I thought New Look’s order of construction made it awkward to check the fit of darts, and their zipper insertion made things more difficult than they had to be!).

The Winter Coat – construction

About a year ago I bought some gorgeous, ex-Burberry wool coating fabric from Ditto with plans to eventually make another winter coat. The muted turquoise wool has a patterned herringbone weave on one side but it’s also very thick and un-drapey but has the advantage of not fraying at all (almost like a boiled wool or Melton).

The fabric is so thick that I knew had to choose my pattern wisely, leaving out coats with lots of pleats or gathers that would’ve meant lots of bulk here.

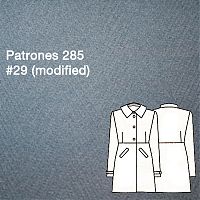
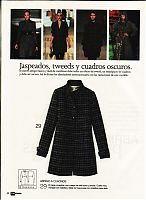
As soon as I saw the Armani knockoff coat in the September Burda issue, I thought I’d found the match for my fabric, but as you recall, that pattern was just downright awful. So I started looking through my coat patterns again for something suitable, and Claire (Seemane) suggested I combine Patrones 285 #29 with some elements of the other coats in that issue, which is more or less what I ended up doing (though I need to change my tech drawing here to show the applied welt pockets I finally decided on rather than buttoned welts).

DIY Wedding Fascinator – in progress

The Gown is progressing nicely, the shoes are bought and are being broken in little by little (while doing such glamorous tasks as watering the garden and taking out the rubbish!), so it’s now time to focus on my hair. In the past I’ve made fascinators (First in gold and then in silver) with a comb base that worked well for my long, thick, and straight hair, but post-chemo my hair is only two of those things so I’m using a headband for the base of this fascinator. In some strange twist of Life Imitating Art, my hair looks almost exactly like it does in the wonderful cartoon of us drawn by John Allison way back in March when I had barely any hair at all!

It appears that my “How to Make a Fascinator” tutorial vanished off BurdaStyle during one of their site moves, so I’m really glad I saved it as a Pdf a while ago so you can download it here now!

In the past my construction technique mostly centred around the glue gun, but for this one it just felt a bit wrong to do so when the rest of the ensemble is full of couture techniques. So for this base I used two teardrop shaped pieces of blue wool felt (the only colour I had on hand), with one of them stiffened with the ultra-rigid interfacing I used on my sun hat. I then covered this felt with a scrap of the vintage dress satin, stitched on the underside to prevent any puckers at the edges. You could omit this step if your felt matches the colour of whatever you’re covering it with, but the blue kept showing through the first few layers of feathers so I needed the satin layer.

I specifically chose a thin headband that had a fabric covering around it so I’d have something to anchor my stitches to, so keep this in mind while you’re shopping, as it’d be difficult to sew onto an all-plastic band (in which case you’re probably better off using glue). I then sewed the satin-covered base onto the headband, making sure my stitches went around the band each time for strength. Since the top was being covered in feathers, I didn’t bother to hide my stitches on the top side.

Once the decoration attachment is all complete, I’ll stitch the other blue felt piece to the underside of it all to hide the stitches (and band) and create a bit of grip on my hair.

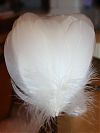
Here’s the fascinator with just the white goose feathers attached:
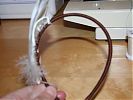
Sewing these onto the base was way easier than I was expecting. I just took 2 or 3 stitches over the central portion of the feather near the base, and that was enough to keep them secure. I’m leaving them unattached at the tips because as the headband stretches whilst worn, the feathers stay close to my head anyway.

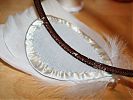
Here’s the underside so you can see my stitches and that super-stiff interfacing: