Moda Moldes magazine – April 2011

I only recently discovered that there are more Brazilian pattern magazines than just Manequim, and so when I learned a good friend was going to Brazil on holiday over Easter, I sent her on a mission to find as many as she could to bring back to me.

Not only did she find two Manequims for herself (she’s one of my beginning sewers so I told her I’d write up instructions for her for whichever of the patterns she wanted to make), but she brought me back three other magazines, too.

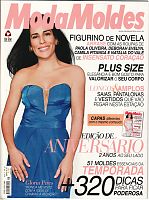
The first I have to show you is Moda Moldes magazine (which roughly translates as “Fashion Patterns”).

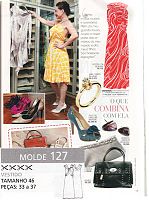
This magazine has a lot of celebrity-influenced fashion like Manequim, and I really liked the tech drawing for this draped, jersey maxidress, though I’d definitely shorten it to suit my tastes.

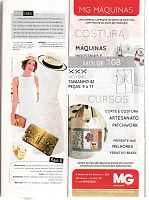
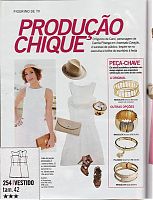
There’s clearly a limited pool of Brazilian celebrity outfits to choose from, because MM have chosen the same white dress that was also featured in the May 2011 Manequim (though in this case, I like Manequim’s pattern (on the right) better!).

Our DIY wedding – printed materials

One cost that can add up really quickly for a wedding are all the printed materials you need for the day. I’m not just talking about the invites (which can get ridiculously expensive if you go the letterpress, inner envelope, return card, RSVP envelope, etc route!), but also all the other bits of papery stuff that is forgotten until a few days before when you realise you actually do need them!

The illustration

The first step in our wedding design process was to commission a cartoon drawing of us from the illustrator John Allison (of Scary Go Round fame). James has been a big fan of his comic for ages now, and we both really liked his design style. So we sent him a photo of us, a brief description of James’s suit and my dress (at that point I was still thinking of that Vogue cowl-neck number) and to imagine 6 months’ more hair on my head. Which somehow he got eerily spot-on.

(Apologies for the awful jpg artifacting – I’ve not got the big version of the illustration in front of me to work from)

The wedding website

With the illustration in a nice, big file, we could then set about making our wedding website, which was to be the crux of our invitations. We both work in web developments, and absolutely everyone we know, right up to my grandparents, has an email address, so this way we could put the bulk of the information for both receptions on our site and be able to update it later, too. The RSVPs were all online, using a Google Spreadsheets form (easy to set up, easier for people to reply to than a trip to the post office, and we could both get access to the running tally), and all the usual venue info and registry links could be added without having to worry about word counts and layout.

I can now post a link to it for you to have a look at James’s standards-compliant coding prowess, because I don’t have to worry about you all messing up the RSVPs or gatecrashing or anything! The worst that can happen is that you decide to buy us some more insulation off our registry…

Invites

So with the website in place, all the invites really had to do was give folks the date, and point them towards the website. We ran up two sets of postcards from Moo.com (one set for the UK wedding and reception, and one for the Pennsylvania reception). And to set the tone, the wording was “James and Melissa are finally getting married!” ha!

How to sew a narrow bias edge

I had a busy yet productive weekend – not only did I finish my Colette Patterns Beignet skirt, but I also made the Patrones 292 sleeveless bias cowl top, too! I didn’t have enough time for a photoshoot over the weekend, but I did remember to finally document my favourite way of finishing the edges of thin blouses like the cowl top so I can finally share this with you.

This technique is great for necklines and armscyes on sleeveless tops, and is my preferred way to finish any kind of blousey, lightweight fabrics like silk satins and the viscose (rayon) you see here. You get a thin, finished edge that looks good inside and out with a minimum of fuss, and you don’t have that awkward problem of facings flipping out or anything, either. As long as you’re okay with a small amount of topstitching on the right side, this is the technique for you…

So before we begin, sew one of your seams so you’ve got a C-shape. If you’re finishing a neckline, this means you sew one of the shoulder seams. I’m finishing the armscye of a sleeveless blouse here, so in this case I’m sewing both shoulder seams, leaving the side seams free.

Step 1


Cut out a bias strip that’s the length of your opening edge, plus a few centimetres just to be sure. For the width, I prefer a finished facing of just 1cm, so my width here is 1cm + (2× 1.5cm seam allowances) = 4cm.

Been making and opening…

Believe it or not, I’ve been doing an awful lot of resting and napping, but as long as I don’t spend too much time standing at the ironing board, I can usually get a fair bit of sewing done before I get too tired (though on the days I have to go into outpatients I just come home and collapse!).

Making!

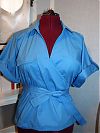
Since I already had this KnipMode wrap blouse prepared as an activity pack, it seemed the ideal candidate to ease myself into my sewing room again. I’m waiting for my wigs to arrive from Hong Kong before I do the photoshoot, but here’s a teaser on Susan…

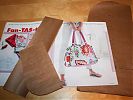
I realise I’m posting out of order here since I haven’t shown you all the fantastic August issue of KnipMode magzine yet, but let’s just say it’s so fan-tas-tic (terrible Dutch pun, uggggh) that I’ve already drafted this weekend bag pattern and have online shopping lists together to get all the haberdashery bits to complete it. I’m SO excited to try that vilene stuff that turns regular fabric into oilcloth, as my RTW bags just get so filthy so quickly!

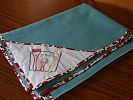
And starting the long line of baby gifts (I have something like 5 or 6 friends due in August & September!!) is this baby blanket for our friend’s little baby, Grace. I did the embroidery (from Urban Threads) while I was in hospital, then used a large amount of the turquiose basketweave fabric (which was just screaming to be made into a blanket even before I made my duffle coat!), and finished it off with some red and white bias tape. How is it that no matter how much bias tape you make, you’ll always end up a little short? Or maybe it’s just me?

Embroidery and bunting

I seem to be pretty lucky so far to have escaped the constant chemo nausea I was told to expect. I’m on two different chemo drugs now until Sunday when I switch to a third on its own, and so far one of them has had zero affect on the way I feel, and the other seems to be giving me wildly different comedy afflictions each day (first fever & headache, then the next day a weird bumpy rash like mosquito bites all over my body plus breathing problems, then tonight it just seems to be a 2 hour long sneezing fest. weird.). In any case, it’s so far much easier than I was expecting (knock on wood), so it’s given me some time to do some crafting in amoungst my tv and film watching.

Yesterday (Day -7) (in bone marrow transplant land, the day you get your stem cells is Day Zero, so right now I’m counting down to that, 8 July. After I receive them, I’ll go into the positive numbers!)

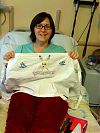
Yesterday I did a bit of ham-fisted embroidery, finishing up a bit for a baby present, which I’ll reveal when it’s totally finished, as well as finally finishing that Sublime Stitching apron kit I’ve been working on here and there over the last few months (remember this from the al fresco sewing day?).

Birthday sewing surprises

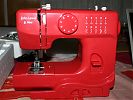
You may remember that last Fall I helped a friend test a bunch of budget sewing machines for a major newspaper, and one of the machines was a tiny, red John Lewis Mini sewing machine. John Lewis is a chain of high quality department stores in the UK (and the only one which still maintains a haberdashery and fabric department) and this is one of their own branded machines, though it’s actually a Janome under the hood. If you had any doubts – when you order these off the John Lewis website, it comes shipped directly from Janome UK!

Anyway I didn’t have much need for a tiny, portable machine back in October, but happily James’s parents thought I might like to do a bit of sewing in hospital and gave me this for my birthday!

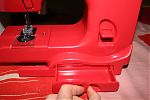
As I knew before, it’s definitely got its limitations, but as a second, portable machine, it should do nicely for me. It is really tiny, and very lightweight – the instruction manual for it is printed on bigger paper than the machine itself, and even I can lift it with one arm! It doesn’t have any accessories, or a light, for that matter, but it sews well, and through denim, too, being a sturdy mechanical Janome.

Retail therapy

Ahh, the beginning of the month – when my sewing money comes in, then goes right back out again… I have no problems whatsoever in budgeting in real life, but for sewing funds, it’s gone as soon as it hits my accounts!

First up was a notions restocking from Sew Essential after Laura reminded me that they stock the Vilene bias tape that BWOF is so crazy over for knit seam stabilisation. So I got a bunch of that, plus upholstery thread in grey and also gold for jeans topstitching, and a ginormous spool of Gutermann Sew-All in black as I’m nearly out and hardly anyone seems to stock it in huge quantities anymore. I also picked up a few boring but essential tools like a loop turner (yes, I have survived with a pair of locking tweezers up until now!), and a tracing wheel with a much kinder-to-the-hands wooden handle for tracing patterns. I also got a big ol’ roll of freezer paper for quick stencilling jobs (it’s not available in supermarkets here), and some silver jeans buttons, which were accidentally substituted with the boring brass variety. A quick email later and they’re sending out the silver variety while letting me keep the brass ones – that’s how customer service should be done! My feeling is that everyone makes mistakes, but it’s how they’re dealt with that sets people apart…

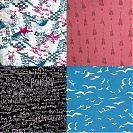
With the exception of Pip’s silk, I hadn’t bought fabric in a good, long time, so I suppose I was ripe for falling off the wagon. I’m making a concerted effort to track what I actually wear this month (which you’ll see at some point), and I realised that in cooler weather I definitely gravitate towards trousers and knit tops rather than the dresses and skirts I live in over the spring and summer. So, after a brief tour round the internet, I fell prey to the charms of Crybaby’s Boutique yet again! You may recall that I bought some sturdy denim and chestnut print lycra from them before and was really pleased with the quality, so fingers crossed for this bunch, too.

Black biker trousers

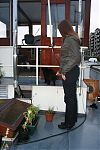
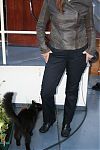
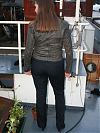
Continuing on with my need to fill my wardrobe’s trouser-shaped void, I decided this time around to try (gasp!) a different trouser pattern! But since I still wasn’t sure how well BWOF 05/2006 #112 would fit me, I opted to sew it up in the leftover black cotton drill from Simon’s pirate coat so that nothing would be lost if the fit was awful.

Frankly, I should’ve trusted Burda more – the fit is even better on these than on my casual TNT (“tried and true”) pattern I’ve been making for ages. These trousers have a seam running down the front leg that goes right into the pockets at the waist, and I think this extra seam really helps to shape them more closely to my legs.

I couldn’t wait for the photoshoot to wear these, though – so forgive the wrinkles! By this point they’d already been out for a friend’s birthday cocktails followed by langostines (yum!) in Soho, plus a full day at work. So just trust me when I say that there are no fit wrinkles when they’re fresh…

Pattern matching

I should have some photos for you very soon of my beautiful silk blouse, but in the meantime, I’ve started thinking about sewing up my next pair of jeans, using some brand name Levis 3% lycra denim from Crybaby’s Boutique (though it appears to be sold out now!). It’s all washed and dried (in my neighbour’s tumble dryer) and pressed and ready to go, but now I have to decide whether I’ll stick with my tried and true jeans pattern, Burda World of Fashion 08/2006 #109, or whether I should a new pattern, BurdaStyle’s Anita skinny jeans pattern.

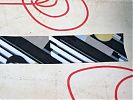
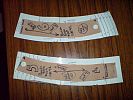
So my first thought was to compare the two patterns to see exactly how different Anita is from my usual pattern. It fits me like a glove, but has back darts rather than a yoke, which is my only aesthetic issue with it. Now, the BWOF pattern (in brown paper) does not have seam allowances and Anita (in white paper) does, so if the two patterns were exactly the same there should be 5/8 inch of white showing all the way around the edges.

Here’s the waistband pieces: