Blog

Temporary sewing

While our boat is in drydock for maintenance, we’re temporarily living on a very kind neighbour’s boat. Packing for a month (though possibly 2 weeks) was a challenge in itself, as you want to to give yourself choices (in clothing, entertainment, comforts, and cooking), but yet you’ve still got to physically move everything, so you don’t want to overpack, either.

I brought the bare minimum of sewing supplies, which for me means my JL Mini sewing machine, which is great for travel and beginners alike (speaking of, I have a friend who’s selling her identical red JL Mini as she’s upgraded to a fuller-featured machine. If anyone’s interested in buying it from her for £30, please leave a comment and I’ll put you in touch!).

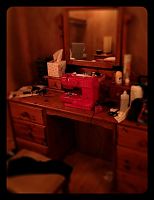
I also brought a few patterns and the fabrics to go with them, and I set up a temporary sewing station in the bedroom we’re staying in:

I thought it was quite amusing that the only place in the boat that was suitable for sitting and sewing was a pretty dressing table, and my boudoir sewing station inspired me to start one of my transported projects last weekend – another Ruby Slip!

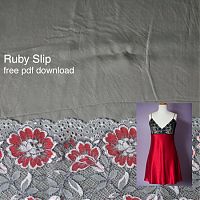
My first Ruby Slip was seafoam green with brick red lace and I loved it so much that I knew I’d be making another. If you missed the discussion then, Sherry offered a free pdf pattern and fantastic photo tutorials, which I highly recommend, even for beginners, as it’s beautiful and quite easy to sew (especially if you choose a thin cotton lawn).

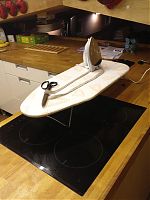
To match my sewing station, I set up a pressing station in the kitchen, with a travel iron and mini ironing board which live on the boat.

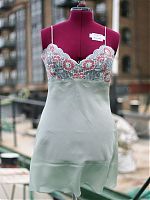
A seafoam green Ruby Slip (and matching panties)

The Ruby Slip is a free pdf pattern and comprehensive set of tutorials over at Pattern Scissors Cloth, and as soon as I saw it, I knew it was just the most perfect pattern ever for me and I had to sew it ASAP!

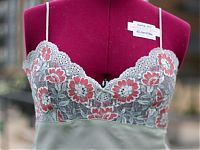
I had 2m of seafoam green silk in my stash that I’d bought at Bhopal Fabric on Brick Lane over the summer (at £6/m), so I took a swatch of that along with me to MacCulloch and Wallis just before Christmas to buy lace specifically for this. Their lace selection isn’t great, but I totally fell in love with this stretch lace, made up of seafoam green, grey, and brick-red flowers, and it was the required 18cm for the pattern. It was pretty eye wateringly-expensive at £14/m, but I ended up with a silk matching lingerie set for £40 exactly, so I think the economics of my decision were sound.

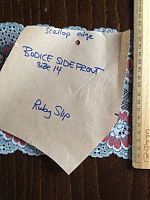
Sherry has done an incredible job going through all the ins and outs of lace cutting, bias silk sewing, how to do an FBA, etc, but I did get a surprise when I found that 18cm lace is not wide enough for the side front:

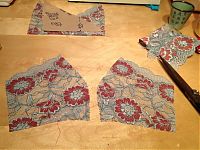
Since I went out and bought the lace specifically for this, I was a little annoyed, but I was also feeling flu-ish so I sat down with my copy of Bridal Couture and hand-pieced some lace from my scraps to make up the missing corner. It involved a ton of tiny hand stitches in both seafoam and brick to get everything to match seamlessly, but I’m pleased with the end result (she’s since posted some ways of dealing with narrow lace).

I also wanted to demonstrate how much you need to pay attention which cutting lace. I was paying heed to all of the scallops in order to get them in join up nicely at the seams, but I totally didn’t see that my motif was off at first. Happily, I had enough to re-cut that piece to have a nicer join over the seam (seen on the right).

Right, all that aside, and let’s see some finished photos! But, er, not modeled on me since there’s see-through lace and I’m not an exhibitionist. So you’ll just have to take my word that I squealed with delight when I first tried this on, because the fit is just perfect! The bias skirt really just hugs my curves without being tight, and everything just fits like it was meant to be. I made the “short” version, and the hem lies about 3-4 inches above the knee, which is perfect for me.

New Year's Progress Report

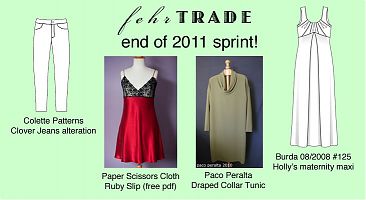
Back on the 17th I set some bold goals to finish by New Year’s:

I thought it was time for a little progress report, seeing as how I only have a few days to go…

  1. Paco’s Drape Collar Tunic – I sewed this up in an evening before Christmas. Though I had to get very creative in order to get long sleeves out of the 2m of sweater knit I bought… Note to self: Buy more yardage, or shorten the body length next time!
  2. Clover jeans – I just finished these! I’m totally loving the fit and the (IMHO) improved pockets, too.
  3. Holly’s maternity maxi-dress, Burda 08/2008 #125 – Having no place to cut the fabric of the enormous skirt pieces, I actually took it along to work yesterday and cut it out on the big (and empty) lunch table at lunchtime! The few guys left in the office already think I’m weird anyway. Shrug. In any case, this is now ready to sew!
  4. Ruby Slip – I wanted to cut the skirt pieces at the same time I cut out the maxi dress, but the low table height was killing my back by the time I finished with the maxi dress. I don’t think this will take long to sew together if I can ever find somewhere to cut the single-layer, bias layout… A good cutting area is my new productivity choke point.

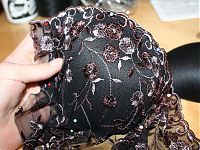
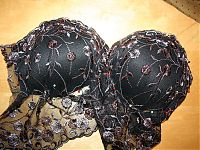
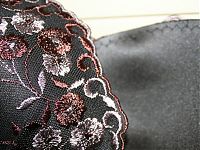
A black and brown lacey lingerie set (and exclusive freebie!)

I think it was inevitable that I’d need a quick and fun distraction from all my pattern drafting and muslins, and nothing spells “quick” and “fun” like lingerie! Seriously, if you’ve never sewn lingerie, you won’t really understand the appeal, but playing with tiny bits of lace and trim is just so creative and rewarding, especially for ladies like me who really aren’t into embellishment elsewhere in their wardrobes.

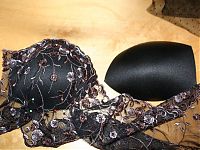
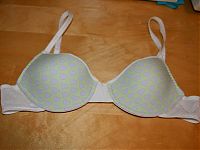
Since it fit so well before, I used the same modified bra pattern from my purple hearts bra, though this time I used black, pushup foam cups and the black/brown Alice lingerie kit from The Sewing Chest.

The first step was to cover the cups with the rigid lace. The lace in the kit was 50cm long, with two scalloped edges, so I aligned a scalloped edge along the top of the cup, then pinned and smoothed and made a few needed pleats in order to get it looking nice. If the lace or covering material is stretchy, then you don’t need any pleats in it, but as mine was rigid, a few small pleats were necessary towards the bottom.

Here’s the covered and uncovered cups:

Then I did the same with the other cup, though I had to use the opposite scalloped edge so both cups were symmetrical. In bra making, symmetry is king!!

With a wide zigzag stitch, I basted the lace around all the edges and trimmed the excess. I actually went back later and added some stretched, narrow elastic on the inside of the top of the cups, but I’d recommend actually doing this, or applying FOE (foldover elastic) to the upper cup edge before stretching the lace over your cups to avoid a second line of zigzagging over the lace. Even if you think your cups are sturdy enough to not need the elastic, it really makes a difference in keeping the top of the cup close to your body and not getting any gaping.

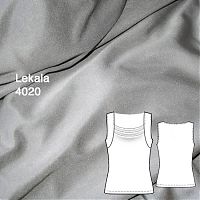
Lekala cowl top instructions and giveaway

You’ve seen my version of this fantastic cowl top, now’s your chance to make your own and show me yours!

As you’ll recall, the above is made using Lekala 4020, but I’ve created sleeve bands on the back to echo the ones on the front, so our first step is to alter the pattern for this.

Here’s the (unaltered) tech drawing:

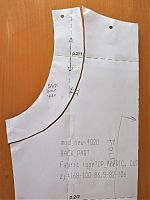
Lekala give full pattern pieces rather than placing some patterns on the fold, so the first thing I like to do is fold the front and the back in half. If you’re altering the back like me, then cut the back piece in half along this foldline (at the CB).

To echo the sleeve bands/yokes on the back, first lay the front sleeve band/yoke piece onto the back, and mark the corresponding widths at the back shoulder and the back side seam, so the two bands will align nicely when sewn together. Then, using the front yoke piece as a guide, draw a nice curve to join the two points, trying to keep the width of the yoke even. Lastly, draw a double notch somewhere in the lower half across the line, so you’ve got the notches on both the back piece and your new back band piece. Then cut along the line and treat as two pieces.

You’ll end up with something like this:

A different kind of lingerie success

I’ve made three bras so far, and despite winning the PR Lingerie contest last year, I’ve never been that happy with the fit of any of those bras. I mean, they were okay, but the style is different to the kind of bras I buy, and the underwires dug in, and well, the girls just didn’t look their best. So they’ve kinda worked their way to the bottom of my lingerie drawer, which makes me sad. I sew to wear, not to shove in a drawer!

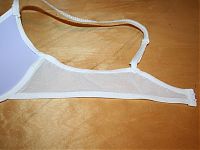
As I mentioned last week, I got very excited about the notion of sewing a bra made with foam cups, which are the sort I always buy, and speaking to Kellie at The Sewing Chest, she got me all set up with the right bits to have my first go. I made a toile using her purple hearts foam cups over the weekend and the fit is so good I wore it all day Sunday and now again Monday!

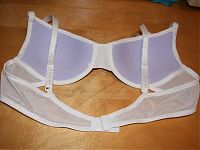
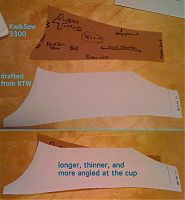
I started the process by making a rigorous comparison of the Kwik Sew 3300 pattern vs two RTW bra backs and ended up drafting a back similar to a Ted Baker one that fits me well.

Here you can see the difference between the KwikSew back (in brown) and my newly drafted-from-RTW back (in white) –

I'm currently excited about…

My turquoise and silver motif dress is nearly done (check out the fantastic lace hem tape I found in my stash to pretty-fy my hem, too!), but it doesn’t stop me thinking ahead…

  • Lekala 4020 – My brain needs a quick knit top, and I looooove the cowl neck and shoulder yokes on this. I’ve created echoing sleeve bands on the back to decrease the “coffin back” look (the only reason I haven’t made their “S dress” yet is that I’m contemplating how to jazz up the back on it. Any ideas?). I’ve got some small lengths of silver silk jersey left in my stash that I think will find a good home in this top.

    Even better is that they’ve got every pattern available in a free size 44 pdf this month if you want to try them free before you do the custom-size thing!

  • A foam cup braOMG I am amazingly excited to learn there’s a pattern out now for making the type of bras I buy in RTW with the moulded, foam cups! It’s the Pin Up Girls “Amanda” bra pattern. I’ve made bras before, but I’ve never been happy with the fit, and I think that half my problem is that I’m trying to sew the kind of bras I never actually buy…

    I had an email chat with the lovely Kellie, owner of The Sewing Chest shop (the best UK source of elastic and boning and lingerie fabrics, hands down!), and I’m now totally excited about sewing bras again. She’s advised me to put some of her foam cups onto the non-cup parts of the KwikSew 3300 bra I’ve made before, and see how that goes. She’s also advised me to use a different underwire size, too. Fingers crossed for bra success!

A beginner skirt sewing lesson

Sunday afternoon was Lesson Two for my beginning sewing ladies, following along from the first lesson a few weeks ago when they learned how to operate a sewing machine and make a shopping bag.

At the end of the last lesson, Holly, Ness, and Veda were all begging to learn how to make a skirt, so how could I refuse? I decided they should follow in my footsteps and learn with New Look 6843, which was one of the VERY first patterns I ever made (then remade over and over again with a few variations!).

They picked out their own fabric and zippers, with Ness choosing a navy corduroy (so we got to talk about nap!), Holly choosing a beautiful navy wool suiting fabric, and Veda going for a bright and cheerful Liberty print.

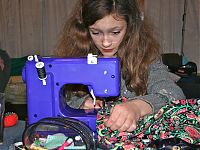
Here’s Veda sewing on her own purple JL Mini machine (like my red one!)

We talked through measurements, pattern layouts, what the symbols on patterns mean, and also how you don’t have to follow the directions if you don’t want to (since I thought New Look’s order of construction made it awkward to check the fit of darts, and their zipper insertion made things more difficult than they had to be!).

Black flannel pyjama bottoms

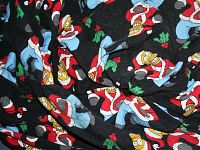
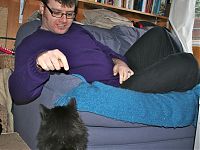
James isn’t normally the pyjama sort, but it’s been particularly cold this winter and he’s been in need of some PJ bottoms for quite a while. He only has one pair and it’s kinda sad to be wearing Santa Homer Simpson in February:

(Note to family – please don’t take this as a plea to send more. He really only needs and wants this one pair!)

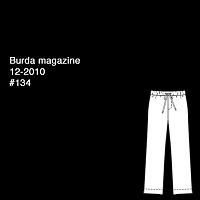
So I took pity on him and said I’d sew him a new pair to wear, and Burda magazine 12-2010 #134 was particularly handy. There are tons and tons of unisex pyjama trouser patterns out there, but this one was easy to find, and I know Burda’s sizing is so consistent that a 52 would fit him fine.

We were going to use the grey knit fabric we bought at Ditto, but I greatly underestimated the width of that so there was nowhere near enough (totally my fault as Gill asked “are you sure that’s enough?”). In a sea of insipid cutsey prints, Chawla’s came through with this solid black cotton flannel for cheap (3m for £11 shipped and I’ve got extra for jacket interlining if I like now, too). Chawla’s may not have the widest selection of natural fibre fabrics, but they are consistently the fastest shippers ever – I ordered this on a Tuesday, and it arrived in Thursday’s post!

The Caramel turtleneck

“Oh”, I hear you think*, “another one of those Burda turtlenecks?!?!”

Endless others have already made this, and I admit I was hesitant to make it myself because:

  1. When a pattern gets made a LOT, it kinda makes me want to sew it less (maybe it’s shades of “I sew so I don’t wear the same thing as everyone else” coming through?)
  2. I love love loved the Burda September issue and it almost feels like a cop-out to make the super easy pattern from it first when there’s just so many great patterns in there

But in the end, I still really needed more long sleeved tops and I already had the fabric and the overlocker and coverstitch were still threaded in the right colours. So it’s fate.

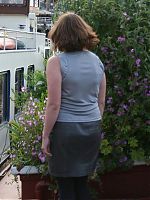
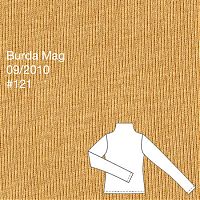
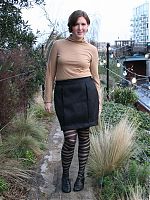
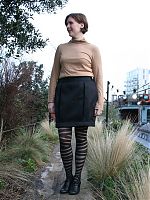
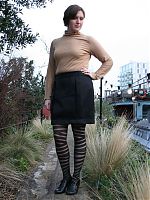
So here is my version of the Burda Sept 2010 turtleneck, in caramel-coloured bamboo jersey