The ombre denim Gimlet birthday dress

Happy (slightly belated) 38th birthday to meeeeeeeee!

My birthday was on Saturday and, after the stinker that was last year, I had a blast! I have a tradition where I like to sew myself something special to celebrate the occasion, and this year I decided to make myself a cocktail dress – rather fitting since I invited my friends out for cocktails on Friday to our favourite little whisky bar.

I’ve been utterly enchanted with the Gimlet dress pattern from the moment Capital Chic released it. Granted, Sally is a friend and I respect her work and design aesthetic so much, but this dress in particular was just too “me” not to make! I mean – sheath dress (tick), asymmetric (tick). And that’s pretty much all I need to add it to my To Sew list, ha!

A monochrome turtleneck

I’ve been absolutely swamped with work recently (and when you’re self-employed this is no bad thing!) but I still managed to squeeze in a little Me Sewing on the side. I’m a big believer in sewing up a “quick knit top” when you need a mojo boost, and this top probably took an hour in total, from tracing to cutting to sewing to wearing, split into several ten minute segments snatched here and there – the busy woman’s way to getting stuff sewn!

A yellow Drape Drape dress

From the first time I flipped through the first Drape Drape book, this dress really grabbed my attention and I knew that I’d eventually make it. Like most of the patterns in the Drape Drape books, this one has both unusual, 3D seaming and lots of gathers (or tucks). This is the third pattern I’ve made in the series, after the asymmetric teeshirt (twice!), and the gathered tunic dress.

Unlike the Pattern Magic books, in the Drape Drape books the patterns are included in several sheets at the back which you trace off, a’la Burda magazine. But though the lines aren’t packed as densely as in Burda’s, the lines aren’t coloured nor do they have different dashes or dots, so it’s not as easy to trace in my opinion! Because the shapes are often wraparound, the pieces can be quite big, and you have to trace them in a few different parts.

Burda magazine July 2016

Burda definitely keep up with the seasons, but I still kinda miss the reliable rhythm that the issues used to have back in the day – January had loungewear, March was always the wedding special (the only one they’ve reliably kept!), some menswear in April, May had tons of dresses, August was the Fall fashion previews (and usually maternity, too), cocktail dresses every November, and evening gowns in December. But my least favourite was always the summery beachwear in the June and July issues, because there was pretty much nothing I could wear in an English summer, where it rarely gets about 70-75F (25C)!

But in recent years Burda have been mixing things up, and the old scheduling has given way to more unpredictable features, which I think gives more variety and appeal to a wider rare of sewists. This issue certainly has a lot more than I’d usually like from a July!

Two casual Tessellate Tees

By the time I was able to release my Tessellate Tee pattern, I had made so many samples of all the different uses and features that the photoshoot required something like 8 wardrobe changes in the restrooms at our local park! You’ve already seen a few of the exercise-specific versions, but I know some of you may be more tempted to sew up a casual tee than an activewear one. So today I wanted to show that you can use it to make a long-sleeved (or short sleeved) teeshirt to just wear with jeans rather than leggings, too.

The full digital release of the Tessellate Tee pattern comes with all the included extras, but these versions were sewn as samples for Love Sewing magazine, so these are just the straight teeshirt with no hood, pocket, or thumb cuffs.

Sewing jeans against the world

Sometimes you have to just close yourself into your sewing room, try to block out the world, and just make. This weekend I closed myself in my sewing cave and emerged on Sunday with a new pair of jeans and a teeshirt.

Let’s start with the jeans – I’ve lost track, but these are probably at least the 10-15th pair of jeans I’ve sewn myself, so I pretty much know what I want and how to achieve it by now. I usually try to make at least a pair a year, as they seem to live for just over a year of hard wear before the inner thighs inevitably start to wear thin and they’re relegated into “boat work jeans”.

Named Harriet lumberjacket in wool & vintage silk

I am both back from our trip to the States and feeling back on form now, so I’ve started to tackle documenting the absolute mountain of finished makes from the last four months. I have some garments from early January, some made more recently and well, I’m just going to share them with you in no particular order! The photos are a bit more slapdash than usual, but I know that if I waited to do proper photoshoots of all of these then it’d be another 6 months before you’d get to see them!

So I’m going to start with a garment that was the longest in the planning, and also quite possibly my favourite of the early 2016 makes. It all started back in summer 2014, when I bought some fabulous navy wool coating & vintage silk twill from Ditto when I was down in Brighton. I knew I wanted to use them together for a transitional, short coat, but then I had quite a journey in finding the right pattern!


The psychedelic 1960s vintage silk twill lining that was originally made for neckties!

Over the course of 18 months, I ended up making five different muslins before I was happy enough to cut into the wool and silk:

  1. StyleArc Audrey (the silhouette and proportions were just so bad on me. So bad.)
  2. Burda Jan 2015 jacket in size 42 (way too small for non-stretch outerwear, oddly, though Burda’s fit is usually very standard)
  3. Burda Jan 2015 jacket in size 44 (traced ALL the pieces again and it still fit very weirdly)
  4. Patrones 342 No23 dolman sleeve coat (ridiculously tiny sleeves and zero arm mobility even with the underarm gusset)

And then finally I muslined Named’s Harriet lumberjacket pattern, bought during a flash sale during their advent calendar promotion. And I was like Goldilocks, it was juuuuuuust riiiiiight.

A charcoal and lime Jasper sweatshirt

For some reason, Paprika Patterns wasn’t entirely on my radar. I remember liking their skirt pattern when it was released, but I was super busy with my own patterns, and somehow I missed the release of their Jasper sweater/dress pattern entirely, until I stumbled upon it on my Twitter timeline, and thought WOW! And then immediately went and bought it.

As luck would have it, shortly after I bought the pattern I was gifted some amaaaaaaazing technical fabric from my friend with activewear industry connections – it’s charcoal jersey on one side, bonded with navy wicking fleece on the reverse. It’s super high quality with nice stretch and a great weight for keeping warm post-workout. I have also seen nothing like it on sale anywhere, sorry!

So I thought it’d be the perfect fabric and pattern combo to be my post-workout cooldown coverup. I’m a bit embarrassed to admit that I’ve been wearing the same ratty old red jacket after long runs and hard workouts, which I’d bought 10 years ago from a discount chain! Not really a great look when I wear all the crazy, wonderful workout gear underneath, so it was high time I upped my post-workout wardrobe game.


Seen here with my mesh-insertion leggings which I still love, but are too baggy for running in these days. Still great for cycling and casualwear though!

I thought an all-grey sweatshirt would be too boring for me, though, so I added a bunch of accents in lime green wicking jersey – I’d found some deep discounted gym tops in Pennsylvania in January so I bought the biggest I could find to get the most fabric possible, and paid only $5! The hems and bindings were particularly useful for inserting into seams, but for the large colourblocked areas I overlaid the green onto the thicker jersey/fleece first, since the green was considerably thinner.

I made a size 6 (B cup) of the Sweater length and the fit is great – I did narrow the sleeves by about 1.5cm further (and adjusted the cuff to match) but that was the only fit change I made. The length of everything is perfect for me.

The lower back colourblocking wasn’t originally intended – it’s not included in the pattern and only came about because I realised I did “a stupid” and accidentally cut the Back piece along the Lengthen/Shorten Line instead of the Sweater cut line, guh! So instead of cutting a whole new piece, I decided to play with the lower back and make it look intentional instead!

Fehr Trade x Laurie King fabric – first samples

Thank you all so, so much for your enthusiasm and compliments on the launch of our fabric designs last week! I’ve been swamped with work (which is great!) but managed to squeeze in some time to sew up the first two samples – a VNA Top and Duathlon Shorts (booty length) in the coordinating “Maps” citrine & black colourway.

So if you buy one yard of the “Maps” citrine/black VNA fabric and one yard of the “Maps” citrine/black Duathlon fabric, this is what you get! Cool, eh? There’s more photos of me modelling at the end, but I know loads of you were waiting to see finished versions first before taking the plunge!

Having cut out and sewn both, I took some photos throughout the process, and have a few tips as well. The previous post shows you how to lay out your pieces onto the different zones, but in real life, I know my makeshift cutting table (err, desk!) isn’t big enough to hold the full yardage.

So the first thing I recommend is to cut the fabric apart along the different zones and trim the white borders.

This makes it a lot easier to match up the edges so you can fold the zones in half and cut on the fold (or in the case of the Duathlon shorts, cut two layers at once). It also means I can fit the fabric onto my cutting table!

Burda magazine December 2013

I had high hopes for this issue after the stellar November issue and the sneak peek at the back of that, but when I saw the line drawings it became apparent this could’ve just been entitled “The Dolman Issue” for the number of dolman sleeved garments in it! I’m not sure if someone at Burda HQ gave down the commandment that set-in or raglan sleeves weren’t beginner friendly or what, but there sure are an awful lot of fabric-guzzling designs in here, but it’s not all bad…

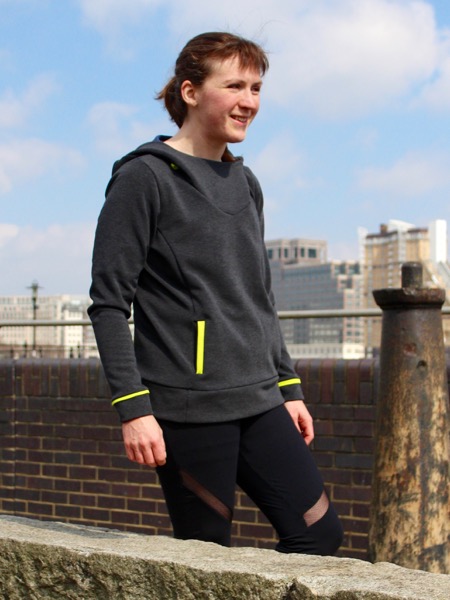
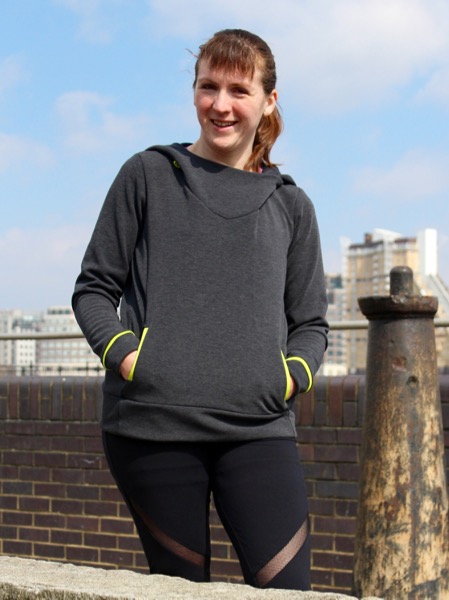
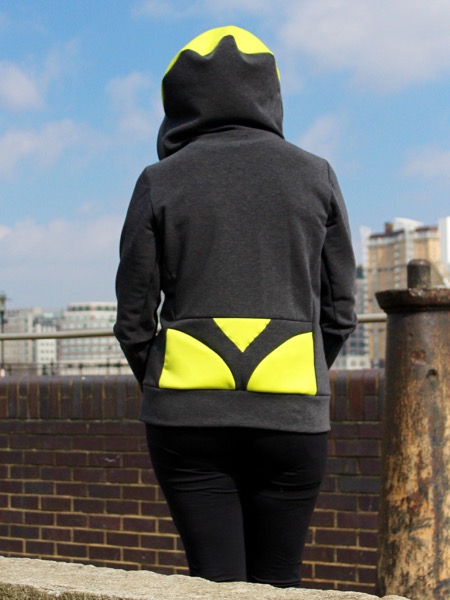
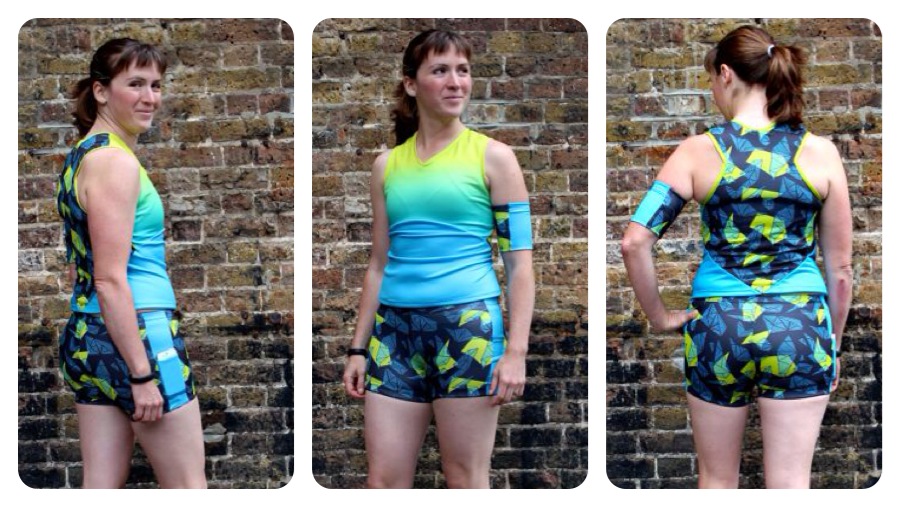
First up, no surprises for guessing – it’s a dolman sleeve tee! Actually this design isn’t so bad, it’s a nice twist on a casual, long sleeved tee, and the narrow sleeve cuffs help control some of the volume in the underarm/side seam area.

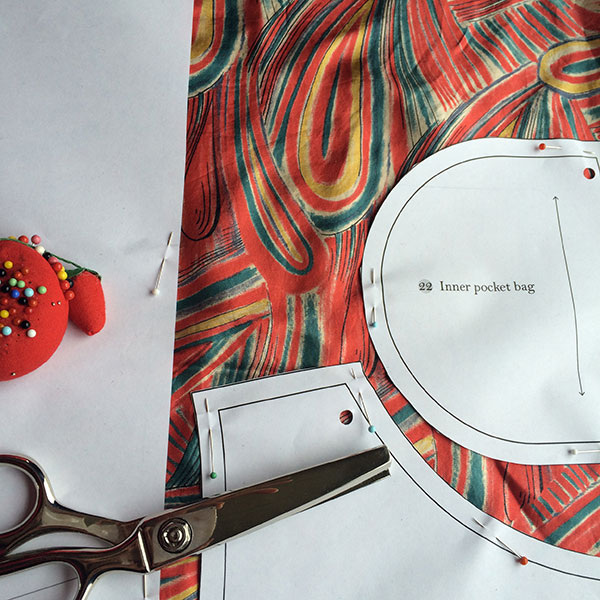
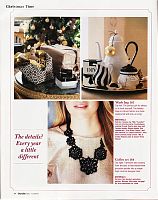
Since this is the holiday issue, the crafts are spread throughout the magazine and are way better than Burda’s usual “stick some glitter on twigs and call it interior design” school of crafts. For instance, these box bags are actually really nice little gifts, and a great way to use up scraps of nice, hefty home dec or other fabrics. There’s also a pattern for little moccasin slippers that uses wool and thick fleece that might be worth making as gifts too.

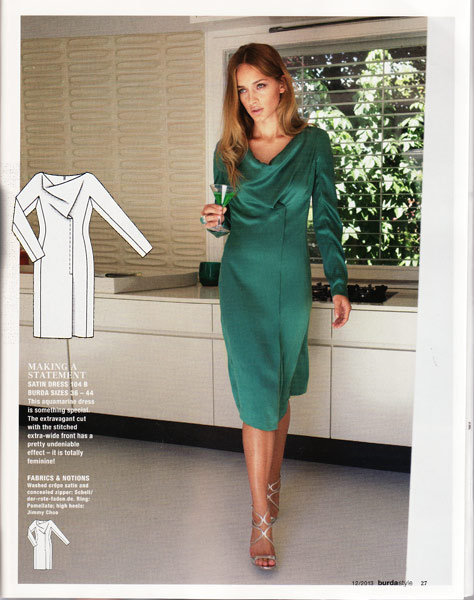
Now you’d think that, because this is a cowl dress, I’d be all over it, but I’m actually lukewarm. There’s something about that long pleat running into the cowl that just looks messy and haphazard, and from the cutting diagram I can see that the front is cut entirely as one (including the kimono sleeves, which have a gusset thrown in so you can actually lower your arms!), and then the pleat is just folded over. I know fabric is cheap these days, but the layout just makes me wince at the amount wasted to make a dress that way!

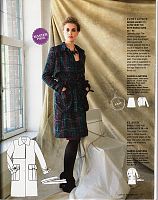
There are a few good trench coat patterns in this issue, but I particularly like this one because it shows that you can make a nice boucle coat without it being the same, ugly, tired, Chanel-alike design.

Again with the cowl neck and (nearly) dolman sleeves! This one looks like it’s just asking for a wardrobe mishap, along with showing off every little lump and bump in that fabric, but the top version of this doesn’t seem much better.