Blog

Two pairs of Cycling Shorts

These are the final garments I’ve got to show you from my “Sew Your Own Activewear” book – for now, anyway! And it’s fitting that I’ve saved these to the end because I wore both of these shorts hard all summer long, and I wanted to show again how you can mix and match features to make garments that work for you. The thirteen designs in the book were only ever intended as a starting point – you have my full permission and encouragement to change them up, repurpose bits of one design onto another, and make what works for you and your chosen exercise!

So in that spirit, last summer I decided I loved the Cycling Shorts design, but I wanted them for running. So I didn’t increase the back rise (a cycling-specific adaptation that’s not needed for running), and I also left off the chamois padding and silicone hems for similar reasons.

The “Sew Your Own Activewear” Cycling Shorts

I can’t quite believe it, but this is our final week and 13th design from my “Sew Your Own Activewear” book! It feels like just yesterday it was the start of January and I finally got to tell you all about the first of the designs in the book. And here we are, 13 weeks later, and I’ve taken you in-depth on each one of them. I’ve saved one of the best for last, though, and I think you’ll find that the Cycling Shorts are a super stylish addition to your activewear wardrobe, even if you never climb onto a bike!

My birthday animal-print Cycling Top

Happy 39th birthday to me! (And coincidentally to Rosie DIY Couture, though I don’t think she’s as old as me!) Yesterday was my birthday, and thank you so much to everyone who wished me well on social media – I’d planned to get this post up on the day itself, but I ended up spending my day packing and hefting boxes as we moved into the temporary flat we’ll be living in while the boat is being renovated! We only really took these photos as we were loading my bike into the rental van to move it to the flat (you can even see it in one of the shots!) so please forgive that the photos aren’t as clear or comprehensive as usual – they were taken very quickly on my phone on a very tiring day!

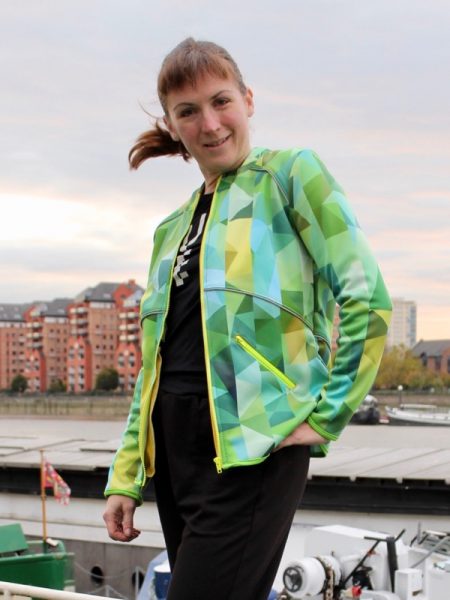
Every year I like to make myself something special to celebrate my birthday, and often these garments get so closely tied in my memory to that time in my life that I still refer to my green silk dress as “my 30th birthday dress”, for instance, and it means I get to do a bit of selfish sewing for myself, too!

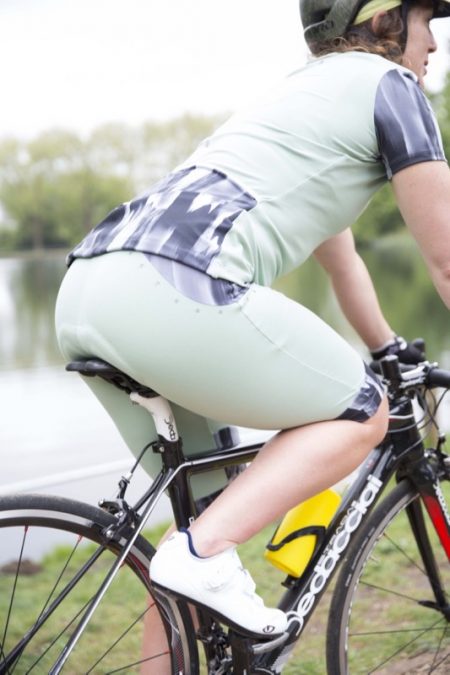
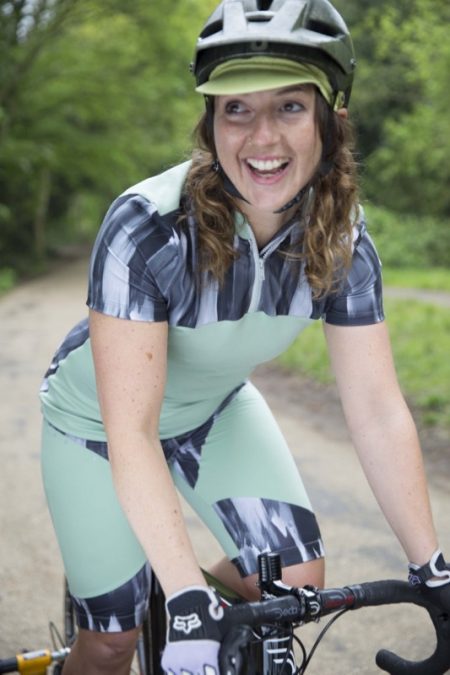
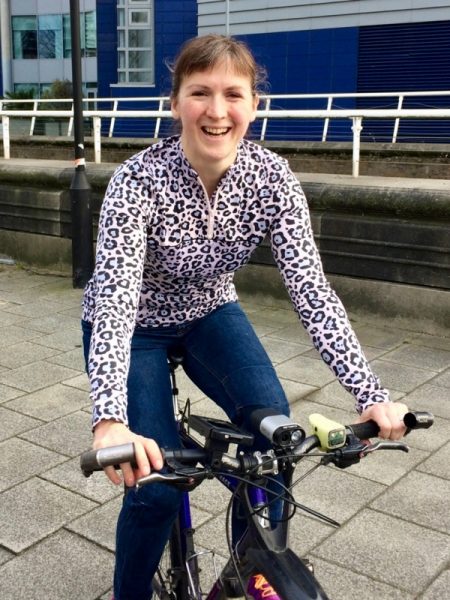
This year I decided to make something I’ve been planning for months and months – ever since I bought a length of pale pink & lavender leopard (or is it cheetah?) spotted activewear fabric from Stoff & Stil in Oslo back in November. I then realised I hadn’t bought quite enough to make the Cycling Top I had envisioned in my head, so I had to order another meter from Stoff & Stil online, which ended up being from a slightly different dye lot (it’s only noticeable if you get really close!).

The “Sew Your Own Activewear” Cycling Top

What’s an activewear book without some cycling kit? Not much of an activewear book, if you ask me, so I knew that I absolutely wanted to include some cycle-specific gear when I was developing the designs for my “Sew Your Own Activewear” book. I’d already developed a great cycling top (as well as all-around winter exercise and rashguard!) when I’d made my Surf to Summit Top pattern (also available for men!), so I wanted to take some learnings from that and make the book design different enough that cyclists would want to make both!

How to make your Split Shorts less revealing

I designed the Split Shorts in my “Sew Your Own Activewear” book to have the greatest mobility possible to minimise the chance of the inseams riding up while running (a really common issue with running shorts!). These shorts do show a bit of thigh, but the back of the shorts stay close to the body, and the inseams really do stay put. In fact, they can be mistaken for a skort or running skirt while you’re in motion, and they look really feminine!

But some of you may find that the Split Shorts as drafted in the book are a little more revealing than you’d like, and the good news is that there are two easy ways to adjust for this! Note that by making these less revealing, though, you are limiting the mobility of the leg, so be sure to make incremental steps and sew and test your muslins along the way to make sure you can still move effectively in them. But if you’re planning to wear these for an activity that doesn’t require the extreme amount of forward leg motion needed for running, then modesty may be more important to you than the range of motion anyway!

The “Sew Your Own Activewear” Split Shorts

Let’s pretend we’re in summer and talk about the Split Shorts design from my “Sew Your Own Activewear” book this week! I really wanted to make sure the book included designs for all four seasons and as a runner myself, I know the perils of finding a pair of running shorts that don’t ride up as you move.

It took me months and months of development work to come up with our Threshold Shorts pattern, so I took my learnings from that and designed a pair of shorts for the book which have an almost infinite amount of movement in the front leg and won’t restrict movement or ride up in the inner thigh (a very common problem with RTW running shorts and retro “athleisure” designs). During early development these were called the “Petal Shorts” as the overlapping front pieces look like the petals of a flower, but ultimately “Split Shorts” won out as it’s more descriptive of the design!

How to add more room to your Active Jacket collar

Today I want to give you a little pattern hack that can help if you find that the opening edge of your Active Jacket (or Cycling Top) from my “Sew Your Own Activewear” book is a bit too snug. This can especially be an issue for the smaller sizes, or if your fabric has very little crosswise stretch.

This is a really easy adjustment to make, either after you’ve drafted the collar according to the instructions on page 80 (or page 58 for the Cycling Top), or after you’ve already got your finished pieces cut out.

A digitally printed Active Jacket

So you might be thinking “Wait – haven’t I seen this jacket before?” and if you follow me on Instagram then you’d be right. Or if you follow this blog on RSS or by email, then you may also be right, as I’d taken these photos last fall but wanted to save the post until the book came out, and then accidentally made my draft post live when I added some tags to it (I do love Wordpress but it is WAY too easy to do that – on my old blog platform it was almost impossible to set something live accidentally!).

But in either of those circumstances, you didn’t really get to see or hear very much about this jacket, but I am SO happy with it and bursting to share!

The “Sew Your Own Activewear” Active Jacket

This week we’ll be talking about one of the most popular designs in my “Sew Your Own Activewear” book (that is, if your initial To Sew list intentions are anything to go by!), the Active Jacket! I was so lucky that my publisher gave me absolute creative control with the contents and designs for this book, and I knew from the first conversations that I wanted to include a jacket of some sort. They’re the sort of garment I wear all the time, whether it’s on my cycle commute, marathon training, or just to wear after a race, but for some reason I never quite found the time to release a pattern for one. So the Active Jacket was born!