Gathering supplies

It feels like I only just spoke about shopping but here I am, back with more lovely things to share! In my mind, it’s important that I have an intended use/project for 95% of the things I buy, and that I actually do end up using it, or (in the worst case) giving it away.

So with that in mind, I tried to make purchases of things I’m likely to use fairly soon, and I’m definitely all set for the long Easter weekend now!

Minerva Crafts

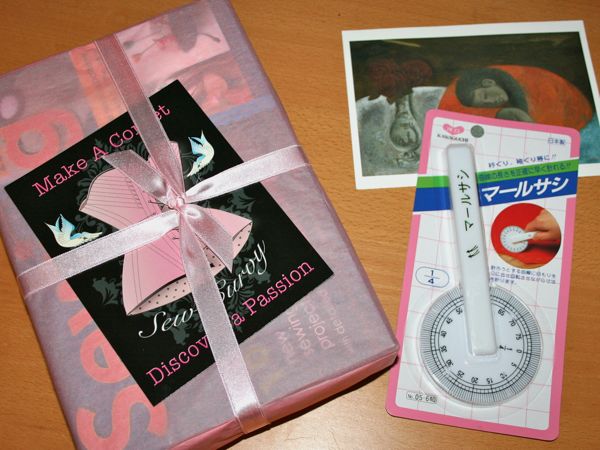
I was approached by the lovely Vicki at Minerva Crafts asking if I’d like to try some of their products. I’m approached fairly often by retailers about this sort of thing and I usually decline unless it’s a) most definitely sewing related (and not just another clothing store wanting to pimp me out for some % off code!) and b) I genuinely think I’d like the product and feel good about recommending them.

Not only are Minerva most definitely sewing-related (and owned by fellow sewists!!) but omg do they stock a gargantuan amount of sewing supplies! Ladies, it took me four days to trawl through the site and actually decide what I wanted. Four days. Not just fabric, but a ton of haberdashery (including supplies I’ve never seen anywhere else, like the stretch/lycra bindings), high end sewing tools and gadgets, patterns, the works. I didn’t even look in the Knitting, Quilting, or Needlework sections!

They’ve also got free shipping on all orders over £20, which is pretty awesome, too, as I’ve seen a lot of places with a much higher barrier than that…

But I won’t leave you in suspense any longer, here’s what I selected!

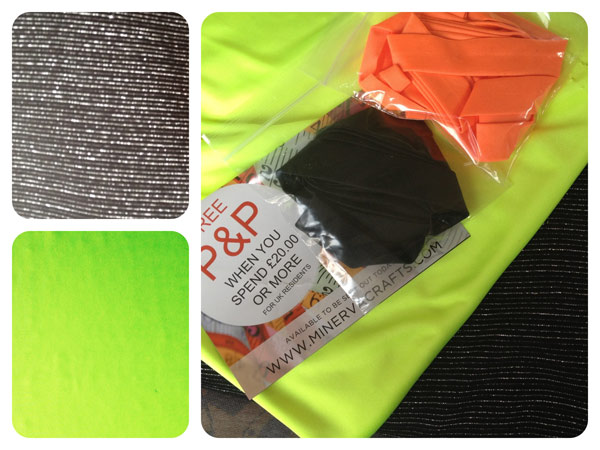
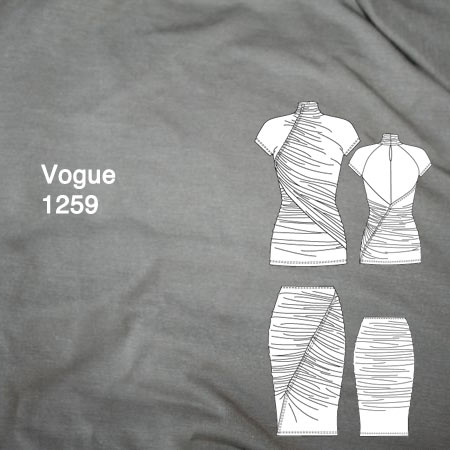
First up – 2.5m Black and silver heavyweight jersey to make the StyleArc Marie jacket, which coincidentally arrived from Australia the same day (4 working days after the shipping email! Noice!). This feels perfect for the jacket, too – hefty but drapey at the same time, with a nice bit of glam from the silver lurex threads.

Vintage wiggle dress – pattern notes

My latest project is this vintage sheath dress from the November Burda magazine (which you can purchase as a pdf here if you missed the magazine)!

It’s a reprint of an original pattern Burda printed in 1956, and one of my favourite running features that Burda magazine have been doing this year. Since the company’s had a very long history, it makes sense that they should look into their archives, dust off a few gems, grade up the sizing to their usual modern range, and translate the instructions!

Contrary to popular belief, this particular one is not a maternity dress, despite the fact that the model clearly looks like she’s “showing”. I can assure you that I do not look pregnant in it one bit, so let’s move on with the catty remarks…

In any case, I finished this one on Sunday night, but considering that it gets dark at 4pm here now, I won’t be able to do a photoshoot until this weekend, meaning you won’t see it on me until next week. By which time I’ll have probably forgotten all the construction details, boo!

So by way of a reminder, I thought I’d type up my thoughts now, then you’ll see the finished design next week. So the “Tell”, then the “Show”!

1. The bodice has seven monster, curved darts, all of which needed to be accurately marked onto the fabric. If you have carbon paper, I suggest you make good use of it, but for me, I remove the inside of the darts with scissors, then thread trace each dart with silk basting thread so I can see it on both sides. Then repeat for the other bodice piece. This took a few evenings, but it was important to get them right, as it’s the focus of the entire dress!

Grey Pattern Magic "Flip Turn" top

Ever since I first opened the Pattern Magic books, a few designs have been burning a hole in my sewing brain. One of these was the “Flip Turn for a Draped Effect” bodice from Pattern Magic 2, and I was so happy that I was able to draft this on my Morley College Pattern Magic 2 course last month! It wasn’t too bad to figure out, but I’m still really pleased to have the instructor there and because I muddled through (albeit with help), I feel much more confident about tackling other designs in the books.

The only problem was that we drafted all the course designs based on the largest Bunka sloper, which was still rather a lot smaller than me, so if I wanted to actually wear the designs from the course, I’d have to create them again off my own sloper, which just seemed a bit dull.

Or maybe… just maybe… I wonder if the Bunka sloper version would fit if I eliminated the back waist darts and made it in a knit?

OMG a toile for a fashion college dressform fits me!! :O 😀

Since this was a total fit experiment, I wanted to try this first in a low-risk fabric, and I had just enough of this viscose grey marl jersey leftover in my stash from the Manequim “big shirt”.

One interesting part of this design is that the reverse of the fabric is shown on a large portion of the lower front, and in this fabric, the reverse is kinda textured and loopy, but without any major colour change from the “correct” side. It means you get a subtle texture change on that panel, but without screaming “hey! I’m the wrong side!”.

To further play up the texture change and to make it look more intentional, I used the wrong side of the fabric on the neck band, too (maybe I’ll do the sleeves on the wrong side next time, too?)

Lucky Me

Well, aren’t I a lucky girl recently? First of all, I won interfacing and a metal seam gauge from Pam’s giveaway at Off the Cuff!

I’ve won Pro-Sheer Elegance and Pro-Woven Shirt Crisp interfacings, to be precise. Coincidentally, both kinds were the few I didn’t buy on my interfacing binge a few month ago! So now I’ve got an even greater biodiversity in my interfacing bag…

Then, hot on the heels of winning that – I may have lost Karen’s draw, but I ended up winning a copy of the novel “Laura’s Handmade Life” from craftycrafty.tv, too! A novel where the heroine bounces back from life crises through sewing? Yes, I think I’ll enjoy this… So now I’ve got three books in my reading queue, aahh!

And it was time again for another Google Adsense payout, so I thought this time I’d spend your hard-earned funds on something a great majority of you will want to see: the new DKNY Vogue pattern (1259), and 3m of this gorgeous mushroom-coloured viscose/cotton/lycra from Tia Knight aka “In Fashion Fabrics” on ebay. It’s ridiculously soft, lightweight, and drapey and just perfect for the gajillion gathers on this pattern, so when both arrived within a day of each other late last week, I set to work!

Some lovely sewing gifts

In amongst my usual pattern magazine subscriptions, my postie has been quite busy delivering some additional goodies to FehrTrade Towers over the past few weeks! First, I won a sewing (almost) page-a-day calendar from Julia at Marmalade Kiss, whose blog I’ve been following for ages and ages! She’s incredible at corsetry, underwear and drafting (and has her own corsetry supply shop, too) and was one of the contributors in the calendar so I’m looking forward to bumping into hers as I work my way through the year!

Not long after that, the lovely and extremely chic Yoshimi posted a giveaway for a really cool rotary ruler, and this was not two days after I’d just painstakingly measured the armscye and the sleeve curve on my winter coat pattern so I was really hoping I’d win as this would make it SO much easier to match curves! And then I was gobsmacked to win this, too! It’s like a pizza cutter but with a ruler along both sides of the wheel so you can measure as you roll! I’ve never seen anything like it before, but it’s such a cool idea.

The Motherload of KnipMode – Part Two

You can read my roundup of Part One of the haul of older KnipModes from Hilde here, but now it’s time for the exciting conclusion to my newly-acquired stash of KnipModes from 2005 through 2007.

KnipMode May 2006

Wow Knip have gone full-on wedding crazy here! The bridal feature takes up a good third of the magazine! Ok so the wedding gown is not really to my taste, but I still think it’s a shame that the pattern is a special-offer to post away for and isn’t included…

…but the patterns for the rest of the bridal party are!! Everyone from the baby to mother of the bride to wow! those are the first maternity patterns I’ve ever seen in Knip! I wonder why they stopped printing them, especially since Burda and Patrones seem to publish maternity patterns with some regularity.

I really liked the khaki and white colour scheme of this feature, especially with this model’s colouring, but my favourite pattern of the lot was these nice pleated trousers:

Bridal bodice – Prepping the pieces

I finally got the muslin fixed and finished! Thanks for all your advice, though I haven’t had a chance to reply to hardly any of you, for which I do apologise…

Muslin #3 changes –

  1. Unpinned the shoulder change, took off the waist stay, and since it seemed to be pulling everything upwards before, I reasoned that it must be too low. I repinned it a little higher and everything seemed to sit nicely and correct those weird problems it threw up before.
  2. I’ve said it before but I’ll say it again – I detest Rigilene boning! Only someone who hates women could’ve come up with those tiny, needle-like implements of torture. My spiral steel boning for the finished dress arrived and it just feels wonderful.
  3. No one actually came up with the fix I needed for piece #3’s weird bubble. As it turns out I just needed to flatten the curve a bit below the inset corner. (Before and After are below)
  4. There’s no way I’m muslining the skirt. It’d literally take a whole week of sewing time to even approximate the panels on the existing skirt, plus the drape and weight of the muslin fabric is totally different, and it won’t achieve much of anything I won’t learn in the actual skirt attachment anyway. End of story.
  5. Yes, I know about wearing proper undergarments. I’ve been wearing the bra I intend to wear on the day all along (though I got sharpie on it during my muslin marking process so I need to buy another copy of it, boo.). I was not being serious about the push up bra.

So with the muslin done, on with the dress itself!! Hurrah!

First step was to lay the pattern pieces onto the wrong side of my flannel underlining, fuzzy side down (I’d been transferring all my changes onto them and I prefer paper with no seam allowances over muslin with allowances). Once pinned in place, I then chalked the seam lines, waist, centre back and fronts, and the two notches onto it. Then I cut out the pieces with eyeballed seam allowances (when you’re dealing with seamlines, the size of the allowances are largely unimportant).

Next I laid the flannel pieces onto the wrong side of the satin, pinning only in the seam allowances because all the pin holes show on this fabric.

Do You Speak Sewing?

I finished hemming the Pendleton wool tuxedo-inspired trousers last night, using the very, very last of my navy blue thread, so we should hopefully be able to have the photoshoot tonight and you’ll see the completed suit tomorrow!

In Patrones news, I’ve been very busy tracing off a bunch of patterns from the December and October 2007 issues that my wonderful East London benefactor has lent to me. So far I’ve traced off 6 patterns and scanned and cleaned up images for 11. My Type A personality is really shining through here, but what I’ve done is put the traced pieces (I usually use brown kraft paper but for some reason the same paper in green was half price so who am I to argue?) plus a scan of the fashion photo plus a scan of the technical drawing and instructions all into a gallon-sized ziploc bag. Hopefully this means I won’t lose pieces or forget what I have when I go to choose a project…

Going through all the instructions made me yearn for something like Naaipatronen’s Dutch sewing terms list that I’d be able to use for all these Spanish sewing terms. I don’t really need much, but I found it necessary to at least know the type of fabric required before starting off, so knowing things like punto means knit is invaluable. Using a variety of online sources I’ve managed to cobble together a small list of Spanish sewing terms, but it’s nowhere near comprehensive and, not being a native speaker, probably has a bunch of errors in it. But I can keep it as a work in progress, so if you speak Spanish and have any corrections or addition, PLEASE send them over and I’ll update the file.

Download my Spanish – English sewing terms translation list (in pdf format)

An asymmetric swimsuit

It’s been a while since I’ve had to write a negative pattern review but hoo boy, this one’s a doozy. The thing is, I ended up with a finished swimsuit that I really like and feel great in, but that’s in spite of this pattern, not because of it. I significantly redrafted all the pieces and relied heavily on another blogger’s instructions in order to get to the finished result.

I’m not even sure how the Edgewater Avenue “Marley One Piece” pattern came on my radar, tbh. I’ve never heard of the brand before, but they seem to specialise in swimwear sewing patterns and this particular one was on sale for $5 for a limited time, so I bought it.

Completing the Alpine Cycling Set (& 100 miles!)

When I sewed myself the Alpine cycling kit last summer, I didn’t make a sports bra to go along with the Surf to Summit Top jersey and the Rouleur Leggings bib shorts, even though I’d done so for my previous two cycling sets (rainbow in 2019 and Tokyo-inspired in 2020). This was because I didn’t really think I’d have enough fabric left as I knew I wanted to make Tenacity Shorts and a Versatili-Tank with it too, but also because I figured I had enough sports bras and it didn’t really matter.

But apparently I do care, because in the months of cycling in the kit since then (99% of which was on Zwift!), it kinda bugged me that I didn’t have a matching bra – petty, I know, but easily fixable! So once I decided that I’d be cycling RideLondon’s 100 miler in this kit, I pulled out the leftover scraps to see if I could piece together a sports bras from the bits of fabric and upcycled race tees. And the answer was “just barely”!