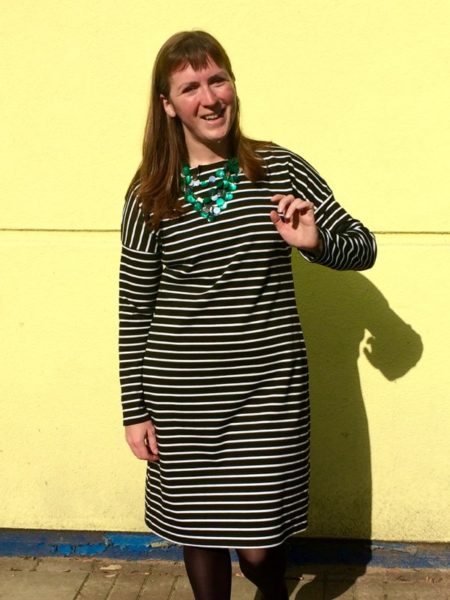
The origins of this dress are a bit “chicken and egg” – did I think about making the Breton tee dress from the latest Great British Sewing Bee book first, or did I decide I finally wanted to cut into the hefty black and white striped ponte in my stash first? I’m not entirely sure of the order, but I do like it when a plan comes together which doesn’t involve me buying anything more!
A Breton tee dress
James’s ombre Lightspeed Leggings
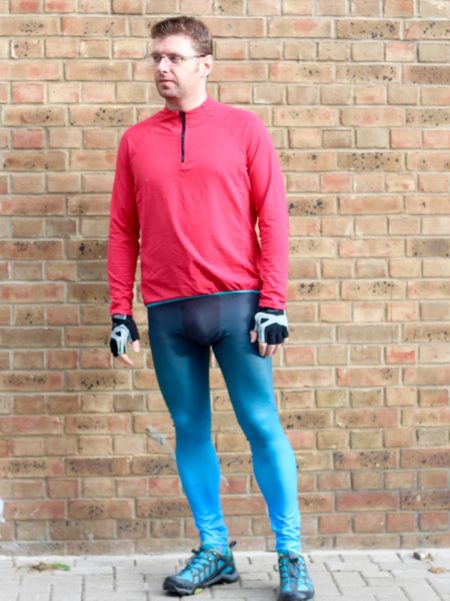
Wow, you all really do love a sale! It’s great to see so many of you sharing our enthusiasm for the new Lightspeed Leggings pattern, too! I hope you’ve had enough time to compose yourself after meeting our first athlete model, Jason, as today we’re going to take a look at our second athlete model, James. Yes, my husband James! 😘
Jason’s houndstooth Lightspeed shorts & cycling jersey
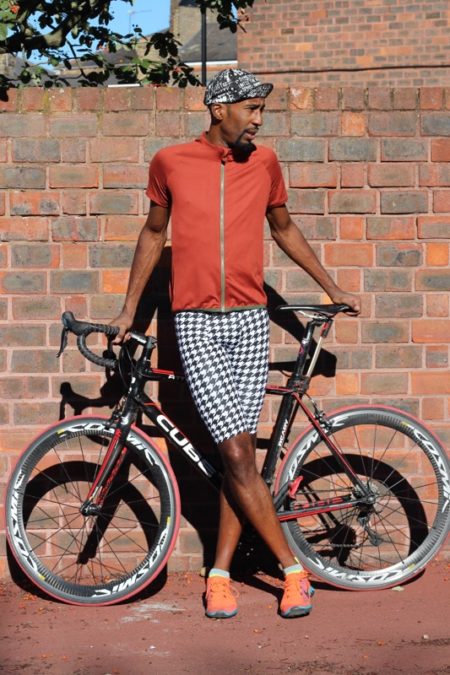
Thanks so much for all your enthusiasm over our new Lightspeed Leggings pattern! There’s also been a bit of *ahem* enthusiasm over our latest athlete model, Jason, so I thought it was high time you learned a little bit more about our cover star!
Another pair of cycling jeans
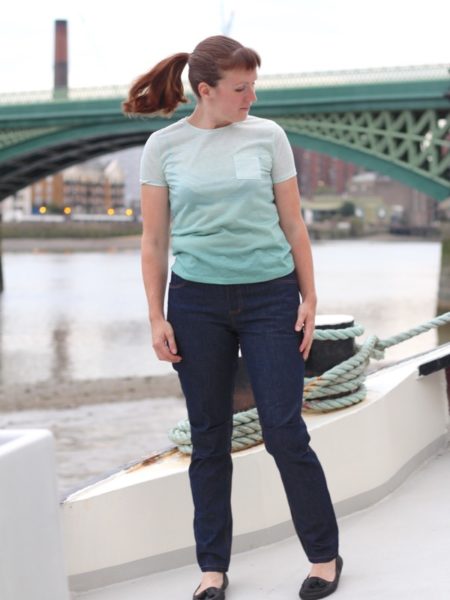
I’ve made a lot of jeans since I started sewing 14 years ago. I remember I made my first pair before we even bought the boat, which would put them back in 2006 or 2007, and I really haven’t stopped since! I’ve probably made at least 10-15 pairs over the years, with various patterns and weights of denim, but my most recent pair with cycling-specific adaptations have been one of my favourites, so I wanted to have another pair of those in my wardrobe.
The majority of my jeans over the years have been made with Ditto Fabrics’ super freaking amazing Italian denims, and this traditional, non-stretch, dark dye was bought when I last visited their shop in December. It’s no coincidence that we’ve got another trip to Brighton planned in a few weeks so I can restock then…
A matching silk hardshell clutch
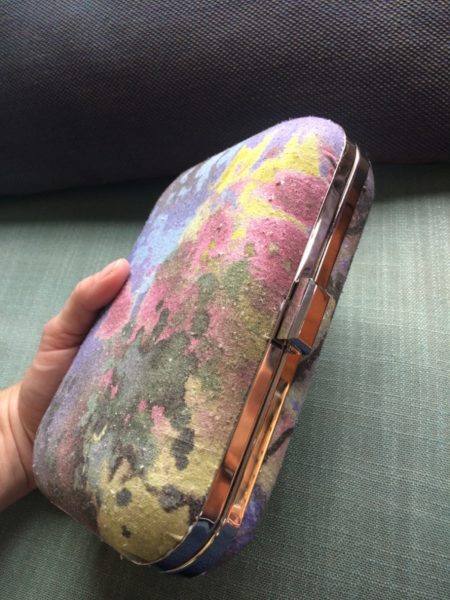
When I make a nice dress for a formal occasion, I often like to create a small handbag to match the dress (or jacket!) as it just creates a more “pulled together” look, and it’s something I can do that RTW often can’t!
So when I was cutting out the silk noile for the Pamela dress you saw earlier this week, I realised I had a small rectangle leftover – perfect for covering one of the U-Handbag hardshell clutch cases I’d bought!
All the clutch bags I’d made previously had been sewn (a favourite being the Cake patterns wristlet), so a hardshell case involving lots of glue was totally new territory for me! Luckily, Lisa provides really great, printable instructions for these, and honestly, it was SO easy to make!
A watercolour silk noile dress
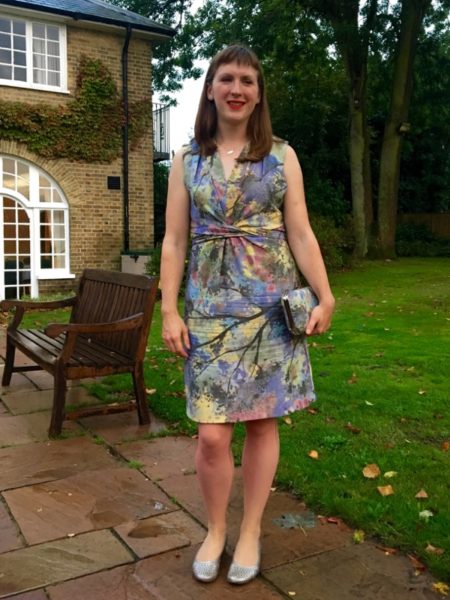
At my last shopping trip down to Ditto Fabrics in Brighton last December, I bought a great mix of spring and summer fabrics with a few cold weather ones thrown in for good measure. So far I’ve already sewn up a Fair Isle sweater (which I was too sick to blog about properly), that muted turquoise lace dress, a pair of cycling jeans (with another coming later this week).
But I’d bought a length of silk noile with a watercolour-esque muted floral print that the owner, Gill, was raving over, saying it made the most comfortable summer dress. It’s long sold out now, but Ditto have a few other silk noiles in stock. I knew I wanted to make a dress from it – preferably unlined to take advantage of the silk noile’s comfort and coolness, but I needed an occasion to actually sew it up. Luckily, two friends I’d know for years from Run dem Crew got married this weekend, so I had the perfect excuse!
A neon cropped tee
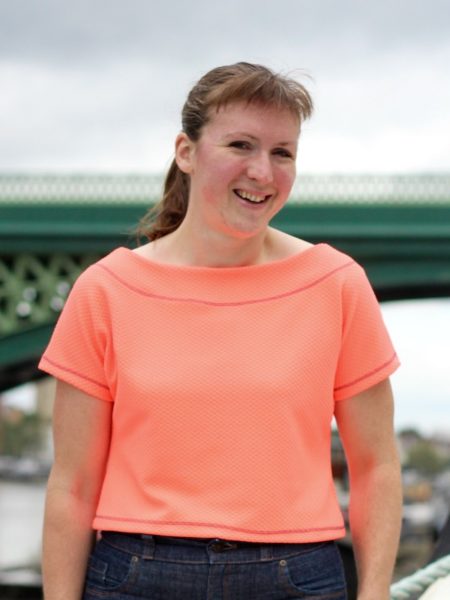
As you heard earlier this week, I bought this eye-wateringly n-e-o-n peach, 100% polyester pique jersey at Abakhan in Liverpool to pair with some grey scuba to make the Triple Triangle Dress from the new No Patterns Needed book.
But I really only used the pique jersey in strips to bind the armholes, neckline, and waist, so there was quite a bit leftover. Now, I must point out that this pique jersey is craaaaaaazy bright in real life. Like, “it hurts your eyes to look at it for too long” bright. So most women would probably shy away from both wearing it near their face and wearing it in big blocks of colour.
I am not most women.
A Triple Triangle scuba dress
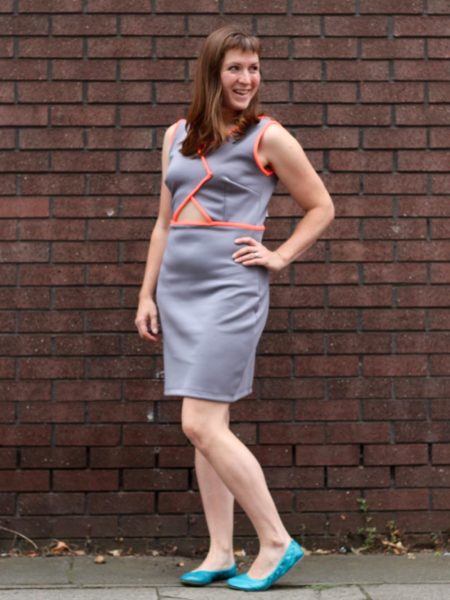
Like my Donna Karan x Liberty shirt you saw earlier this week, this dress is another departure from my comfort zone. Yes, it’s made in stretchy scuba and in decidedly “me” colours, but it’s drafted from my measurements instead of a pattern and you can see my midriff!
This all began when I went to the launch party for the DIY Couture No Patterns Needed book back in July. The party itself was a total blast – it was basically a Who’s Who of the London sewing scene and I got to see loads of people I’d not seen in years, as well as meet plenty of new friends too, in addition to seeing a lot of the models from the book wearing the different designs. I bought the book on the night (and got it signed!) but I wanted to hold off talking about it here until I’d had a chance to actually make something from it.
Now, if you’re expecting an unbiased review, you’re going to have to go elsewhere – Rosie is a good friend, having bonded not just over sewing but cycling, London, helping people, teaching, generally having a good ol’ rant while we worked together behind the scenes on GBSB season 3. This is her second book, and I personally know how hard she’s worked on this, slaving over it even on the hottest summer days, for like two years now! She’s truly a one-woman show, devising all the designs, working out the maths so they fit any body shape, and doing all the illustrations and samples herself, too.
The Donna Karan x Liberty shirt
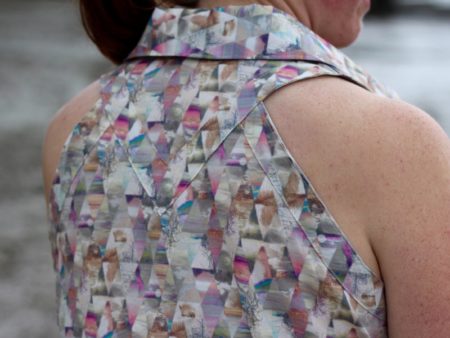
This shirt is a bit of a departure for me, both in terms of what I normally wear, but also in terms of what I normally sew. I don’t tend to wear many button-down shirts, because, if I’m because brutally honest, I really can’t be bothered to pick up an iron outside of when I’m sewing! And I don’t usually wear prints outside of activewear, and certainly not Liberty ones (way too twee for me!).
But a few weeks ago, I knew I had the Sewing Weekender coming up and I wanted a project to take along for the open sew session that didn’t involve an overlocker (since there’d be only two for 50 sewists) and that wasn’t anything close to the Work Sewing I’d been doing so much of recently.
A Quick Ombré Teeshirt
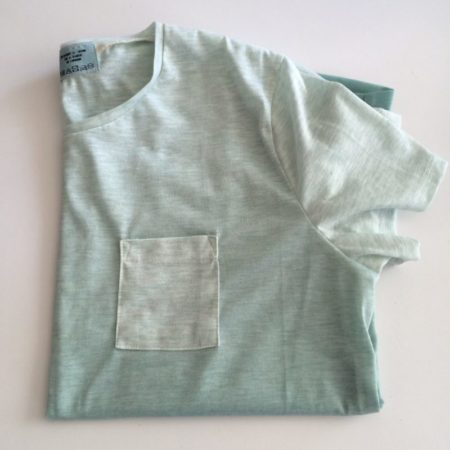
I only bought this fabric from Abakhan Liverpool only two weekends ago but I’ve already sewn it up and worn it already!
As you’ll recall, I was pretty restrained upstairs at my first Abakhan experience, but then I went down into the bargain basement, and saw this ombré teeshirting! Even then, I could see it was quite thin with very little stretch but I loved it too much to let it go! I paid about a fiver for the length (about 1.5-2m?), and there’s probably enough left for a second tee, too, to be honest. So this is quite the bargain make!